outdoor grow guide yield

Outdoor growing offers a natural environment, leveraging sunlight and fresh air for robust plant development. Key practices like strain selection, site preparation, and nutrient management ensure optimal results and higher yields.

1.1 Understanding the Importance of Climate and Location

Climate and location play pivotal roles in outdoor cannabis cultivation. Ideal temperatures, humidity levels, and sunlight exposure are essential for healthy growth. Regions with consistent, warm weather and ample sunlight promote robust development. Proper airflow and drainage in the chosen location prevent moisture buildup, reducing the risk of mold and pests. Understanding these factors ensures optimal conditions for maximizing yield and plant health.

Selecting the Right Strain for Outdoor Growing

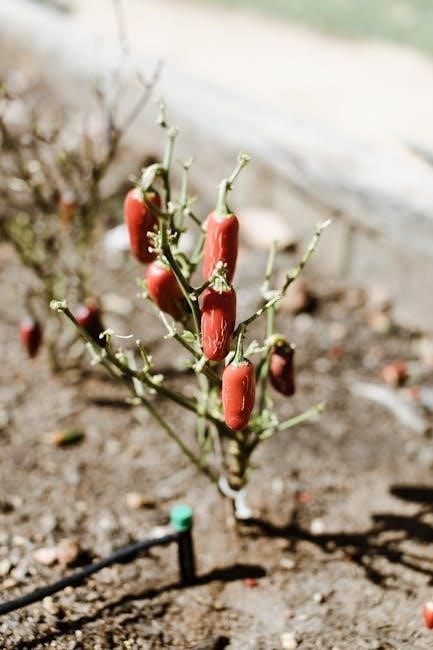
Choosing the right strain is crucial for outdoor success. High-yield strains with suitable growth cycles thrive in specific climates. Autoflowers and photoperiod strains offer unique benefits.

2.1 High-Yield Strains and Their Characteristics

High-yield strains are bred for maximum productivity, featuring robust growth and dense bud formation. Autoflowering strains, like Auto AK-47 and Auto Blueberry, offer quick flowering times and resilience to pests. Photoperiod strains, such as Skunk and Amnesia Haze, thrive outdoors with proper light cycles. These strains are known for their high THC content, disease resistance, and adaptability to various climates, making them ideal for outdoor cultivation. Selecting the right strain ensures a bountiful harvest.

Site Preparation and Soil Optimization

Ensure a location with ample sunlight and proper drainage. Prepare soil with organic matter for nutrient-rich ground. Optimize pH levels for maximum nutrient absorption and healthy root growth.

3.1 Creating the Ideal Soil Mix for Cannabis

A well-balanced soil mix is crucial for outdoor cannabis growth. Combine compost, peat moss, and perlite for improved drainage and aeration. Add worm castings for essential microorganisms. Maintain a pH range of 6.0–7.0 for optimal nutrient absorption. Incorporate organic matter like manure or humus to enrich soil fertility. Avoid heavy clay or sandy soils that hinder root development. Proper soil preparation ensures robust plant health and maximizes yield potential naturally.

3.2 Choosing the Best Location for Sunlight and Airflow

Selecting a location with full sun (6+ hours daily) is vital for photosynthesis and robust growth. Ensure good airflow to prevent mold and pests. Avoid shaded or low-lying areas where water may pool. Ideal spots have southern exposure and gentle slopes for drainage. Proper placement enhances light absorption, promotes healthy air circulation, and maximizes yield potential in outdoor cannabis cultivation.

Nutrient Management for Outdoor Plants

Nutrient management is crucial for outdoor cannabis growth. Use balanced fertilizers, considering organic or synthetic options, and apply them at the right growth stages to optimize plant health and yield.

4.1 Organic vs. Synthetic Nutrients: Which is Better?

Organic nutrients promote soil health and long-term plant sustainability, enhancing flavor and aroma. Synthetic nutrients offer faster growth and higher yields but may lack beneficial microbes. Choose based on your priorities: organics for natural, complex flavors or synthetics for rapid, robust growth. Both methods require proper timing and balanced application to avoid over-fertilization, ensuring healthy plant development and maximum yield potential.

4.2 Timing and Application of Nutrients

Proper timing and application of nutrients are crucial for maximizing outdoor cannabis yields. Feed plants during active growth phases, avoiding over-fertilization. Start with lighter doses in the vegetative stage and increase gradually. Use water-soluble nutrients for efficient absorption, applying them during watering or via drip systems. Monitor plant responses and adjust schedules to prevent nutrient burn, ensuring balanced growth and optimal bud development throughout the season.

Training Techniques to Maximize Yield

Training methods like topping, pruning, and low-stress training (LST) enhance growth and yield. These techniques optimize space, promote even light distribution, and maximize bud development effectively.

5.1 Topping and Pruning for Better Growth

Topping and pruning are essential techniques to control plant growth and maximize yield. Topping involves removing the top growth to promote a bushy structure, while pruning focuses on trimming lower foliage to redirect energy to the main colas. These methods improve airflow, enhance sunlight penetration, and encourage even bud development, leading to healthier plants and higher yields outdoors.

5.2 Low-Stress Training (LST) Methods

Low-Stress Training (LST) involves gently bending and securing branches to optimize light exposure and promote even growth. By removing stress without damaging the plant, LST encourages bushy growth, increases bud sites, and improves airflow. This method enhances light penetration, leading to denser, more uniform buds and higher yields. It’s a versatile technique for outdoor growers to maximize potential without causing plant shock or stunted growth.

Pest and Disease Control

Regular monitoring, organic pest control methods, and maintaining a clean environment are crucial to prevent infestations and diseases, ensuring healthy plant growth and maximum yields outdoors.

6.1 Common Pests and How to Prevent Them

Common pests like aphids, spider mites, and caterpillars can damage outdoor cannabis plants; Regular monitoring and organic control methods, such as neem oil, garlic sprays, or introducing beneficial insects like ladybugs, help prevent infestations. Proper sanitation, trimming infested areas, and maintaining airflow also reduce pest risks, ensuring healthy growth and maximizing yields. Early detection is key to preventing widespread damage and maintaining plant health.

  • Aphids: Use neem oil or soap solutions.
  • Spider mites: Increase humidity and spray with water.
  • Caterpillars: Hand-pick or use Bt (Bacillus thuringiensis).

6.2 Organic Pest Control Methods

Organic pest control methods are effective and eco-friendly for managing outdoor cannabis pests. Neem oil, garlic sprays, and soap solutions are popular choices to repel and eliminate pests. Introducing beneficial insects, like ladybugs and predatory mites, helps maintain a balanced ecosystem. Additionally, diatomaceous earth and Bt (Bacillus thuringiensis) are natural substances that target pests without harming plants or the environment. These methods promote healthy plant growth and sustainable cultivation practices.

  • Neem oil: Repels aphids, mites, and fungal diseases.
  • Garlic spray: Deters aphids and spider mites.
  • Diatomaceous earth: Dehydrates and kills insects.

Lighting and Space Considerations

Maximizing sunlight exposure is crucial for photosynthesis and growth. Ensure proper spacing between plants to avoid overcrowding, which can reduce airflow and lower yields.

  • Adequate sunlight promotes healthy growth.
  • Proper spacing enhances air circulation.

7.1 Maximizing Sunlight for Photosynthesis

Outdoor plants thrive when exposed to direct sunlight, as it powers photosynthesis, the engine of growth. Position plants to receive full sun, ideally 6-8 hours daily, for optimal energy production. Southern-facing locations often provide the best light. Avoid shading from trees or structures, as it can stunt growth. Proper sunlight intake ensures robust development, larger buds, and higher yields.

  • Ensure direct sunlight for 6-8 hours daily.
  • Choose south-facing locations for maximum light.
  • Minimize shade to promote healthy growth.

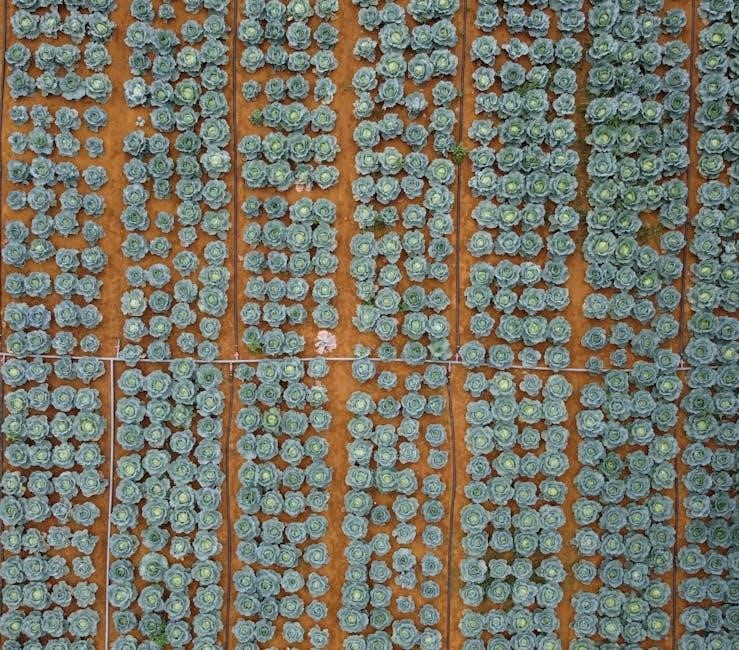
7.2 Proper Spacing Between Plants

Proper spacing is crucial for outdoor cannabis plants to ensure adequate airflow and sunlight penetration. Overcrowding can lead to pests, diseases, and reduced yields. Space plants according to their mature size, typically 3-6 feet apart, depending on the strain. This allows air to circulate, reducing humidity and preventing mold growth, while also maximizing sunlight exposure for healthy development.

  • Space plants 3-6 feet apart based on strain size.
  • Ensure airflow to prevent humidity and mold.
  • Allow sunlight to reach all parts of the plant.

Harvesting Techniques

Harvesting is crucial for maximizing yield and potency. Use sharp pruning shears to cut branches, ensuring clean cuts. Harvest in a dry, well-ventilated area for optimal results.

  • Timing is key for maximum potency and flavor.
  • Harvest in a clean, dry environment to prevent mold.

8.1 When to Harvest for Maximum Potency

Harvesting at the right time is crucial for achieving maximum potency. Check trichomes under magnification; they turn from clear to cloudy or amber when ready. Most pistils should be amber, indicating ripeness. Harvest when 70-90% of trichomes are cloudy for balanced effects. Avoid early harvesting to ensure full cannabinoid development. Weather conditions like frost or heavy rain may necessitate earlier harvesting to preserve quality.

8.2 Proper Trimming and Drying Methods

Proper trimming and drying are essential for preserving quality and preventing mold. Trim excess foliage from harvested buds, focusing on removing large fan leaves. Use sharp, clean tools to avoid damaging trichomes. Dry plants in a cool, well-ventilated area with low humidity, ensuring good airflow. Monitor temperature (50-65°F) and humidity (30-50%) to prevent mold. Proper drying enhances flavor, aroma, and long-term storage potential, ensuring a high-quality final product.

Curing and Storage

Curing and storage are crucial for preserving flavor and potency. Store cured buds in airtight containers in a cool, dark place with low humidity to maintain quality.

9.1 Curing Methods for Better Flavor and Potency

Proper curing enhances flavor and preserves potency by slowly drying buds in airtight containers. Start with higher humidity (60-65%) and gradually reduce it. Monitor temperature (68-72°F) and check containers daily to release moisture. This process locks in terpenes and cannabinoids, ensuring smooth, flavorful smoke and potent effects. Cure for 2-4 weeks for optimal results.

9.2 Long-Term Storage Solutions

For long-term storage, use airtight containers to maintain humidity and protect buds from light and contaminants. Store in a dark, cool, dry place (ideal conditions: 60-65% humidity, 60-70°F). Avoid plastic bags and refrigerators, as they can introduce moisture and mold. Check buds every few weeks to ensure freshness. Proper storage preserves potency and flavor, maintaining the quality of your harvest for months.

Mastering outdoor growing requires patience, dedication, and attention to detail. By following key practices like strain selection, nutrient management, and pest control, you’ll achieve a thriving harvest. Consistency and adaptability are crucial for success. Always monitor local weather and plant health to ensure optimal results. Happy growing!

10.1 Summary of Key Practices

Successful outdoor growing hinges on selecting high-yield strains, optimizing soil and nutrients, and employing training techniques like topping and LST. Ensure proper sunlight, spacing, and pest control. Monitor nutrient timing and application, and harvest at peak potency. Regular pruning and curing enhance flavor and potency. Adapting to local climate and maintaining consistent care ensures a bountiful and healthy harvest. Attention to detail and patience are vital for achieving maximum yield outdoors.

10.2 Advanced Tips for Experienced Growers

Experienced growers can further enhance yields by refining water and light optimization, implementing precise nutrient regimens, and experimenting with advanced pruning techniques. Utilize technology like soil sensors and data tracking to monitor plant health. Adjust techniques based on local microclimates and seasonal variations. Invest in high-quality tools and consider automating irrigation and nutrient delivery for consistency. Continuous experimentation and adaptation are key to pushing yields to new heights.

outboard motor stand plans pdf

Discover comprehensive DIY plans for building a sturdy outboard motor stand, ensuring secure storage and easy transportation. Ideal for enthusiasts, these plans offer step-by-step guides, material lists, and customizable designs to suit various engine sizes and needs. Perfect for maintaining or showcasing your outboard motor, these plans are easy to follow and budget-friendly. Downloadable PDFs provide clear instructions, making it simple to construct a reliable stand in just a few hours. A great project for boat owners and DIY enthusiasts alike!

Why Build an Outboard Motor Stand?

Building an outboard motor stand offers a practical solution for storing and transporting your engine securely. It provides a stable platform for maintenance, repair, and display, protecting your investment from damage. A DIY stand also saves money compared to purchasing a commercial product. With customizable designs, you can tailor the stand to fit your specific motor size and needs. Additionally, it enhances workshop organization and ensures your outboard motor remains in excellent condition. Downloadable PDF plans make the process straightforward, even for those with limited DIY experience.

Benefits of Using a DIY Outboard Motor Stand

A DIY outboard motor stand offers cost-effectiveness, customization, and ease of construction. It allows you to save money by using affordable materials and tools. Custom designs ensure the stand fits your motor’s specific needs, whether for storage, maintenance, or display. With clear PDF plans, the project is accessible even for beginners. The stand enhances workshop organization and protects your motor from damage. Additionally, building it yourself provides a sense of accomplishment and ensures durability. It’s a practical and efficient solution for any boat owner or DIY enthusiast looking to manage their outboard motor effectively.

Materials and Tools Required

2×4 lumber, plywood, screws, bolts, and casters are essential. Tools include a saw, drill, wrench, and measuring tape for precise cuts and assembly.

Essential Lumber and Hardware

For a sturdy outboard motor stand, use 2×4 lumber for the frame and plywood for additional support. Galvanized screws, bolts, washers, and nuts are recommended for durability. Casters with a weight capacity matching your motor’s size ensure mobility. Cut lumber into required lengths, such as 60-inch and 30-inch pieces, as specified in your plans. Ensure all hardware is rust-resistant for outdoor use. These materials are readily available at most hardware stores, making the project accessible and cost-effective.

Recommended Tools for Construction

To build an outboard motor stand, you’ll need a circular saw for cutting lumber, a drill for screwing parts together, and a wrench for tightening bolts. A tape measure ensures accurate cuts, while clamps help hold pieces in place. Sandpaper and paint can finish the stand for durability. Safety gear like gloves and goggles is essential. These tools are readily available and will help you complete the project efficiently. Proper tool preparation ensures a smooth and safe construction process.

Safety Considerations

Prioritize safety by wearing protective gear like gloves and goggles. Ensure a clear, well-lit workspace and follow weight capacity guidelines to maintain stability and prevent accidents during construction.

Protective Gear and Workspace Setup

Safety is paramount when building an outboard motor stand. Always wear protective gear, including gloves and goggles, to prevent injuries. Ensure your workspace is clean, dry, and well-ventilated, free from tripping hazards. Secure the motor firmly during assembly to avoid accidental movement. Use clamps or brackets to stabilize heavy components. Properly ventilate the area, especially when using power tools or painting. Maintain a clear workspace to minimize distractions and ensure precise cuts and assembly. A well-prepared workspace enhances safety and efficiency throughout the project.

Weight Capacity and Stability Tips

Ensure your outboard motor stand can safely support the engine’s weight by using heavy-duty materials and a sturdy design. A 275lbs weight capacity is ideal for most motors, while larger engines may require up to 330lbs. For stability, use a wide base and consider adding supports to prevent tipping. Securing the motor firmly to the stand is crucial to maintain balance. Proper weight distribution and robust construction ensure the stand remains stable during transport or storage. Always test the stand with the motor before moving it to confirm its stability and weight capacity.

Step-by-Step Construction Guide

Cut lumber to specified lengths, assemble the frame, attach casters for mobility, and secure the motor mount. Follow detailed plans for a sturdy, functional stand.

Cutting and Assembling the Frame

Begin by cutting the lumber according to the specified lengths in your plans. Use a saw for precise cuts, ensuring accuracy for a sturdy frame. Assemble the base using 2x4s, securing the pieces with wood screws. Attach the side rails and cross supports, forming a rectangular or square structure depending on the design. Make sure the frame is square and level. Sand rough edges for safety. Follow the plans carefully to ensure proper alignment and stability, as the frame is the foundation of your outboard motor stand.

Attaching Casters for Mobility

To add mobility to your outboard motor stand, attach heavy-duty casters to the base. Ensure the casters are securely screwed into place, ideally at the corners of the frame. Use bolts or lag screws for maximum stability. For added durability, select casters with a weight capacity exceeding your motor’s weight. This step allows easy movement of the stand, making it convenient to transport or store your outboard motor. Properly tightened casters ensure smooth rolling and prevent shifting during transport, enhancing safety and convenience for users.

Mounting the Outboard Motor

Mounting the outboard motor securely is a critical step. Attach the motor to the stand by aligning its mounting bracket with the pre-drilled holes on the stand. Use bolts or screws to fasten it firmly, ensuring the motor sits level and stable. Tighten all connections to prevent movement during transport or maintenance. For larger motors, consider adding additional support brackets for extra stability. Double-check the weight capacity of the stand to ensure it can safely hold your motor. Proper mounting ensures safety and prevents damage to the motor or stand.

Design Variations and Customization

Explore adjustable height and folding designs for versatile use. Customize with additional features like shelves or trays to enhance functionality, ensuring your stand meets specific needs and preferences.

Adjustable Height and Folding Designs

Opt for adjustable height settings to accommodate different engine sizes and maintenance needs. Folding designs allow for easy storage and transport, saving space when not in use. These versatile features ensure your stand adapts to various scenarios, from workshops to marinas. Incorporate hinges and locking mechanisms for secure adjustments, providing a practical solution for enthusiasts seeking flexibility. Customize the design to fold flat or collapse neatly, making it ideal for limited storage spaces. This innovative approach enhances functionality while maintaining durability, perfect for boat owners and DIY enthusiasts alike.

Incorporating Additional Features

Add functionality with features like built-in trays for tools or lubricants, ensuring everything is within reach during maintenance. Include sturdy hooks or holders for cables, hoses, or accessories, keeping your workspace organized. A removable platform or shelf can provide extra storage, while integrated wheels enhance mobility. Consider adding a flushing bucket holder to simplify engine maintenance. These practical additions make your stand versatile and user-friendly, catering to your specific needs. Customize your design to include features that enhance convenience and efficiency, ensuring your stand is both functional and adaptable for various tasks.

Cost and Time Estimates

Building an outboard motor stand is budget-friendly, with materials costing under $20. Assembly typically takes 2-3 hours, making it an efficient DIY project for any skill level.

Budgeting for Materials

Budgeting for an outboard motor stand is straightforward and cost-effective. Materials typically cost less than $20, with 2×4 lumber, screws, bolts, and casters being the primary expenses. For a basic design, you’ll need 2x4s of varying lengths, such as 60-inch and 30-inch pieces, along with hardware for assembly. Optional upgrades like heavy-duty casters may slightly increase costs but ensure durability. Downloadable PDF plans often include detailed parts lists, helping you stay within budget while ensuring the stand can support up to 275 lbs, making it a practical and affordable DIY project.

Time Required for Assembly

Building an outboard motor stand is a manageable DIY project that can be completed in just a few hours. Basic designs typically require 2-3 hours of assembly, depending on your skill level and the complexity of the design. Cutting and assembling the frame are the most time-consuming steps, while attaching casters and mounting the motor are quicker. With pre-cut materials, you can finish the stand in about 2 hours. Customizations or additional features may add extra time, but the process remains straightforward for most DIY enthusiasts.

Tips for Using and Maintaining the Stand

Regularly inspect the stand for stability and wear. Clean the surface and lubricate casters for smooth movement. Store the stand on a level, dry surface to prevent damage and ensure optimal performance.

Regular Inspection and Maintenance

Regularly inspect the stand for wear and tear, ensuring all bolts and screws are tight. Check the casters for proper function and lubricate them if necessary. Clean the stand thoroughly, removing any dirt or debris that could affect its stability. Inspect the frame for signs of damage or rust and address any issues promptly. Ensure the weight capacity is not exceeded, and store the stand on a level surface when not in use to maintain balance and prevent tipping.

Optimal Placement and Storage

Place the stand on a level, stable surface to ensure balance and prevent tipping. Store it in a dry, well-ventilated area to avoid rust or moisture damage. Position the stand away from direct sunlight to protect the finish and materials. When not in use, secure the stand to prevent accidental movement. For long-term storage, consider covering it to shield from dust and debris. Proper placement and storage will extend the stand’s lifespan and ensure it remains reliable for future use.

Where to Find Detailed Plans

Detailed PDF plans for outboard motor stands are available online. Websites like Ko-fi and forums such as The Hull Truth offer downloadable guides with clear instructions and diagrams.

Downloading PDF Plans Online

Download detailed PDF plans for outboard motor stands from platforms like Ko-fi or forums such as The Hull Truth. These plans include cut lists, diagrams, and step-by-step instructions. Many are free or low-cost, making it easy to access professional designs. Ensure the plans match your motor’s size and weight requirements. Print and follow the clear instructions to build a sturdy stand. Perfect for DIY enthusiasts, these PDF guides simplify the construction process, saving time and effort. Start your project with confidence using these reliable resources.

DIY Communities and Forums

Engage with DIY communities and forums like The Hull Truth or Pinterest for shared plans and ideas. These platforms offer valuable insights, tips, and troubleshooting from experienced builders. Many forums provide free or low-cost plans, while others share personal projects and modifications. Participate in discussions to learn from experts and gain confidence in your build. These communities are invaluable resources for finding inspiration, solving challenges, and refining your outboard motor stand design. Join today and connect with fellow enthusiasts to elevate your DIY project!

the norton field guide pdf

The Norton Field Guide is a trusted resource for academic writing, offering clear guidelines and adaptable chapters. It covers twelve key genres, providing practical advice for students and instructors.

Overview of the Norton Field Guide to Writing

The Norton Field Guide to Writing is a versatile resource designed to aid students and instructors in navigating the complexities of academic writing. It offers adaptable chapters, color-coded links for easy navigation, and practical guidelines for writing across multiple genres. The guide emphasizes flexibility, allowing educators to tailor content to their teaching methods. With its comprehensive approach, it serves as an essential tool for improving writing skills and understanding rhetorical strategies in various contexts.

Importance of the Norton Field Guide in Academic Writing

The Norton Field Guide plays a pivotal role in enhancing writing skills by providing structured guidance across various genres. Its clear, adaptable approach helps students master rhetorical strategies and genre-specific writing. Educators value its flexibility, enabling tailored instruction. The guide’s emphasis on practical advice and comprehensive coverage makes it an indispensable resource for academic success, fostering improved writing outcomes for students at all skill levels.

Key Features of the Norton Field Guide

The Norton Field Guide offers flexible chapters, color-coded links for easy navigation, and guidelines for writing in multiple genres, making it a versatile tool for writers.

Flexibility in Teaching Rhetoric

The Norton Field Guide excels in offering adaptable chapters tailored to diverse teaching styles. Its structure allows instructors to assign topics in any order, ensuring a customizable learning experience. This flexibility caters to varied classroom needs, making it ideal for both traditional and innovative pedagogical approaches. The guide’s modular design enables educators to focus on specific skills or genres, fostering a personalized and effective teaching environment for students of all levels.

Color-Coded Links for Easy Navigation

The Norton Field Guide incorporates color-coded links to enhance navigation, ensuring students can seamlessly find additional resources and detailed explanations. These visual cues connect key concepts, making it easier for users to explore related topics. The intuitive design streamlines the learning process, allowing students to focus on understanding rather than searching. This feature is particularly useful in the PDF version, where quick access to information is essential for efficient study and reference.

Guidelines for Writing in Multiple Genres

The Norton Field Guide provides comprehensive guidelines for writing across twelve genres, offering tailored advice for each. From academic essays to creative writing, students gain clarity on structure, tone, and style. The guide’s clear, concise instructions help learners adapt to diverse writing contexts, ensuring they produce polished, effective work. These genre-specific strategies are invaluable for developing versatile writing skills, making it an essential tool for students and educators alike.

Editions of the Norton Field Guide

The Norton Field Guide is available in multiple editions, with the 5th and 6th being the most recent. Each edition offers updated content and improved features.

Differences Between the 5th and 6th Editions

The 6th edition of the Norton Field Guide introduces new chapters on digital writing and visual rhetoric, enhancing its adaptability. It refines guidelines for modern genres and expands resources for instructors. Compared to the 5th edition, the 6th offers streamlined content and improved navigation, making it more accessible for both students and teachers. These updates ensure the guide remains relevant in evolving academic environments, while maintaining its core focus on clear, practical writing instruction. PDF versions of both editions are widely available.

New Chapters in the 3rd Edition

The 3rd edition of the Norton Field Guide introduced new chapters on academic writing and choosing genres, enhancing its relevance for students. These additions focused on practical strategies for engaging with academic discourse and selecting appropriate writing styles. The guide retained its core structure, covering twelve key genres, while expanding its resources for instructors. This edition also featured a combined glossary and index for easier navigation, making it a comprehensive tool for both teaching and learning. Its adaptability continues to be a hallmark of its success.

Authors and Contributors

Richard Bullock, Francine Weinberg, and Maureen Daly Goggin are the primary authors, bringing their expertise in rhetoric and composition to the guide’s collaborative structure and clear instruction.

Richard Bullock and His Contributions

Richard Bullock is a renowned author and educator, best known for his work on The Norton Field Guide to Writing. His contributions include developing a flexible, student-centered approach to teaching rhetoric. Bullock’s expertise lies in creating accessible guidelines for various writing genres, making complex concepts understandable. His work emphasizes adaptability, allowing instructors to tailor content to their teaching styles. Bullock’s clear and concise style has made the guide a valuable resource for both students and educators, fostering effective writing skills across academic settings.

Francine Weinberg and Maureen Daly Goggin

Francine Weinberg and Maureen Daly Goggin are esteemed contributors to The Norton Field Guide to Writing, collaborating with Richard Bullock. Their expertise enhances the guide’s depth, particularly in academic writing and genre selection. Weinberg and Goggin’s work ensures the text remains adaptable, catering to diverse teaching methods. Their contributions reflect a commitment to fostering clear, effective writing skills, making the guide indispensable for both students and educators seeking practical, genre-focused instruction.

Downloading the Norton Field Guide PDF

The Norton Field Guide PDF is available on reliable platforms like Open Library, offering easy access to its comprehensive writing resources and guidelines.

Reliable Platforms for PDF Downloads

Several platforms offer the Norton Field Guide PDF for download. Open Library is a popular choice, providing free access to a vast collection of eBooks. Additionally, websites like Libgen and PDF Drive host various editions of the guide. Users can also explore academic forums or online communities where members often share PDFs. Ensure to verify the credibility of the source to avoid unauthorized or outdated versions. Always prioritize legal and secure download options to respect copyright regulations.

Open Library and Other Resources

Open Library stands out as a reliable source for accessing The Norton Field Guide to Writing PDF. With over a million free eBooks, it offers a user-friendly interface for downloads. Other resources include academic forums and online communities where users share PDFs. Additionally, platforms like Libgen and PDF Drive host various editions, though users should verify their credibility. Always opt for legal and secure downloads to ensure compliance with copyright laws and avoid unauthorized versions.

Structure of the Norton Field Guide

The Norton Field Guide is structured to cover twelve key genres, offering adaptable chapters on writing strategies. It features color-coded links for easy navigation and includes a combined glossary and index for quick reference.

Twelve Genres Covered in the Guide

The Norton Field Guide covers twelve essential genres, including essays, reports, proposals, and narratives. Each section provides clear guidelines, examples, and adaptable strategies to help students master different writing styles. The guide emphasizes practical advice, making it a versatile tool for both students and instructors. Its structured approach ensures comprehensive coverage of various writing tasks, catering to diverse academic needs and enhancing overall writing proficiency effectively.

Combined Glossary and Index

The Norton Field Guide features a combined glossary and index, designed for easy navigation and quick access to key terms and concepts. This integrated tool helps users locate definitions and relevant sections efficiently. The glossary explains important terminology, while the index provides detailed cross-references. This feature enhances the guide’s usability, making it a valuable resource for both students and instructors seeking to understand complex writing concepts and terminology swiftly and effectively.

Advantages of Using the Norton Field Guide

The Norton Field Guide offers adaptable chapters, color-coded links, and guidelines for multiple genres, making it a versatile and user-friendly resource for improving writing skills effectively.

Adaptable Chapters for Teaching

The Norton Field Guide features adaptable chapters designed to suit various teaching styles. Instructors can assign chapters in any order, providing flexibility in curriculum design. Each chapter offers concise yet comprehensive content, allowing educators to tailor lessons to student needs. This adaptability ensures that the guide remains a valuable tool for both new and experienced teachers, fostering an effective learning environment. The structure supports diverse approaches, making it ideal for different classroom settings and student proficiency levels.

Practical Guidelines for Students

The Norton Field Guide provides students with clear, actionable guidelines for improving their writing skills. It offers detailed instructions for various genres, ensuring clarity and precision. Color-coded links and a combined glossary-index facilitate easy navigation, helping students quickly find relevant information. The guide’s structured approach enables learners to understand key concepts and apply them effectively in their own writing, making it an indispensable resource for academic success and skill development.

Challenges in Accessing the Norton Field Guide

Accessing the Norton Field Guide, especially the 6th edition, can be difficult due to limited availability and restrictions on digital downloads, frustrating many users seeking the resource.

Availability of the 6th Edition

The 6th edition of the Norton Field Guide is challenging to obtain, with limited availability in both physical and digital formats. Restrictions on digital downloads and limited distribution channels further complicate access. Users often report difficulty finding reliable sources, despite its popularity. Earlier editions remain more accessible, but the latest version’s scarcity frustrates many seeking updated content. This unavailability hinders students and educators relying on its comprehensive resources for academic writing and rhetoric instruction.

Restrictions on Digital Access

Digital access to the Norton Field Guide is often restricted due to copyright protections and digital rights management. Many platforms require subscriptions or purchases, limiting availability for some users. Additionally, certain editions may not be widely distributed online, making it difficult to find downloadable PDFs legally. These restrictions aim to protect intellectual property but can hinder accessibility for students and educators seeking affordable or convenient access to the guide’s valuable resources.

The Norton Field Guide remains a vital tool for enhancing writing skills, offering adaptable chapters and practical advice. Its structured approach ensures accessibility and effectiveness for all users.

Final Thoughts on the Norton Field Guide

The Norton Field Guide is a trusted resource for academic writing, offering adaptable chapters and practical advice. Its structured approach ensures accessibility and effectiveness for both students and instructors. The guide’s focus on twelve key genres, combined with its color-coded navigation and clear guidelines, makes it an indispensable tool for improving writing skills. With its comprehensive coverage and user-friendly design, the Norton Field Guide remains a highly recommended resource for anyone seeking to enhance their academic writing abilities.

Recommendations for Future Users

Future users are encouraged to explore the Norton Field Guide’s adaptable chapters and color-coded navigation for a seamless learning experience. Utilize the guide’s focus on twelve key genres to refine writing skills across various academic disciplines. Additionally, consider accessing supplementary materials and online communities for further support. Staying updated with the latest editions, such as the 6th edition, ensures access to the most current resources and features designed to enhance writing effectiveness and clarity.

Additional Resources

The Norton Field Guide is complemented by supplementary materials and online communities, offering further support for writers. Open Library provides access to additional resources and guides.

Supplementary Materials for Writing

The Norton Field Guide is supported by supplementary materials, including workbooks, exercises, and online resources. These tools provide additional guidance for writers, enhancing their understanding of key concepts. Videos, interactive tutorials, and sample essays are available to reinforce learning. Open Library and other platforms offer access to PDF versions of the guide, making it easier for students to study. These resources cater to diverse learning styles, ensuring comprehensive support for academic and creative writing endeavors.

Online Communities for Support

Online communities provide valuable support for users of the Norton Field Guide. Forums, social media groups, and educational platforms offer spaces to discuss writing strategies, share resources, and address challenges. Many users exchange tips on accessing PDF versions and navigating the guide’s features. These communities foster collaboration, helping writers refine their skills and troubleshoot issues related to the guide. They serve as a vital resource for both students and educators seeking additional support beyond the textbook.

panasonic viera tv operating instructions

Safety Precautions

Always read the safety precautions before operating your Panasonic Viera TV․ Avoid improper adjustments and follow guidelines to prevent damage․ Use built-in eHELP for detailed instructions․

1․1․ General Safety Information

Read the operating instructions carefully before using your Panasonic Viera TV․ Ensure proper installation and avoid exposing the TV to water or extreme temperatures․ Never attempt to modify internal components‚ as this may cause damage or pose a safety risk․ Keep the TV away from direct sunlight and ensure good ventilation to prevent overheating․ For detailed guidance‚ refer to the built-in eHELP feature or the provided manual․ Always follow safety guidelines to ensure safe and optimal performance of your device․

1․2․ Compliance with Regulations

Ensure your Panasonic Viera TV complies with local regulations and standards․ The device meets DVB-T and MPEG requirements for digital broadcasts․ Follow all applicable safety and usage guidelines to adhere to regional laws․ Proper disposal and recycling of the TV are required at the end of its lifecycle․ Refer to the manual or eHELP for specific compliance details and environmental recommendations․ Adherence to these regulations ensures lawful and safe operation of your Panasonic Viera TV․

Setting Up Your Panasonic Viera TV

Setting up your Panasonic Viera TV involves physical installation‚ connecting external devices‚ and basic operating steps․ Refer to the manual or eHELP for detailed guidance․

2․1․ Physical Installation and Positioning

Position your Panasonic Viera TV on a sturdy stand or wall mount to ensure stability․ Place it away from direct sunlight and moisture․ Ensure proper ventilation to prevent overheating․ Follow the manual’s guidelines for installation to avoid damage․ Use the built-in eHELP feature for detailed setup instructions․ Proper positioning ensures optimal viewing angles and prevents screen damage․ Always refer to the operating instructions for specific installation requirements․

2․2․ Connecting External Devices

Connect external devices like Blu-ray players‚ gaming consoles‚ or soundbars to your Panasonic Viera TV using HDMI ports for high-quality digital audio and video․ Ensure cables are securely plugged into the correct ports․ Refer to the operating instructions or eHELP for guidance on compatible connections․ Use HDMI cables for optimal performance․ For older devices‚ use AV or component inputs․ Always turn off devices before connecting or disconnecting cables to avoid damage․ Proper connections ensure a seamless entertainment experience․

2․3․ Basic Operating Steps

Turn on your Panasonic Viera TV using the remote control or power button․ Use the remote to navigate the on-screen menu for settings and features․ Access eHELP for built-in operating instructions․ Adjust volume and change channels using the remote․ If no picture appears‚ ensure the correct input is selected․ Check all cable connections to confirm they are secure․ Refer to the manual for detailed guidance on basic operations․

Remote Control Overview

The remote control provides easy navigation of your Panasonic Viera TV’s menus and features․ Use it to adjust settings‚ access eHELP‚ and customize viewing experiences․

3․1․ Remote Control Layout and Functions

The Panasonic Viera TV remote control offers intuitive navigation with a logical layout․ Key buttons include the power button‚ volume controls‚ channel navigation‚ and menu access․ The remote also features dedicated buttons for functions like “eHELP‚” “Menu‚” and “Settings․” Use the directional pad to scroll through on-screen menus effortlessly․ Additional buttons provide quick access to features like picture mode adjustment and sound settings․ Familiarize yourself with the remote’s layout to enhance your viewing experience and efficiently manage your TV’s advanced functions․

3․2․ Navigating the On-Screen Menu

Access the on-screen menu by pressing the “Menu” button on your remote․ Use the directional pad to navigate through options like Picture‚ Sound‚ and Settings․ Highlight your selection and press “OK” to enter․ Adjust settings using the directional pad or number buttons․ Use the “Back” or “Exit” button to return to previous screens․ The menu is user-friendly‚ allowing easy customization of your viewing experience․ Refer to eHELP for detailed guidance if needed‚ ensuring optimal setup and functionality of your Panasonic Viera TV․

3․3․ Customizing Remote Control Settings

Customize your remote control settings for a personalized experience․ Press and hold the “Setup” button to access remote settings․ Assign frequently used functions to shortcut keys for quick access․ Adjust the remote’s sensitivity and backlight settings for optimal use․ Sync the remote with your TV by following on-screen instructions․ Use the “OK” button to save changes․ Refer to the operating manual or eHELP for detailed steps to ensure all features are utilized effectively‚ enhancing your control over the Panasonic Viera TV’s functionality and performance․

Picture and Sound Settings

Adjust picture quality and customize sound settings for optimal viewing experience․ Use eHELP for detailed instructions on fine-tuning settings to suit your preferences․

4․1․ Adjusting Picture Quality

To enhance your viewing experience‚ adjust picture settings via the on-screen menu․ Select from preset modes like Cinema‚ Sports‚ or Game for optimized visuals․ Fine-tune contrast‚ brightness‚ and sharpness based on room lighting․ Use color and tint adjustments for personalized preferences․ Enable LED motion technology for smoother motion and reduced blur․ For OLED models‚ utilize pixel precision settings for superior image quality․ Refer to eHELP for detailed guidance on advanced picture customization and optimal display calibration․

4․2․ Customizing Sound Settings

Access sound settings via the on-screen menu to tailor your audio experience․ Choose from preset modes like Cinema‚ Music‚ or Game for optimized sound․ Adjust bass‚ treble‚ and balance for personalized preferences․ Enable surround sound or Dolby Atmos for immersive audio․ Use the equalizer to customize frequency levels․ Activate voice clarity to enhance dialogue in movies or shows․ Refer to the built-in eHELP feature for detailed guidance on advanced sound customization and optimal audio calibration for your viewing environment․

Using the eHELP Feature

eHELP provides built-in operating instructions for your Panasonic Viera TV․ Access it for setup guidance‚ troubleshooting‚ and exploring advanced features․ Refer to eHELP for detailed assistance anytime․

5․1․ Accessing Built-in Operating Instructions

To access the built-in operating instructions on your Panasonic Viera TV‚ navigate to the eHELP feature․ This provides detailed guidance on setup‚ customization‚ and troubleshooting․ Use your remote control to open the menu‚ select the eHELP option‚ and browse through the available instructions․ The eHELP feature is designed to assist with all aspects of your TV’s operation‚ ensuring you can easily find the information you need․ Refer to eHELP for comprehensive support anytime during your TV’s setup or use․

5․2․ Navigating eHELP Menus

Navigate the eHELP menus using your remote control․ Press the “Menu” button to access the eHELP feature․ Use the arrow keys to scroll through categories like Setup‚ Picture‚ and Sound․ Select a topic by pressing “OK․” Detailed instructions and troubleshooting guides are available within each section․ To exit‚ press the “RETURN” or “BACK” button․ The eHELP system is user-friendly‚ ensuring easy access to operating guidance and solutions for your Panasonic Viera TV․ Utilize this feature for optimal setup and maintenance․

Advanced Features

Explore advanced settings like resolution adjustment and aspect ratio customization․ Access firmware updates for improved performance and new features․ Utilize these tools to enhance your viewing experience․

6․1․ Resolution and Aspect Ratio Settings

Adjust the resolution and aspect ratio to optimize your viewing experience․ Select from options like 16:9 for widescreen content or 4:3 for standard formats․ The “Just” mode ensures content fits the screen without distortion․ These settings preserve the original cinematic quality or adapt to your preferences․ Access these options through the picture menu to customize your display․ Proper configuration ensures compatibility with various sources and enhances visual clarity․

6․2․ Updating Firmware

Regularly update your Panasonic Viera TV’s firmware for improved performance and new features․ Use the built-in eHELP feature to guide you through the process․ Connect your TV to the internet‚ go to the settings menu‚ and select the firmware update option․ Follow on-screen instructions to download and install the latest version․ Ensure the TV remains powered on during the update․ For manual updates‚ download the firmware from Panasonic’s official website to a USB drive and follow the installation steps provided in the user manual․

Troubleshooting Common Issues

For common issues‚ check connections‚ reset settings‚ or restart the TV․ Use eHELP for guidance․ Consult the user manual or contact Panasonic support for persistent problems․

7․1․ General Troubleshooting Guide

Start by checking all cable connections and ensuring they are securely plugged in․ Restart the TV and external devices to resolve minor glitches․ If issues persist‚ reset settings to factory defaults or update firmware; Use the built-in eHELP feature for step-by-step solutions․ For unresolved problems‚ refer to the user manual or contact Panasonic support․ Regularly updating software and maintaining proper ventilation can prevent many common issues․

7․2․ Resolving Picture and Sound Problems

If you experience picture issues‚ check the input source and ensure all cables are securely connected․ Adjust the display settings or reset to factory defaults․ For sound problems‚ verify speaker settings and volume levels․ Use the built-in eHELP feature for guided solutions․ If issues persist‚ update the TV’s firmware or reset audio settings․ Ensure proper ventilation to avoid overheating‚ which can affect performance․ Refer to the user manual or contact Panasonic support for further assistance if problems remain unresolved․

Warranty and Support Information

Visit the official Panasonic support page for warranty details‚ repair information‚ and firmware updates․ Contact support for assistance with your Viera TV․

8․1․ Understanding Your Warranty

Your Panasonic Viera TV warranty covers parts and labor for one year from the purchase date․ It applies to defects in materials and workmanship under normal use․ Proper registration is required for warranty validation․ Misuse or unauthorized repairs may void the warranty․ For detailed terms and conditions‚ refer to the Panasonic Viera TV warranty section in the operating instructions or visit the official Panasonic support page․

8․2․ Contacting Panasonic Support

For assistance with your Panasonic Viera TV‚ visit the official Panasonic support page․ Here‚ you can find operational guidance‚ troubleshooting tips‚ and warranty information․ To access resources‚ enter your TV’s model number for specific support․ The site also offers firmware updates‚ repair services‚ and user manuals․ For further help‚ contact Panasonic’s customer service team directly․ Ensure to have your product details ready for efficient support․ This service is designed to address all your Panasonic Viera TV needs effectively․

midland weather radio manual wr-120

The Midland Weather Radio Manual WR-120 is a essential guide for setting up and using your weather radio. Designed for emergency preparedness, it ensures you stay informed during severe weather conditions. With S.A.M.E. technology, it provides reliable alerts, keeping you and your family safe.

Features

The Midland Weather Radio WR-120 offers advanced features like S.A.M.E. technology for location-specific alerts and multiple NOAA weather channels. It includes an emergency alarm, backlit display, and battery backup. Enjoy customizable alerts, USB charging, and adjustable volume for reliable weather monitoring and alerts.

Key Features

  • S.A.M.E. Technology: Allows for location-specific emergency alerts, ensuring you receive only the most relevant warnings for your area.
  • NOAA Weather Channels: Access multiple channels for continuous weather updates and emergency broadcasts;
  • Emergency Alert System: Automatically activates to deliver critical information during severe weather or other emergencies.
  • Backlit Display: Easy-to-read screen with adjustable brightness for clear visibility day or night.
  • Battery Backup: Operates on both alkaline batteries and a rechargeable battery pack for extended use during power outages.
  • USB Charging Port: Conveniently charge your phone or other small devices in an emergency.
  • Customizable Alerts: Select specific alerts you want to receive, minimizing unnecessary interruptions.
  • Adjustable Volume: Tailor the alert and broadcast volume to your preferences.

These features ensure the WR-120 is a reliable and versatile tool for staying informed and safe during severe weather events.

Installation

Installing the Midland WR-120 is straightforward, ensuring you’re quickly connected to weather alerts. Place it in a central location, plug it in, and optionally insert batteries for backup power. Test the system to confirm proper function and adjust settings as needed.

Unboxing

Unboxing the Midland WR-120 weather radio is an exciting first step to ensuring your safety during severe weather conditions. Carefully open the box and verify all components are included: the radio unit, user manual, power cable, backup batteries, and an external antenna.


Take a moment to inspect each item for damage. The compact design of the WR-120 makes it easy to place in any room. Familiarize yourself with the controls and ports before proceeding to the setup process.

This initial unboxing stage sets the foundation for proper installation and operation, ensuring you’re prepared to receive critical weather alerts when they matter most.

Setup

Setting up the Midland WR-120 weather radio is straightforward and ensures optimal performance. Begin by placing the radio in a safe, elevated location to maximize signal reception. Connect the included external antenna to the designated port and secure it properly for the best results.


Next, plug in the power cable to an electrical outlet. For added reliability, insert the backup batteries (not included) to maintain operation during power outages. Turn on the radio and allow it to initialize.


Use the controls to navigate through the menu and select your area’s specific weather channel. Enter your county’s S.A.M.E. code to receive localized alerts. Adjust the volume and display settings to your preference for clear notifications.


Finally, test the radio by triggering a test alert to ensure it functions correctly. Proper setup ensures you stay informed and prepared for severe weather events.

Operation

Operating the Midland WR-120 weather radio is designed to be user-friendly and efficient. Once set up, the radio continuously monitors weather broadcasts and emergency alerts, ensuring you stay informed. Use the controls to adjust volume, toggle between channels, or mute non-emergency alerts for uninterrupted monitoring.

  • Monitoring Weather Broadcasts: The WR-120 receives NOAA weather broadcasts 24/7, providing real-time updates on weather conditions.
  • Receiving Alerts: When an emergency alert is issued, the radio sounds an alarm and displays the message, ensuring immediate notification.
  • Adjusting Settings: Customize volume, display brightness, and alert types to suit your preferences for optimal notification.
  • Testing Functionality: Regularly test the radio by triggering a test alert to confirm it operates correctly during emergencies.

Regular operation ensures the WR-120 remains a reliable source of critical weather and emergency information, helping you stay prepared and safe.

Customization

The Midland WR-120 weather radio offers a range of customization options to tailor its functionality to your needs. Users can personalize settings to enhance convenience and ensure the device meets specific preferences for alerts, displays, and operation.

  • S.A.M.E. Technology: Program the radio to receive alerts for specific counties or areas, reducing unnecessary alarms and focusing on relevant weather events.
  • Alert Types: Choose which types of emergencies trigger an alert, such as tornadoes, floods, or Amber Alerts, to customize notifications.
  • Volume Settings: Adjust the alert volume independently of regular broadcasts to ensure clarity during emergencies.
  • Display Options: Modify the backlight brightness and enable or disable the LED alert light to suit your environment.
  • Alert Tones: Select from multiple tone options to differentiate between routine broadcasts and urgent alerts.
  • Silent Mode: Enable silent mode to mute alerts during specific times, such as nighttime, while still receiving visual notifications.
  • Battery and Power: Customize power settings to prioritize battery life or continuous operation based on your needs.

These customization features allow users to optimize the WR-120 for their lifestyle, ensuring it remains a reliable and adaptable tool for weather monitoring and emergency preparedness.

Maintenance

Regular maintenance of the Midland WR-120 weather radio ensures optimal performance and longevity. Follow these steps to keep your device in prime condition:

Key Maintenance Tasks

  • Clean the Exterior: Wipe the device with a soft cloth to remove dust and dirt, ensuring buttons and controls remain responsive.
  • Battery Care: If using alkaline batteries, replace them annually or when the low-battery indicator appears. For rechargeable batteries, charge them as recommended.
  • Antenna Check: Inspect the antenna for damage or obstruction. Ensure it is securely connected for the best signal reception.
  • Software Updates: Periodically check for firmware updates on Midland’s official website and install them to access new features and improvements.
  • Storage: Store the radio in a dry, cool place when not in use. Avoid extreme temperatures or humidity to prevent damage.
  • Inspect Cables: Regularly examine power cords and connectors for signs of wear. Replace any damaged cables immediately.
  • Test Alerts: Perform a monthly test of the emergency alert system to ensure the radio is functioning correctly.

By following these maintenance tips, you can ensure your Midland WR-120 weather radio remains reliable and ready to provide critical alerts during emergencies.

The Midland WR-120 weather radio is a vital tool for staying informed and safe during severe weather events. With its advanced S.A.M.E. technology, customizable alerts, and user-friendly design, it offers reliable emergency preparedness for homes and businesses. The comprehensive manual provides clear guidance for setup, operation, and maintenance, ensuring users can maximize its benefits. Whether you’re bracing for tornadoes, floods, or other hazards, the WR-120 is a trusted companion for critical alerts. By following the manual’s instructions and performing regular maintenance, you can rely on this device to keep you and your loved ones informed and protected. Invest in peace of mind with the Midland WR-120—it’s more than a radio; it’s a lifeline during emergencies.

hanuman chalisa in bengali pdf

The Hanuman Chalisa is a revered devotional hymn composed by Goswami Tulsidas‚ now available in Bengali for regional devotees․ This PDF version offers 40 verses praising Lord Hanuman‚ ideal for worship‚ spiritual growth‚ and emotional peace․ It is a cherished text for both personal devotion and community recitation‚ ensuring accessibility and convenience for Bengali-speaking followers․

Overview of Hanuman Chalisa

The Hanuman Chalisa is a 40-verse devotional hymn composed by Goswami Tulsidas‚ celebrating Lord Hanuman’s devotion‚ strength‚ and divine attributes․ Now available in Bengali‚ it serves as a vital spiritual text for devotees seeking connection with Hanuman․ The verses honor his unwavering loyalty to Lord Rama and his divine powers‚ resonating deeply with those who seek emotional peace and spiritual growth․

Importance of Bengali Translation

The Bengali translation of the Hanuman Chalisa bridges cultural and linguistic gaps‚ allowing Bengali-speaking devotees to connect deeply with the hymn’s spiritual essence․ It ensures accessibility for millions‚ fostering devotion and understanding․ This translation preserves the original text’s sanctity while making it relatable‚ enabling emotional and spiritual resonance among regional followers․ It is a vital resource for personal worship and communal recitation in Bengal and beyond․

Origin and Significance of Hanuman Chalisa

Hanuman Chalisa‚ composed by Goswami Tulsidas in the 16th century‚ is a sacred hymn celebrating Lord Hanuman’s devotion and strength․ Its significance lies in its spiritual and cultural impact across generations‚ offering solace and inspiration to millions․

History and Composer of Hanuman Chalisa

The Hanuman Chalisa was composed by the revered poet-saint Goswami Tulsidas in the 16th century․ Originally written in Awadhi‚ a dialect of Hindi‚ it reflects Tulsidas’s deep devotion to Lord Rama and his ardent admiration for Hanuman’s unwavering loyalty and strength․ Tulsidas‚ a prominent figure in Hindu spirituality‚ crafted this hymn to celebrate Hanuman’s divine attributes and his role in the Ramayana․ Its composition marks a significant milestone in devotional literature‚ making it a timeless spiritual treasure․ The Bengali translation ensures its reach extends to Bengali-speaking devotees‚ preserving its cultural and devotional essence․

Religious and Cultural Significance

The Hanuman Chalisa holds profound religious and cultural significance‚ embodying devotion to Lord Hanuman and his unwavering dedication to Lord Rama․ It is widely recited in temples and homes‚ serving as a powerful medium for spiritual growth and divine connection․ In Bengal‚ its translation bridges cultural gaps‚ making it accessible to Bengali-speaking devotees․ The hymn is not only a religious text but also a cultural symbol‚ reflecting values of loyalty‚ courage‚ and faith․ Its verses resonate deeply‚ fostering emotional solace and communal bonding during festivals and rituals․

Structure and Content of Hanuman Chalisa in Bengali

The Hanuman Chalisa in Bengali is a devotional hymn comprising 40 verses by Tulsidas‚ praising Hanuman’s strength‚ wisdom‚ and devotion to Lord Rama‚ now accessible in Bengali for regional speakers․

40 Verses and Their Meaning

The Hanuman Chalisa consists of 40 verses that extol Lord Hanuman’s virtues‚ strength‚ and unwavering devotion to Lord Rama․ Each verse carries deep spiritual significance‚ praising Hanuman’s courage‚ wisdom‚ and selfless service․ The hymn begins with an invocation of Lord Rama and Hanuman‚ followed by verses that highlight Hanuman’s divine attributes and his role in the Ramayana․ The closing verses express gratitude and seek blessings‚ making it a comprehensive devotional text for spiritual growth and worship․ The Bengali translation ensures accessibility for regional speakers‚ preserving the original essence and meaning of the verses․

Language and Translation Accuracy

The Hanuman Chalisa in Bengali PDF ensures precise translation of the original text‚ maintaining its spiritual essence and poetic rhythm․ Scholars have carefully translated the verses to preserve their emotional depth and devotional significance․ The Bengali version retains the hymn’s traditional meter‚ making it suitable for recitation․ Additionally‚ transliterations guide pronunciation‚ aiding non-experts․ This translation bridges cultural gaps‚ offering Bengali-speaking devotees a meaningful connection to the sacred text while staying true to its original intent and spiritual power․

Benefits of Reciting Hanuman Chalisa

Reciting the Hanuman Chalisa brings spiritual blessings‚ emotional peace‚ and strength․ It helps devotees connect with Lord Hanuman‚ fostering devotion and resilience in daily life․

Spiritual Blessings and Devotional Aspects

Reciting the Hanuman Chalisa in Bengali fosters a deep spiritual connection with Lord Hanuman‚ offering divine grace and protection․ It is believed to strengthen devotion‚ bring peace‚ and grant blessings for courage and wisdom․ Many devotees recite it to seek solace‚ overcome challenges‚ and attain spiritual growth․ The hymn’s verses‚ rich in devotion‚ help purify the mind and heart‚ creating a calming and meditative experience․ It is a powerful tool for enhancing faith and surrender to the divine․

Emotional and Mental Well-being

Reciting the Hanuman Chalisa in Bengali brings emotional peace and mental calm‚ helping to alleviate stress and anxiety․ Its melodious verses create a soothing effect‚ fostering resilience and positive energy․ Many find solace in its recitation‚ which helps manage life’s challenges and promotes emotional balance․ The hymn’s devotional power strengthens the mind‚ offering hope and courage during difficult times․ Regular recitation can enhance mental clarity and foster a sense of inner harmony‚ making it a cherished practice for emotional well-being․

Downloading and Accessing Hanuman Chalisa in Bengali PDF

The Hanuman Chalisa in Bengali is easily accessible online․ Popular platforms like Google Drive and spiritual websites offer free downloads․ Simply search‚ select‚ and save the PDF file․

Popular Platforms for Download

The Hanuman Chalisa in Bengali PDF is widely available on various platforms․ Popular options include Google Drive‚ spiritual websites‚ and Vaidika Vignanam․ Many devotees share it on Amazon Drive and personal blogs․ Additionally‚ religious forums and cultural groups often provide free access․ These platforms ensure easy downloading‚ making the hymn accessible to everyone․ Simply search for “Hanuman Chalisa Bengali PDF” to find reliable sources and download the file instantly․

Steps to Download and Save the PDF

To download the Hanuman Chalisa in Bengali PDF‚ visit a reliable website like Vaidika Vignanam or Google Drive․ Search for “Hanuman Chalisa Bengali PDF” and select the correct file․ Click the download button‚ choose a location‚ and wait for the file to save․ Once downloaded‚ you can access it offline for recitation or printing․ Ensure to verify the source for authenticity and security before downloading․

Understanding the Verses

The Hanuman Chalisa in Bengali PDF captures the essence of each verse‚ highlighting Hanuman’s strength‚ wisdom‚ and devotion․ It facilitates easy understanding and recitation for Bengali-speaking devotees․

Transliteration for Easy Recitation

The Bengali PDF includes accurate transliteration of each verse‚ ensuring that devotees can recite the Hanuman Chalisa flawlessly․ This feature is particularly helpful for those unfamiliar with Sanskrit‚ as it maintains the original pronunciation while using Bengali script․ The transliteration enhances accessibility‚ making it easier for everyone to engage in spiritual practices and connect deeply with the hymn’s divine essence․ This approach bridges language barriers‚ fostering widespread devotion and unity among worshippers․

Explanation of Key Verses

The Bengali PDF elaborates on pivotal verses‚ highlighting Lord Hanuman’s unwavering devotion‚ strength‚ and wisdom․ Key verses praise his role as a loyal servant to Lord Rama and a protector of devotees․ These verses underscore his divine qualities‚ such as courage and humility‚ making them central to worship․ The Bengali translation ensures these profound teachings are accessible‚ fostering deeper spiritual connection and understanding among regional followers‚ enriching their devotional practices and reverence for Hanumanji․

Cultural Impact in Bengal

The Hanuman Chalisa in Bengali is deeply cherished in West Bengal and Bangladesh‚ resonating with local traditions․ Its verses are integral to festivals‚ rituals‚ and daily worship‚ fostering spiritual unity and devotion among Bengali-speaking communities․

Popularity in Bengali-Speaking Regions

The Hanuman Chalisa in Bengali has gained immense popularity in West Bengal and Bangladesh due to its accessible translation and cultural resonance․ Devotees widely recite it during festivals like Durga Puja and Hanuman Jayanti‚ making it a cornerstone of spiritual practices․ The Bengali version bridges language barriers‚ allowing natives to connect deeply with the verses․ Its melodious recitation and emotional solace have made it a beloved hymn in both rural and urban areas‚ fostering a strong sense of devotion and community bonding․

Role in Festivals and Rituals

The Hanuman Chalisa in Bengali plays a vital role in festivals and rituals‚ particularly during Hanuman Jayanti and Durga Puja․ Devotees chant it to seek blessings‚ strength‚ and prosperity․ In temples and homes‚ its recitation is believed to purify the environment and bring divine grace․ Many Bengali communities incorporate it into their daily poojas and special ceremonies‚ making it an integral part of their spiritual and cultural practices․ This tradition strengthens faith and fosters a deeper connection with Lord Hanuman․

Practical Tips for Recitation

For effective recitation‚ choose a quiet space‚ use the Bengali PDF for clarity‚ and recite with devotion․ Understanding each verse enhances spiritual connection and focus․

Best Time for Recitation

The ideal time for reciting the Hanuman Chalisa is during early morning hours‚ preferably at sunrise‚ or in the evening after sunset․ These periods are considered sacred and conducive to spiritual focus․ Reciting it with devotion during these times enhances its benefits‚ fostering peace and divine connection․ Consistency in timing is encouraged to deepen the practice and maximize its positive effects on mental and emotional well-being․

Preparation and Rituals

Before reciting the Hanuman Chalisa‚ one should prepare by cleansing the space‚ lighting a lamp‚ and sitting comfortably with focus․ Offerings like flowers and fruits to Lord Hanuman are customary․ Rituals include chanting specific mantras before starting‚ ensuring a pure and devotional atmosphere․ These practices enhance the spiritual experience‚ fostering a deeper connection with the divine energy of Lord Hanuman‚ and are essential for maximizing the benefits of the recitation․

Modern-Day Relevance

The Hanuman Chalisa in Bengali PDF remains highly relevant today‚ offering easy access on mobile devices‚ thus preserving the text for future generations and fitting modern lifestyles․

Adaptation in Digital Media

The Hanuman Chalisa in Bengali PDF has been widely adapted into digital media‚ making it accessible on mobile devices and platforms․ Its digital formats include downloadable PDFs‚ MP3 recitations‚ and mobile app integrations․ These adaptations ensure the text remains relevant‚ blending traditional devotion with modern technology․ The PDF version is particularly popular for its portability and ease of sharing‚ allowing devotees to carry the sacred verses anywhere‚ enhancing accessibility and engagement in the digital age․

Contemporary Practices and Innovations

The Hanuman Chalisa in Bengali PDF has embraced modern innovations‚ such as digital platforms and mobile apps‚ to enhance accessibility․ Interactive features like transliterations and explanations cater to diverse audiences․ Virtual recitation sessions and eco-friendly digital storage have also gained popularity․ These contemporary practices ensure the hymn remains relevant‚ blending tradition with technology․ Additionally‚ educational workshops and online communities further promote its understanding‚ making it a dynamic part of modern spiritual practices while preserving its cultural and religious essence․

food web worksheet answer key pdf

Food web worksheets are essential educational resources for understanding how energy flows through ecosystems. They provide structured activities to explore food chains, trophic levels, and ecological relationships. Ideal for students, these tools enhance critical thinking and scientific literacy by engaging learners in analyzing complex interactions within nature.

What is a Food Web Worksheet?

A food web worksheet is an educational tool designed to help students understand the complex interactions within ecosystems. It typically includes diagrams or illustrations of food webs, along with questions and activities that guide learners in identifying producers, consumers, and decomposers. These worksheets often require students to label trophic levels, create food chains, and analyze the flow of energy through different organisms. They may also include questions about the ecological impacts of changes in the food web, such as the loss of a key species. Food web worksheets are widely used in biology and environmental science classes to promote critical thinking and a deeper understanding of how ecosystems function. They are often accompanied by answer keys to facilitate self-assessment and teacher feedback.

Key Components of a Food Web Worksheet

A food web worksheet typically includes a variety of components designed to enhance learning and understanding of ecological relationships. Central to these worksheets are detailed diagrams of food webs, which visually represent the interconnectedness of organisms in an ecosystem. These diagrams often highlight producers, consumers, and decomposers, providing a clear foundation for analysis. Questions and activities are also key components, such as identifying trophic levels, creating food chains, and explaining energy flow. Many worksheets include sections for labeling organisms according to their roles, such as primary consumers or tertiary consumers. Additionally, some worksheets incorporate ecological scenarios, asking students to predict the impact of changes in the food web, like the loss of a predator or the introduction of an invasive species. Answer keys are often provided to help students verify their understanding and track their progress.

Importance of Food Web Worksheets in Education

Food web worksheets play a vital role in education by fostering a deeper understanding of ecological concepts. They provide hands-on activities that engage students in analyzing energy flow, trophic levels, and the interdependence of organisms. These resources are particularly valuable for visual learners, as they often include diagrams and charts that simplify complex relationships. Worksheets also help students develop critical thinking skills by prompting them to create food chains, identify producers and consumers, and predict ecosystem changes. With answer keys available, teachers can assess student progress and provide targeted feedback. By integrating food web worksheets into the curriculum, educators can make abstract ecological concepts more accessible and interactive, ensuring students gain a solid foundation in environmental science.

Structure of a Food Web Worksheet

A food web worksheet typically includes sections for identifying producers, consumers, and decomposers, along with diagrams and questions to analyze energy flow and ecosystem interactions.

Typical Sections in a Food Web Worksheet

A food web worksheet often includes several key sections to help students understand and analyze ecological relationships. The first section typically involves identifying and labeling producers, consumers, and decomposers within a given food web diagram. Students are also asked to create food chains by tracing energy flow from one organism to another. Another common section focuses on analyzing trophic levels, where students classify organisms as primary, secondary, or tertiary consumers. Additionally, worksheets often include questions about the ecological impacts of changes in the food web, such as the effects of removing a specific species. Some worksheets also provide case studies or practical examples to apply theoretical knowledge. Finally, many include answer keys or solutions to help students verify their understanding and improve their learning outcomes.

Common Questions Found in Food Web Worksheets

Food web worksheets often include a variety of questions to assess understanding of ecological concepts. Common questions ask students to identify producers and consumers within a food web, create food chains, and label trophic levels. Many worksheets also prompt students to explain the potential impacts of changes in the ecosystem, such as the loss of a key species. Additionally, questions may require students to analyze the flow of energy, identify herbivores and carnivores, and distinguish between food chains and food webs. Some worksheets include case studies or diagrams, asking students to interpret and explain the relationships depicted. These questions help reinforce critical thinking and ecological literacy, ensuring students grasp the interconnectedness of organisms in an ecosystem. Answer keys are often provided to guide learning and verify responses.

How to Analyze a Food Web Diagram

To analyze a food web diagram, start by identifying the producers, typically plants or algae, which form the base of the ecosystem. Next, locate primary consumers, such as herbivores, and trace the arrows to secondary and tertiary consumers. Label each trophic level (producer, primary, secondary, tertiary) to visualize energy flow. Examine how organisms are interconnected and identify food chains within the web. Consider the impact of removing a species on the entire ecosystem. Use the food web to answer questions about predator-prey relationships, energy transfer efficiency, and ecological balance. Finally, verify your analysis by cross-referencing with answer keys or teacher guidance. This process enhances understanding of ecosystem dynamics and prepares students for advanced ecological studies. Regular practice with food web diagrams improves critical thinking and scientific literacy.

Case Studies and Practical Examples

Case studies and practical examples are vital for understanding food web dynamics. For instance, a marine ecosystem food web might include phytoplankton as producers, zooplankton as primary consumers, small fish as secondary consumers, and apex predators like sharks. Worksheets often use such examples to illustrate energy flow and trophic levels. Another example is a grassland food web, where grasses are producers, insects and herbivores like rabbits are primary consumers, and foxes or owls are secondary consumers. These examples help students visualize how energy is transferred and how ecosystems balance. Practical activities, such as creating food chains from a food web or analyzing the impact of species removal, deepen understanding. Answer keys provide correct analyses, ensuring students grasp ecological principles and their real-world applications. These tools are essential for developing critical thinking and problem-solving skills in ecology. Regular exposure to diverse case studies enhances learning outcomes.

How to Answer Food Web Worksheet Questions

To answer food web worksheet questions, identify producers, consumers, and trophic levels, construct food chains, and analyze ecological impacts. Use answer keys to verify accuracy and understanding.

Understanding Food Web Diagrams

Food web diagrams visually represent the complex relationships between organisms in an ecosystem, showcasing how energy flows from producers to consumers. These diagrams consist of interconnected food chains, illustrating the diverse pathways energy can take. Producers, such as plants, form the base, while consumers, including herbivores and carnivores, are positioned according to their dietary habits. Arrows indicate the direction of energy transfer, from prey to predator. Decomposers, though often omitted, play a crucial role in recycling nutrients. To interpret these diagrams effectively, students should identify key components like trophic levels and recognize how species depend on one another. Analyzing food webs helps in understanding ecological balance and the potential impacts of losing a species. Practice worksheets and answer keys provide guidance, enabling learners to master this fundamental concept in biology and environmental science.

Labeling Trophic Levels in a Food Web

Labeling trophic levels in a food web involves categorizing organisms based on their position in the energy flow. Producers (P) are at the base, converting sunlight into energy. Primary consumers (1) eat producers, while secondary consumers (2) eat primary consumers. Tertiary (3) and quaternary (4) consumers follow, representing higher levels. Decomposers, though not always labeled, recycle nutrients. Worksheets often include diagrams where students label each level, enhancing their understanding of ecological roles and energy transfer. Answer keys provide correct labels, helping students verify their work and grasp how organisms interact within an ecosystem. This exercise is crucial for understanding food web dynamics and environmental balance.

Creating Food Chains from a Food Web

Creating food chains from a food web involves identifying sequential pathways of energy transfer. A food web is a network of interconnected food chains, and extracting individual chains helps simplify complex relationships. Start by selecting a producer, then trace arrows to consumers, forming a linear chain. For example, in a grassland food web, a chain might be “Grass → Insect → Frog → Hawk.” Label each organism with its trophic level (P, 1, 2, 3) to clarify roles. Worksheets often include diagrams where students highlight or draw chains, ensuring they understand how energy flows through ecosystems. Answer keys provide correct chains, allowing students to verify their work. This activity enhances understanding of predator-prey relationships and how species depend on one another for survival. It also highlights the interconnectedness of organisms within a food web, reinforcing ecological principles.

Discussions on Ecological Impacts

Discussions on ecological impacts in food web worksheets often focus on how changes in one part of the web affect the entire ecosystem. For instance, removing a key predator can lead to an overpopulation of prey, disrupting the balance. These exercises encourage students to think critically about real-world scenarios, such as the introduction of invasive species or the loss of a top consumer. Worksheets may include questions like, “What would happen if all the frogs in the food web disappeared?” or “How does pollution affect producers and, in turn, consumers?” Answer keys provide insights into potential outcomes, such as population declines or changes in nutrient cycling. These discussions not only deepen understanding of ecological principles but also highlight the importance of conservation and sustainability in maintaining healthy ecosystems. They prepare students to address environmental challenges and make informed decisions about human impacts on nature.

Importance and Resources

Food web worksheets are invaluable educational tools, offering structured exercises to explore ecological concepts. They provide practical examples and answer keys, making complex ideas accessible for learners of all levels.

Educational Value of Food Web Worksheets

Food web worksheets hold significant educational value, particularly in biology and environmental science. They provide students with hands-on activities to visualize energy flow in ecosystems, enhancing their understanding of trophic levels, food chains, and ecological interactions. These resources often include diagrams, labeling exercises, and critical thinking questions, which foster analytical skills. Worksheets with answer keys allow students to self-assess their knowledge, reinforcing learning outcomes. Teachers use these tools to align lessons with curriculum standards, ensuring comprehensive coverage of ecological concepts. By engaging students in practical exercises, food web worksheets bridge theoretical knowledge with real-world applications, preparing learners for advanced studies and fostering environmental awareness. Their versatility makes them suitable for various grade levels, from elementary to high school, catering to diverse learning needs and styles. This makes them indispensable in modern science education.

Common Challenges and Solutions

When working with food web worksheets, students often face challenges such as misunderstanding trophic levels or confusing producers with consumers. To address this, educators can use interactive tools like diagrams and videos to clarify concepts. Another common issue is interpreting complex food web diagrams, which can overwhelm learners. Simplifying diagrams and providing step-by-step guidance helps students focus on key elements. Additionally, some students struggle with labeling organisms correctly, especially when species occupy multiple trophic levels. Offering detailed answer keys with explanations can aid in self-correction and deeper understanding. Finally, ensuring access to up-to-date resources, such as PDF worksheets with clear instructions, helps mitigate these challenges and enhances learning outcomes.

Downloadable Food Web Worksheet Answer Keys

Downloadable food web worksheet answer keys are invaluable resources for students and educators alike. These keys provide clear, detailed solutions to worksheet questions, ensuring accurate feedback and fostering self-correction. Many educational platforms, such as Super Teacher Worksheets and online learning hubs, offer PDF versions of answer keys that are easy to access and print. They cover a wide range of topics, from identifying producers and consumers to constructing food chains and analyzing ecological impacts. By using these resources, students can verify their answers and gain a deeper understanding of complex concepts. Additionally, answer keys often include explanations, making them a powerful tool for independent study and review. They are especially helpful for visual learners who benefit from seeing how answers are structured and presented.

x18 bus timetable morpeth to newcastle pdf

The X18 bus route connects Newcastle upon Tyne with Morpeth, Alnwick, Seahouses, and Berwick, offering a convenient link across Northumberland. Operated by Arriva North East, this service provides essential transportation for both locals and tourists. With regular departures and a downloadable PDF timetable, passengers can easily plan their journeys. The X18 bus timetable from Morpeth to Newcastle is a vital resource for travelers, ensuring reliable and efficient connections throughout the region.

Route Overview

The X18 bus route spans from Newcastle upon Tyne to Berwick, passing through Morpeth, Alnwick, and Seahouses. It offers scenic views of Northumberland’s coastline and countryside, operated by Arriva North East.

Starting Points

The X18 bus route begins at Newcastle upon Tyne’s Haymarket Bus Station, a central location for travelers. Another starting point is Morpeth Bus Station, which serves as a key interchange for passengers heading towards Alnwick, Seahouses, and Berwick. These starting points ensure that commuters and visitors can easily access the route from major towns, making the X18 a vital link for exploring Northumberland. Both locations provide ample facilities, including timetable displays and ticketing options, ensuring a smooth start to your journey. The service is operated by Arriva North East, offering reliable connections across the region.

Stops Along the Route

The X18 bus route features key stops connecting Newcastle upon Tyne with Morpeth, Alnwick, Seahouses, and Berwick. Major stops include Newcastle upon Tyne’s Haymarket Bus Station, Gosforth Regent Centre, Morpeth Bus Station, Pegswood, Widdrington, and Alnwick Bus Station. Additional stops in both directions ensure comprehensive coverage of the route. The journey spans approximately 15 stops, providing easy access to various towns and villages across Northumberland. Real-time tracking and downloadable PDF timetables allow passengers to plan their trips efficiently. Whether traveling for work or leisure, the X18 offers a reliable way to explore this scenic region.

Operator

The X18 bus service is operated by Arriva North East, a trusted provider of public transportation in the region. Arriva runs the X18 route on behalf of Northumberland County Council, ensuring reliable connections between Newcastle, Morpeth, Alnwick, Seahouses, and Berwick. With a modern fleet and a focus on passenger comfort, Arriva North East delivers efficient and accessible travel options. The service includes real-time bus tracking and mobile ticketing through the Arriva app, making journeys seamless. Key stops along the route, such as Newcastle upon Tyne’s Haymarket Bus Station and Morpeth Bus Station, are served regularly, providing essential links for both commuters and visitors. Arriva North East’s commitment to quality ensures a smooth travel experience.

Timetable Details

The X18 bus operates frequently from Newcastle to Morpeth, with services running Monday to Friday, weekends, and holidays, ensuring convenient travel across Northumberland.

Monday to Friday

The X18 bus operates frequently on weekdays, providing a reliable service for commuters and travelers. From Monday to Friday, buses depart from Morpeth Bus Station to Newcastle upon Tyne, with services starting as early as 06:30. The frequency of buses varies throughout the day, with departures approximately every 30 to 60 minutes. Key stops include Gosforth Regent Centre, Newcastle Haymarket Bus Station, and Pegswood Front Street. The timetable ensures consistent service, with buses running from early morning until the evening, making it convenient for both work and leisure journeys. Passengers can rely on the X18 to connect Morpeth and Newcastle efficiently, with minimal waiting times during peak hours.

Saturday

On Saturdays, the X18 bus service operates with a slightly reduced frequency compared to weekdays. Buses depart from Morpeth Bus Station to Newcastle upon Tyne, with the first service typically starting later than on weekdays. The frequency is approximately every 60 to 90 minutes, ensuring consistent coverage throughout the day. Key stops, such as Gosforth Regent Centre and Newcastle Haymarket Bus Station, are included in the route. The timetable is designed to accommodate weekend travelers, with services running from early morning to evening. Passengers can expect a reliable connection between Morpeth and Newcastle, with minimal disruptions. The Saturday service aligns with the weekday route, maintaining the same stops and providing a seamless travel experience for all users.

Sunday

On Sundays, the X18 bus service follows a reduced timetable, catering to the lower demand typical of weekends. The first departure from Morpeth Bus Station is later than on weekdays, with buses running at intervals of approximately 90 to 120 minutes. This schedule ensures that passengers can still travel conveniently, though with fewer options. Key stops, including Gosforth Regent Centre and Newcastle Haymarket Bus Station, remain part of the route. The Sunday service operates from early morning to evening, providing essential connections for those needing to travel. While less frequent than weekdays, the Sunday timetable is designed to meet the needs of both residents and visitors, ensuring accessibility across the region.

How to Download the PDF Timetable

To download the X18 bus timetable from Morpeth to Newcastle, visit the official Arriva North East website. Navigate to the “Timetables & Maps” section and search for the X18 route. Select the desired timetable from the list, which will open in a PDF format. You can then download or print the timetable for easy access. Additionally, the Arriva app offers a mobile-friendly option to view and download the PDF timetable. This ensures you can plan your journey efficiently, whether at home or on the go. The PDF format is compatible with most devices, making it a convenient option for travelers.

Key Destinations

The X18 bus route connects several key destinations, including Newcastle upon Tyne, Morpeth, Alnwick, Seahouses, and Berwick. These towns are significant hubs for both residents and visitors. Newcastle upon Tyne offers urban amenities, while Morpeth provides historic charm. Alnwick is famous for its medieval castle and gardens, and Seahouses is a coastal gem. Berwick rounds out the route with its rich history and scenic views. These destinations make the X18 a vital link for exploring Northumberland’s diverse landscapes and cultural attractions. Each stop is strategically located to ensure easy access to local landmarks, making the X18 a popular choice for travelers.

Service Frequency

The X18 bus service operates regularly, connecting Newcastle upon Tyne with Morpeth, Alnwick, Seahouses, and Berwick. Buses run approximately every 30 to 60 minutes on weekdays, with slightly reduced frequency on weekends. The service starts early in the morning, with the first bus departing around 6:30 AM, and continues until the evening, with the last bus typically departing at 7:00 PM. Frequencies may vary depending on the section of the route, with more buses running between major hubs like Newcastle and Morpeth. Passengers can download the PDF timetable for exact departure times and plan their journeys accordingly. This reliable service ensures convenient travel across Northumberland.

Real-Time Bus Tracking

Passengers can track the X18 bus in real-time using the Arriva app or online tracking tools. The app provides live updates on bus locations, ensuring passengers can plan their journeys accurately. Real-time tracking helps reduce waiting times and offers peace of mind, especially during unexpected delays; The Arriva app also allows users to view bus timetables, set reminders, and receive service alerts. Additionally, the X18 route is equipped with GPS technology, enabling precise tracking of each bus along its journey from Newcastle to Morpeth and beyond. This feature is particularly useful for coordinating connections or adjusting travel plans on the go.

Service Changes and Improvements

The X18 bus service has recently undergone minor timetable adjustments to enhance reliability and improve connections with other routes, such as the X15 at Belford. These changes ensure better timekeeping and smoother transfers for passengers. Arriva North East continues to monitor and refine the service to meet passenger needs and adapt to demand. Any updates are communicated through their website and app, allowing travelers to stay informed. These improvements reflect Arriva’s commitment to providing efficient and accessible transportation across Northumberland, ensuring the X18 remains a reliable option for journeys between Newcastle and Morpeth. Regular reviews and customer feedback contribute to ongoing service enhancements.

Connections with Other Routes

The X18 bus route seamlessly connects with other services, enhancing travel flexibility. At key stops like Alnwick Bus Station, passengers can transfer to route X15, which offers faster journeys between Newcastle and Alnwick. Additionally, the X18 intersects with local routes at Gosforth Regent Centre and Morpeth Bus Station, providing further options for travelers. These connections allow passengers to access a broader network of destinations across Northumberland. Arriva North East ensures that timetables are coordinated to minimize waiting times, making it easier for commuters to plan their trips efficiently. This integrated approach highlights the importance of the X18 as a central link in the regional transport system. Regular updates ensure smooth transitions between services.

Special Notes

The X18 bus service includes several important notes for passengers. Real-time bus tracking is available via the Arriva app, enabling commuters to monitor their journeys accurately. Minor timetable adjustments have been made to improve connections with route X15 at Belford and enhance overall reliability. Additionally, buses between Newcastle and High Clifton only stop at Gosforth (Ivy Road), Regent Centre Metro, and Brunton Lane on weekdays; Passengers are advised to check the latest PDF timetables for exact departure times and plan their trips accordingly. These updates ensure a smoother travel experience across the route from Morpeth to Newcastle. Always verify the most recent schedules before your journey.

The X18 bus route from Morpeth to Newcastle is a vital transportation link, connecting key destinations across Northumberland. Operated by Arriva North East, this service provides reliable and efficient travel options for both locals and visitors. With regular departures and a downloadable PDF timetable, passengers can plan their journeys with ease. The route serves towns such as Alnwick, Seahouses, and Berwick, making it an essential service for exploring the region. By offering real-time tracking and accessible schedules, the X18 ensures a convenient and stress-free travel experience. Always check the latest PDF timetable for the most up-to-date information to make the most of your trip.

bella pressure cooker instruction manual

The Bella Pressure Cooker is a versatile, time-saving kitchen appliance designed to simplify cooking. Its advanced features and pre-programmed settings make it ideal for home cooks and professionals.

Overview of the Bella Pressure Cooker

The Bella Pressure Cooker is a multi-functional kitchen appliance designed to simplify cooking while saving time. It offers pre-programmed settings for various dishes, making it user-friendly. With its advanced features, it allows for versatile cooking options, from soups to grains. The cooker’s design emphasizes efficiency and safety, ensuring even heat distribution and pressure regulation. The accompanying manual provides detailed instructions for setup, operation, and troubleshooting, helping users maximize its potential. Whether for quick meals or elaborate recipes, the Bella Pressure Cooker is a practical addition to modern kitchens.

Importance of Reading the Instruction Manual

Reading the Bella Pressure Cooker manual is essential for safe and effective use. It provides detailed guidance on setup, operation, and troubleshooting, ensuring users understand safety precautions and optimal cooking techniques. The manual also explains how to utilize pre-programmed settings and features, helping to avoid common mistakes. By following the instructions, users can maximize the appliance’s potential, achieve consistent results, and maintain its longevity. It’s a crucial resource for both beginners and experienced cooks to get the most out of their Bella Pressure Cooker.

Safety Precautions and Guidelines

Always follow safety guidelines when using the Bella Pressure Cooker to prevent accidents. Read the manual thoroughly and ensure proper use of the pressure release valve. Regular maintenance is essential for optimal performance and safety. Never leave the cooker unattended during operation, and keep children away. Proper usage ensures safe and efficient cooking.

Basic Safety Tips for Using a Pressure Cooker

Always read the instruction manual carefully before using the Bella Pressure Cooker. Ensure you understand all components, such as the pressure release valve. Never leave the cooker unattended during operation. Keep children away from the appliance while it is in use. Regularly inspect and maintain the gasket and valve for proper sealing. Avoid forcing the lid open, as this can cause injury. Always use the recommended cooking settings and follow the manual’s guidelines for pressure release. Proper usage ensures safe and efficient cooking.

Understanding Pressure Cooker Components

The Bella Pressure Cooker features essential components like the pressure release valve, gasket, and locking lid. The pressure release valve regulates steam and pressure. The gasket ensures a tight seal for proper pressure buildup. The lid locks securely during cooking to prevent accidents. Additional components include a control panel with buttons for settings and a digital display for monitoring cooking progress. Understanding these parts is crucial for safe and effective use of the appliance. Regular inspection of these components ensures optimal performance and longevity of the pressure cooker.

Components and Accessories

The Bella Pressure Cooker includes a durable inner pot, steamer basket, and secure-fitting lid. Accessories like extra gaskets and a recipe booklet enhance versatility and efficiency.

Parts of the Bella Pressure Cooker

The Bella Pressure Cooker consists of essential components like the inner pot, lid, and pressure release valve. The inner pot is durable and non-stick, ideal for cooking. The lid features a locking mechanism for safety, ensuring secure sealing. The pressure release valve regulates steam and pressure. Additional parts include a steamer basket and trivet for versatile cooking. The control panel offers easy navigation for settings. These components work together to ensure efficient and safe cooking experiences. Understanding each part is crucial for optimal use and maintenance.

Essential Accessories for Optimal Use

To enhance your cooking experience with the Bella Pressure Cooker, essential accessories are recommended. A steamer basket is ideal for steaming vegetables or seafood, while a trivet helps prevent food from touching the base. Non-stick pans are perfect for sautéing or browning ingredients before pressure cooking. A spatula is included for safe stirring and serving. Additionally, protective mitts ensure safe handling of hot components. These accessories optimize functionality and safety, enabling you to explore a variety of recipes with ease and confidence. They are designed to complement the cooker’s features for a seamless cooking process.

Initial Setup and Preparation

Unpack and clean the Bella Pressure Cooker thoroughly before first use. Refer to the manual for detailed guidance on assembly and initial preparation steps. Always follow safety guidelines.

Unpacking and Cleaning Before First Use

Begin by carefully unpacking the Bella Pressure Cooker and inspecting all components for damage. Wash the cooker, lid, and accessories with mild soap and warm water. Use a soft sponge to avoid scratching surfaces. Rinse thoroughly and dry with a clean towel to prevent moisture buildup. Refer to the user manual for specific cleaning instructions for electrical parts and valves. Ensure all parts are clean and dry before assembly to maintain hygiene and functionality. This step is crucial for safe and effective first-time use.

Assembling the Pressure Cooker

Start by attaching the pressure release valve and ensuring it is securely locked. Place the gasket inside the lid, aligning it properly to ensure a tight seal. Next, attach the lid to the main pot, making sure it clicks into place. Check that all components, like the steam basket and trivet, are correctly positioned. Refer to the manual for guidance on proper alignment and tightening. Ensure all parts are firmly secured to avoid leaks or malfunctions. Proper assembly is crucial for safe and efficient cooking with your Bella Pressure Cooker.

Cooking Modes and Settings

The Bella Pressure Cooker offers multiple cooking modes, including pressure cooking, slow cooking, sauté, and steam functions. These settings allow for customizable cooking experiences tailored to various recipes.

Understanding Different Cooking Modes

The Bella Pressure Cooker features multiple cooking modes to suit various culinary needs. These include pressure cooking, slow cooking, sauté, and steam functions. Pressure cooking reduces cooking time significantly, while slow cooking is ideal for tenderizing tougher cuts of meat. The sauté mode allows for browning ingredients before cooking, enhancing flavor. Steam mode is perfect for healthy, low-fat dishes. Each mode is designed to offer flexibility and precision, ensuring optimal results for a wide range of recipes. Understanding these modes helps users maximize the cooker’s potential and achieve desired outcomes efficiently.

How to Choose the Right Cooking Settings

Selecting the right cooking settings on your Bella Pressure Cooker ensures optimal results. Start by choosing the preset mode that matches your recipe, such as soup, meat, or grain settings. For precise control, use the manual mode to adjust cooking time and pressure levels. Always refer to the instruction manual for guidance on specific settings. Adjusting the timer and pressure based on the type and quantity of food is crucial. Experiment with settings to achieve your desired texture and flavor, ensuring a perfect cooking experience every time.

Cooking Instructions and Techniques

Mastering the Bella Pressure Cooker involves understanding its versatile cooking functions. From preset modes to manual controls, it offers precise cooking for various dishes, ensuring flavorful results effortlessly.

Step-by-Step Guide to Cooking with the Bella Pressure Cooker

Ensure the pressure cooker is preheated before adding ingredients.
Add food and liquids, avoiding overfilling the pot.
Secure the lid and set the valve to sealing position.
Use preset modes or manual settings for precise control.
Allow the cooker to reach pressure naturally.
Cook according to recipe guidelines.
Release pressure safely—natural or quick release.
Open the lid carefully and serve.
This method ensures even cooking and retains flavors for delicious meals.

Common Cooking Techniques and Tips

For optimal results with the Bella Pressure Cooker, preheat it before adding ingredients. Avoid overfilling to prevent clogging. Use the quick-release feature for delicate foods. Marinate meats beforehand for enhanced flavor. Layer ingredients to ensure even cooking. Experiment with sauté and slow-cook modes for versatility. Regularly clean and descale the cooker to maintain performance. Always follow recipe guidelines for liquid ratios. Familiarize yourself with the pressure valve for safe operation. These tips ensure consistent, delicious meals while extending the cooker’s lifespan.

Maintenance and Troubleshooting

Regularly clean the Bella Pressure Cooker, especially the valve and gasket. Check for blockages and damage. Store in a dry place. Troubleshoot issues by consulting the manual or contacting support.

Cleaning and Maintaining the Pressure Cooker

Regular maintenance ensures optimal performance and longevity. After each use, clean the Bella Pressure Cooker thoroughly, focusing on the lid, valve, and gasket. Wash with mild soap and warm water, avoiding abrasive cleaners. Dry all parts completely to prevent rust or mold. Check the valve and gasket for blockages or wear; replace if necessary. Store the cooker in a dry place, separate from the power base. Refer to the manual for specific cleaning instructions and troubleshooting tips to maintain your Bella Pressure Cooker in excellent condition.

Troubleshooting Common Issues

For common issues with your Bella Pressure Cooker, check the power cord connection and ensure the lid is securely locked. If the cooker doesn’t pressurize, inspect the gasket for proper alignment and cleanliness. Clogging in the steam release valve can cause pressure buildup, so clean it regularly. Refer to the manual for reset instructions if error codes appear. Avoid overfilling, as this can prevent proper sealing. Contact customer support if problems persist. Regular maintenance and adherence to guidelines will help resolve most issues efficiently, ensuring smooth operation and extending the life of your pressure cooker.

Cooking Tips and Recipes

The Bella Pressure Cooker excels at preparing hearty soups, tender meats, and flavorful grains. Try recipes like chili, risotto, or roasted vegetables for delicious, quick meals. Experiment with diverse cuisines while ensuring adequate liquid ratios to avoid burn notices. This versatile appliance simplifies cooking, allowing you to create mouthwatering dishes with minimal effort and time, perfect for busy home cooks seeking gourmet results.

Optimizing Cooking Time and Flavor

The Bella Pressure Cooker significantly reduces cooking time while enhancing flavor. Brown ingredients before pressure cooking for added depth. Use the sauté function to caramelize vegetables, then switch to pressure cooking. Deglazing the pot with liquid ensures no residue and boosts flavor. Marinate meats beforehand for tender results. Layering ingredients and using aromatics like garlic and onions further enhance taste. Avoid overfilling to prevent pressure issues. Experiment with herbs and spices, and always natural release for delicate foods to retain moisture and texture, achieving restaurant-quality dishes efficiently.

Popular Recipes for the Bella Pressure Cooker

The Bella Pressure Cooker excels at preparing a variety of delicious meals. Popular recipes include hearty chili, tender chicken dishes, flavorful risotto, and fall-apart pulled pork. Users also love making soups, stews, and grains like quinoa or rice. For desserts, cheesecake and caramel apples are favorites. These recipes highlight the cooker’s versatility, offering quick and flavorful results. With pre-programmed settings, achieving perfect textures and tastes is effortless. Whether you’re cooking for a family or entertaining guests, the Bella Pressure Cooker delivers mouthwatering dishes with minimal effort. Experiment with these recipes to unlock its full potential.

For more information and support, visit Bella’s official website or download the user manual. Explore recipe guides and troubleshooting tips to enhance your cooking experience.

Final Tips for Getting the Most Out of Your Bella Pressure Cooker

Regularly maintain your Bella Pressure Cooker by cleaning and checking its components. Experiment with new recipes and adjust settings for optimal results. Use the pre-programmed modes for convenience and consistent cooking. Always refer to the manual for troubleshooting common issues. For enhanced flavor, brown meats before pressure cooking. Explore Bella’s official website for additional resources, guides, and inspiration to maximize your cooking experience with this versatile appliance.

Where to Find More Information and Support

For additional guidance, visit Bella’s official website to access user manuals, quick start guides, and troubleshooting tips. Download the Bella 6 Litre Pressure Cooker manual or explore the Bella Housewares support page for detailed instructions. Register your product at www.bellahousewares.com for warranty and support. Online forums and recipe communities also offer creative ideas and solutions for using your Bella Pressure Cooker effectively.

kenmore elite top load washing machine manual

This manual provides essential guidance for operating, maintaining, and troubleshooting your Kenmore Elite top load washer, ensuring optimal performance and longevity of your appliance.

Overview of the Kenmore Elite Series

The Kenmore Elite series offers high-performance appliances designed for efficiency and convenience. Known for their innovative features, these top load washers provide large capacity, advanced cleaning technologies, and user-friendly controls. Built for reliability, they cater to diverse laundry needs, ensuring optimal cleaning with minimal effort. The series stands out for its balance of power, precision, and energy efficiency, making it a preferred choice for modern households seeking durable and high-quality washing machines.

Importance of Reading the Manual

Reading the Kenmore Elite top load washing machine manual is crucial for understanding its features, proper operation, and maintenance. It helps users avoid common mistakes, ensures safety, and optimizes performance. The manual provides troubleshooting tips, warranty details, and guidelines for efficient energy use. By following the instructions, users can extend the appliance’s lifespan and resolve issues without professional assistance, saving time and money while ensuring reliable laundry results.

Key Features and Benefits of the Kenmore Elite Top Load Washer

The Kenmore Elite top load washer offers a large capacity, advanced washing technologies, and user-friendly controls. It provides efficient cleaning, customizable cycles, and reliable performance, ensuring superior laundry results while saving time and energy.

Large Capacity and Efficiency

The Kenmore Elite top load washer features a spacious interior, allowing for larger loads and reducing the number of cycles needed. Its high-efficiency design minimizes water and energy consumption, making it eco-friendly. Advanced sensors optimize water usage and cycle times, ensuring efficient cleaning while saving resources. This combination of capacity and efficiency makes it ideal for busy households seeking convenience and cost savings.

Advanced Washing Technologies

The Kenmore Elite top load washer incorporates cutting-edge technologies for superior cleaning. Active Spray technology ensures thorough cleaning by targeting stains directly. A direct-drive motor enhances performance and reliability while improving energy efficiency. Advanced sensors detect load size and optimize water usage and cycle times. The steam cleaning option deeply penetrates fabrics to remove tough stains, while smart controls offer customizable settings for tailored wash cycles. These technologies combine to deliver exceptional cleaning results with minimal effort.

User-Friendly Controls and Customization Options

The Kenmore Elite top load washer features an intuitive control panel with a cycle selector knob and buttons for custom options. Users can easily select from various wash cycles, adjust soil levels, and enable steam cleaning. The LED display provides clear cycle status updates. Customizable settings allow for tailored washing experiences, while the straightforward design ensures effortless operation for all users, making it simple to achieve perfect laundry results every time.

Installation and Setup Guidelines

Ensure proper installation by checking site requirements, leveling the washer, and connecting water, power, and drainage. Follow manual instructions for a secure and efficient setup.

Pre-Installation Requirements

Before installing the Kenmore Elite top load washer, ensure the installation site is level, well-ventilated, and has access to water, power, and drainage. Verify that the floor is firm and can support the washer’s weight. Check the electrical and water supply connections to ensure compatibility. Ensure the area is clear of obstacles and measure the space to confirm the washer fits properly. Proper preparation ensures a smooth and safe installation process.

Step-by-Step Installation Process

Unpack the washer and inspect for damage. Place it in the prepared area, ensuring it’s level and secure. Connect the water supply lines to the inlet valves, tightening firmly. Plug the power cord into a grounded outlet; Position the drain hose into a standpipe or laundry tub, ensuring no kinks. Test the washer by running a cycle to confirm proper installation and functionality.

Levelling and Balancing the Washer

Ensure the washer is placed on a firm, even surface. Adjust the leveling legs by turning them clockwise or counterclockwise until the washer is stable. Use a spirit level to confirm balance. Tighten the locking nuts once properly aligned. This prevents vibration and noise during operation and ensures optimal performance. Proper levelling is crucial for reducing wear and tear on internal components.

Operating the Kenmore Elite Top Load Washing Machine

Turn on the washer, select the desired cycle using the control panel, and choose options like steam cleaning for enhanced results. Ensure proper loading for optimal performance.

Understanding the Control Panel

The control panel features a cycle selector knob, option buttons, and a digital display; It allows you to choose from various wash cycles, select options like steam cleaning, and monitor the wash progress. Sensors automatically detect load size, optimizing water and energy use. The display shows error codes if issues arise. Familiarize yourself with the panel to customize cycles and ensure efficient operation.

Selecting the Right Wash Cycle

Choose from multiple wash cycles to suit different fabric types and soil levels. The Kenmore Elite offers options like Normal, Heavy Duty, and Delicate. Steam cleaning enhances stain removal, while the Quick Wash option speeds up cycles for lightly soiled loads. The Bulky Items cycle handles larger items like comforters, ensuring optimal cleaning without damage. Always match the cycle to the load for best results and to protect your clothes.

Using the Steam Cleaning Option

The Kenmore Elite’s steam cleaning feature enhances stain removal and sanitizes fabrics. To activate, select a cycle that supports steam, such as Heavy Duty or Normal, and press the Steam button on the control panel. Steam penetrates deep into fabrics, loosening tough stains and reducing odors. This option is ideal for heavily soiled items, ensuring a deeper clean while protecting fabric integrity. Always follow manual guidelines for best results.

Safety Precautions and Warnings

Always avoid washing items soaked in flammable substances and follow all safety guidelines to prevent accidents. Ensure proper installation and usage as outlined in the manual.

Important Safety Instructions

Always avoid washing items soaked in flammable substances, as they may ignite during the cycle. Ensure proper installation and leveling to prevent accidents. Keep children away from the washer while it’s in operation, and use the child safety lock feature when available. Never overload the machine, as this can cause imbalance and damage. Regularly check for worn-out parts and replace them promptly to maintain safety and efficiency. Consult the manual for specific guidelines.

Items to Avoid Washing

Avoid washing items soaked in gasoline, dry cleaning solvents, or flammable substances, as they may ignite. Do not wash non-absorbent items like pillows or comforters without proper casings. Items with metal parts that could damage the drum should also be avoided. Loose fibers or delicate fabrics may require protective bags to prevent damage. Always check the care label and ensure items are suitable for machine washing to maintain your washer’s performance and safety.

Child Safety Features

The Kenmore Elite top load washing machine includes child safety features such as a secure lid and alarms to alert when cycles are complete. Parents can enable the child lock to prevent accidental starts or setting changes. These features ensure safe operation and protect children from potential hazards, providing peace of mind for families with young kids while maintaining efficient laundry performance.

Troubleshooting Common Issues

Identify and resolve issues like error codes, drainage problems, or imbalances. Refer to the manual for specific solutions, ensuring your washer operates smoothly and efficiently year-round.

Identifying and Resolving Error Codes

Error codes on your Kenmore Elite washer indicate specific issues. For example, “OE” signals a drainage problem, while others may point to imbalance or overload. Always refer to the manual for code meanings and step-by-step solutions. Regularly check drain hoses, balance loads, and maintain the washer to prevent errors and ensure smooth operation. Addressing these issues promptly helps maintain efficiency and prolongs the appliance’s lifespan.

Drainage and Imbalance Problems

Drainage issues, like clogged hoses, can cause water retention. Regularly inspect and clean the drain filter and hose. Imbalance occurs when heavy items or uneven loads disrupt spin cycles. Redistribute clothes evenly and avoid overloading to prevent vibrations. Ensure the washer is level. Addressing these issues promptly prevents damage and ensures smooth, efficient operation. Refer to the manual for detailed troubleshooting steps and maintenance tips.

Addressing Noise and Vibration

Noise and vibration issues often arise from imbalanced loads or improper installation. Ensure the washer is level and installed on a firm surface. Redistribute clothes evenly, avoiding heavy items that cause imbalance. Check for loose drum bearings or worn shock absorbers. Regular maintenance, like cleaning the drain filter, can also reduce operational noise. Refer to the manual for troubleshooting steps to address these issues effectively and maintain smooth operation.

Maintenance and Care Tips

Regularly clean the washer interior, check and replace worn parts, and ensure proper ventilation to maintain efficiency and extend the appliance’s lifespan.

Cleaning the Washer Regularly

Regular cleaning ensures optimal performance and prevents odors. Run a cleaning cycle with hot water, add vinegar or baking soda, and leave the lid open to dry. Wipe the gasket and check filters monthly to maintain hygiene and efficiency. Proper maintenance prevents mold buildup and keeps your washer functioning effectively for years.

Checking and Replacing Parts

Regularly inspect hoses, belts, and seals for wear. Replace damaged or cracked hoses every 5 years. Check the drain pump filter monthly and clean it to ensure proper drainage. If parts show signs of wear, refer to your manual for replacement guidelines. Use genuine Kenmore parts for reliability. If unsure, consult a professional to avoid further damage or inefficient operation.

Energy Efficiency Practices

Optimize energy use by selecting cycles with lower water and temperature settings. Use HE detergent for high-efficiency cycles to reduce water consumption. Regularly clean the washer to maintain performance. Check for and replace worn seals to prevent leaks. Run full loads to minimize energy per wash. Use the steam cleaning option sparingly, as it consumes more power. Refer to your manual for eco-friendly settings.

Warranty and Support Information

Your Kenmore Elite washer is backed by a comprehensive warranty. Register your appliance for extended coverage and access dedicated customer support for assistance and repairs.

Understanding Your Warranty Coverage

Your Kenmore Elite washer is protected by a limited warranty covering parts and labor for defects in materials and workmanship. The standard warranty period varies, typically ranging from one to five years, depending on the model and components. Register your appliance to activate extended coverage and gain access to exclusive support services. Refer to your manual or Kenmore’s official website for detailed terms and conditions.

Contacting Kenmore Customer Support

For assistance with your Kenmore Elite washer, visit Kenmore’s official website to access live chat, email support, and a comprehensive FAQ section. You can also call their customer service hotline, available Monday through Friday, 8 AM to 8 PM EST. Ensure you have your model number ready for efficient troubleshooting and repair scheduling.

Accessing Online Resources and Manuals

Visit Kenmore’s official website to access digital versions of your washing machine’s manual, troubleshooting guides, and user FAQs. Use the search bar to enter your model number for specific resources. Additional online tools include repair guides, warranty information, and video tutorials to help you optimize your appliance’s performance and address common issues efficiently.