canon ae 1 program camera manual

The Canon AE-1 Program camera manual provides comprehensive guidance for mastering this iconic film SLR. Learn about its features, shooting modes, and exposure controls to enhance your photography skills.

Overview of the Canon AE-1 Program Camera

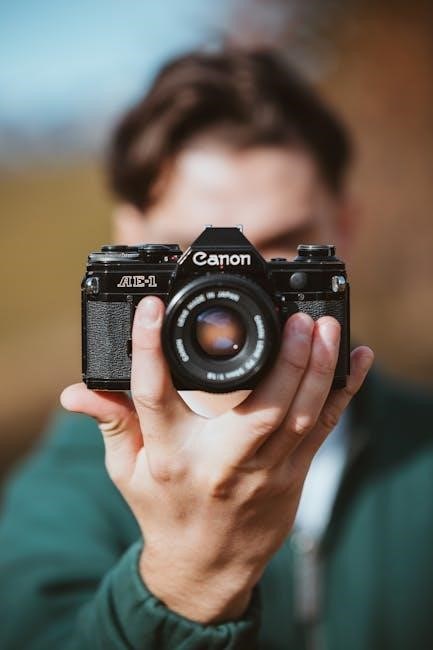
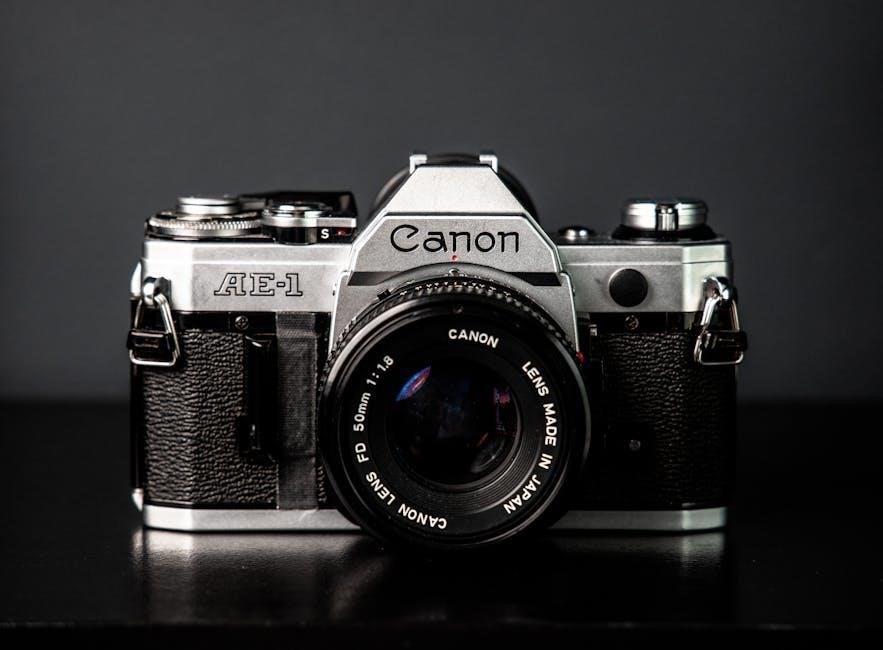
The Canon AE-1 Program is an iconic electronic/mechanical SLR film camera, offering a blend of automation and manual control. Introduced in 1981, it features a shutter speed range of 2 to 1/1000 seconds, aperture priority, and a built-in light meter. Its program mode simplifies shooting, while manual override provides creative flexibility. Compatible with Canon FD lenses, it supports flash synchronization at 1/60 sec. This camera remains popular among photographers and collectors for its durability and versatility.

Why the Canon AE-1 Program Manual is Essential for Users

The Canon AE-1 Program manual is vital for users to unlock the camera’s full potential. It details automatic exposure modes, manual overrides, and ISO settings, ensuring optimal film use. The guide also covers lens compatibility, flash synchronization, and maintenance tips. Whether you’re a novice or an advanced photographer, the manual provides step-by-step instructions to master the camera’s features and troubleshoot common issues, enhancing your overall photography experience significantly.

Key Features of the Canon AE-1 Program Camera

The Canon AE-1 Program offers automatic exposure, manual override, and interchangeable FD lenses. It features shutter speeds from 2 to 1/1000 seconds and ISO settings up to 3200.

Design and Build Quality

The Canon AE-1 Program features a durable, ergonomic design with a lightweight yet robust construction. Its intuitive layout includes a user-friendly interface with clearly marked controls, ensuring easy access to settings. The camera’s body is made from high-quality materials, providing a solid feel and long-lasting performance. The design emphasizes functionality, with a focus on accessibility for photographers of all skill levels, making it both practical and reliable.

Automatic Exposure and Manual Override

The Canon AE-1 Program offers advanced automatic exposure (AE) capabilities, enabling precise control over lighting conditions. Users can seamlessly switch between programmed AE, shutter-speed priority AE, and manual modes. The camera features an AE lock pin for capturing consistent exposures in challenging lighting. With a manual override option, photographers can adjust settings to suit their creative vision, ensuring flexibility and versatility in various shooting scenarios.

Shutter Speed and Aperture Control

The Canon AE-1 Program offers precise control over shutter speed and aperture, with a focal plane shutter ranging from 2 seconds to 1/1000th of a second, plus Bulb mode. The aperture can be set manually or automatically, with a click-stopped aperture ring for accurate adjustments. This system allows photographers to balance creative vision with technical precision, ensuring optimal exposures in various lighting conditions.

Operating Modes of the Canon AE-1 Program

The Canon AE-1 Program features three main operating modes: Programmed AE, Shutter-Speed Priority AE, and Manual Mode, offering flexibility and control for diverse shooting scenarios and creative needs.

Programmed AE Mode

Programmed AE Mode offers automatic exposure control, allowing the camera to select both shutter speed and aperture for optimal results. This mode is ideal for beginners or quick shooting situations, as it simplifies the process while maintaining high image quality. The camera uses its built-in light meter to balance settings, ensuring proper exposure. With ISO sensitivity ranging from 25 to 3200, Programmed AE Mode provides flexibility and ease of use, making it a versatile option for various lighting conditions and subjects.

Shutter-Speed Priority AE Mode

Shutter-Speed Priority AE Mode allows photographers to manually set the desired shutter speed, while the camera automatically adjusts the aperture for proper exposure. This mode is perfect for capturing motion effects, such as freezing fast-moving subjects or creating motion blur. With a range of 2 to 1/1000 seconds, users can creatively control the look and feel of their images, making it ideal for sports, action, and artistic photography.

Manual Mode and Flash Usage

Manual Mode offers full control over both aperture and shutter speed, enabling precise adjustments for creative photography. The Canon AE-1 Program supports flash synchronization at 1/60 sec, allowing seamless integration with external flash units for enhanced lighting. This mode is ideal for photographers seeking ultimate control over their images, combining manual exposure settings with optional flash for versatile and professional results in various lighting conditions.

Exposure Control and Metering

The Canon AE-1 Program features a built-in light meter for precise exposure control. It offers center-weighted metering, ensuring balanced lighting in various conditions, guided by the manual.

Understanding Aperture and Shutter Speed Settings

Aperture regulates light entry, with lower f-stops for more light. Shutter speed controls exposure duration, from 2 seconds to 1/1000th of a second. The AE-1 Program combines these for optimal results, allowing manual override for creative control. Understanding these settings is crucial for mastering the camera’s functionality, as detailed in the manual.

Using the Built-In Light Meter

The Canon AE-1 Program features a built-in light meter for accurate exposure readings. Press the AE lock button to activate it. The meter measures ambient light and provides settings for aperture and shutter speed. Ensure the battery is fresh for accurate readings. Adjustments can be made manually or automatically, depending on the mode. The meter is highly sensitive, enabling precise control in various lighting conditions.

ISO Settings and Film Compatibility

The Canon AE-1 Program supports ISO settings from 25 to 3200, allowing compatibility with a wide range of films. Adjust the ISO dial to match your film speed for accurate exposures. The camera automatically adjusts aperture and shutter speed based on the ISO setting. Ensure proper film alignment and loading for optimal results. Always refer to the manual for specific film compatibility and exposure recommendations.

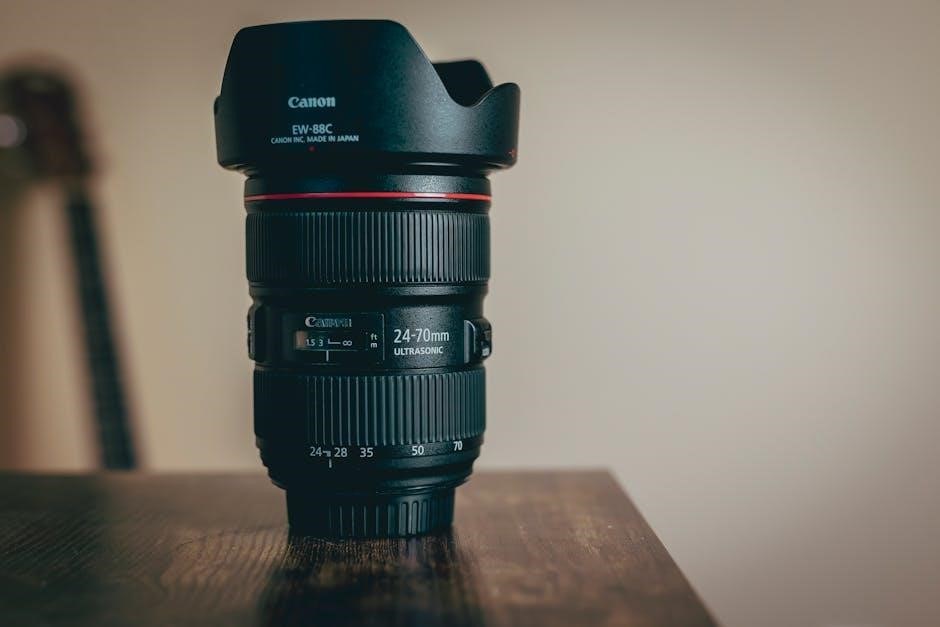
Canon AE-1 Program Lens Compatibility

The Canon AE-1 Program is compatible with Canon FD lenses, offering a wide range of focal lengths and aperture options. Third-party lenses can also be used with adapters.

Canon FD Lens Series

The Canon FD lens series is specifically designed for the AE-1 Program, offering exceptional compatibility and optical quality. These lenses feature a wide range of focal lengths and aperture options, from wide-angle to telephoto, ensuring versatility for various photography needs. The FD series includes popular models like the 50mm f/1.8, 28mm f/2.8, and 70-200mm f/4, providing photographers with a diverse toolkit for capturing stunning images. Their robust build and precise focusing mechanisms make them a favorite among enthusiasts.

Third-Party Lens Options

Beyond Canon’s FD series, third-party lenses offer affordable alternatives for the AE-1 Program. Brands like Vivitar, Tamron, and Tokina provide a variety of focal lengths and apertures, catering to different shooting styles. These lenses often match the quality of FD optics but at lower prices. Users can explore wide-angle, macro, and telephoto options, expanding their creative possibilities without compromising compatibility. Third-party options are popular among enthusiasts seeking versatility and value for their film photography endeavors.

Viewfinder and Focusing Aids

The Canon AE-1 Program features a bright, 97% coverage viewfinder with a built-in microprism and split-image focusing aids for precise manual focusing. Interchangeable screens are available for specialized needs.

Features of the Viewfinder

The Canon AE-1 Program’s viewfinder offers a bright, 97% coverage area with a built-in microprism ring and split-image focusing aid for precise manual focus. The viewfinder also supports interchangeable focusing screens, allowing users to customize based on their shooting needs. This feature-rich design enhances composition and focusing accuracy, making it ideal for both casual and professional photographers.

Using Focusing Screens and Microprism

The Canon AE-1 Program’s viewfinder includes a microprism ring and split-image focusing aid for precise manual focus. To use these tools, align the image in the split-prism or ensure clarity through the microprism. Interchangeable focusing screens, such as the New Split-Image Microprism, can be installed to suit different shooting styles. This adaptability enhances focusing accuracy, making it ideal for photographers who prefer manual control over their shots.

Maintenance and Troubleshooting

Regular cleaning of the Canon AE-1 Program’s lens and camera body prevents dust buildup. Ensure proper battery installation and check for common issues like film jamming or shutter malfunction promptly.

Cleaning the Camera and Lens

Use a soft, dry cloth to wipe the Canon AE-1 Program’s exterior and lens, avoiding harsh chemicals. For stubborn marks, lightly dampen the cloth with distilled water. Gently brush the lens with a microfiber brush to remove dust. Avoid touching the lens surface to prevent smudges. Regular cleaning ensures optimal image quality and maintains the camera’s longevity. Always handle the equipment with care to prevent scratches or damage.

Common Issues and Solutions

Common issues with the Canon AE-1 Program include battery drain and shutter malfunctions. Replace batteries if the camera stops functioning. For stuck shutters, clean the mechanism with compressed air. If the light meter is inaccurate, check the battery connections. Ensure the film is loaded correctly to avoid exposure problems. Regular maintenance and proper handling can prevent these issues, ensuring reliable performance. Consult the manual for detailed troubleshooting steps if problems persist.

Accessories for the Canon AE-1 Program

The Canon AE-1 Program supports various accessories, including Canon FD lenses, neck straps, and third-party grips. The manual and original lens caps are essential for optimal use.

Canon-Approved Accessories

Canon offers a range of official accessories for the AE-1 Program, including high-quality FD lenses, durable neck straps, and protective lens caps. These accessories are designed to enhance functionality and ensure compatibility. The Canon FD lens series provides exceptional optical quality, while the original neck strap offers comfort during extended use. Additionally, Canon-approved lens caps protect your gear from scratches and dust, maintaining the camera’s pristine condition. Using genuine Canon accessories ensures optimal performance and longevity for your AE-1 Program.

Third-Party Accessories

Third-party accessories for the Canon AE-1 Program offer flexibility and affordability. Popular options include lenses from brands like Tamron and Vivitar, which are compatible with the FD mount. Additionally, aftermarket straps, camera bags, and filters provide practical solutions for photographers. These accessories, while not official, often match the quality and functionality of Canon-approved products, making them a viable choice for enthusiasts seeking to enhance their camera setup without breaking the bank.

The Legacy of the Canon AE-1 Program

The Canon AE-1 Program significantly influenced film photography’s evolution, remaining a beloved choice among collectors and enthusiasts for its timeless design and enduring functionality as a classic SLR.

Impact on Film Photography

The Canon AE-1 Program revolutionized film photography by offering advanced automatic features while maintaining manual control, making it accessible to both professionals and hobbyists. Its user-friendly design and reliability helped popularize SLR cameras, influencing a generation of photographers. The integration of Programmed AE mode simplified shooting, while its compatibility with Canon FD lenses expanded creative possibilities, cementing its role in the evolution of film photography and earning it a lasting place in photographic history.

Why It Remains Popular Among Collectors

The Canon AE-1 Program remains a cherished collector’s item due to its timeless design, durability, and historical significance. Its intuitive interface and compatibility with Canon FD lenses make it a favorite among enthusiasts. Many photographers have a nostalgic connection to the camera, having learned photography with it. Additionally, its availability in various editions and strong community support further enhance its collectibility and appeal to film photography enthusiasts worldwide.

Downloading the Canon AE-1 Program Manual

The Canon AE-1 Program manual is available for free download from official Canon websites and third-party resources like ManualsLib. It’s provided in PDF format, ensuring easy accessibility for users.

Official Sources for the Manual

The official Canon AE-1 Program manual can be downloaded directly from Canon’s website or through their authorized service centers; Visit Canon U.S.A. or regional websites for verified PDF versions. Additionally, Canon’s customer support provides access to digital copies, ensuring authenticity and reliability. These sources guarantee the manual is complete and free from errors, making it the most trustworthy option for users seeking accurate information.

Third-Party Websites and Resources

Besides official sources, third-party websites offer the Canon AE-1 Program manual for free. Platforms like ManualsLib and ManualsOnline provide downloadable PDF versions. Additionally, forums and photography communities often share scanned copies. While these sources are convenient, ensure the files are from reputable sites to avoid malware or incomplete documents. Always verify the source’s reliability before downloading to maintain safety and quality.

The Canon AE-1 Program manual provides a detailed guide to its features and operation. Mastering its modes and settings helps photographers achieve creative control and exceptional film results.

Final Tips for Mastering the Canon AE-1 Program

Experiment with different shooting modes to understand their effects. Regularly clean the camera and lens for optimal performance. Familiarize yourself with the manual to unlock advanced features. Practice film loading and unloading to avoid errors. Explore third-party accessories and lenses for enhanced creativity. Keep the manual handy for quick reference. Join photography communities to share tips and learn from others. Happy shooting!

emerson tv owners manual

This guide provides comprehensive information to help you understand and utilize your Emerson TV effectively. It covers installation, operation, troubleshooting, and maintenance, ensuring optimal performance and user satisfaction.

How to Find the Correct Emerson TV Manual

To find the correct Emerson TV manual, visit the manufacturer’s official website or databases like ManualsLib. Enter your TV model, such as LC320EM1 or LC260EM2, to locate and download the specific guide.

2.1. Popular Emerson TV Models and Their Manuals

Emerson offers a variety of TV models, each with unique features and specifications. Some of the most popular models include the Emerson LC320EM1, a 32-inch LCD TV known for its crisp display, and the Emerson LC260EM2, a 26-inch model ideal for smaller spaces. The Emerson LE220EM3 is another favorite, offering a 22-inch screen with HD capabilities. These models, along with others like the Emerson LF501EM6F, are well-documented with manuals available on platforms like ManualsLib and the official Emerson website. Each manual provides detailed instructions for installation, operation, and troubleshooting, ensuring users can maximize their viewing experience. Whether you’re setting up a home theater or simply want to understand your TV’s features, these resources are essential for optimal performance.

Understanding Emerson TV Product Specifications

Emerson TVs feature various screen sizes, resolutions, and technologies. Models like the LC320EM1 and LE220EM3 offer HD displays, while others include smart TV capabilities. Refer to your manual for detailed specs.

3.1. Key Features and Technologies in Emerson TVs

Emerson TVs are equipped with cutting-edge technologies to enhance your viewing experience. Many models feature HD and Full HD displays, offering crisp and vibrant visuals. Smart TV capabilities allow seamless integration with streaming platforms like Netflix and Hulu. Built-in Wi-Fi enables easy connectivity to the internet, while digital tuners ensure access to over-the-air channels. Some models also include LED backlighting for improved brightness and energy efficiency. Additionally, Emerson TVs often come with multiple HDMI ports, USB connectivity, and compatibility with various audio systems for a immersive home theater setup. These features cater to modern entertainment needs, providing users with a versatile and high-quality viewing experience. By incorporating advanced technologies, Emerson TVs aim to deliver both performance and value, making them a great choice for home entertainment.

Installation and Setup Guide

Setting up your Emerson TV is a straightforward process that requires careful attention to detail. Begin by unpacking the TV and ensuring all components, such as the remote control, power cord, and HDMI cables, are included. Place the TV on a stable surface or mount it on a wall using a compatible bracket. Connect the power cord to a nearby outlet and turn on the TV. Use the remote control to navigate through the initial setup wizard, selecting your language, country, and preferred settings. Next, connect any external devices, such as cable boxes or gaming consoles, using HDMI ports. Tune in to available channels by scanning for over-the-air broadcasts or connecting to your cable provider. Finally, ensure your TV is connected to Wi-Fi to access smart features and updates. Refer to the manual for specific instructions tailored to your model.

Operating Your Emerson TV

Turn on your Emerson TV using the remote or power button. Navigate through menus, adjust settings, and connect devices like cable boxes or gaming consoles for enhanced viewing experiences.

5.1. Navigating the Settings Menu

Access the settings menu by pressing the “Menu” button on your remote or the TV itself. Use the navigation buttons to scroll through options like Picture, Sound, and Network. Adjust settings to customize your viewing experience, such as brightness, contrast, and audio modes. Explore advanced features like parental controls, HDMI settings, or software updates. Save your preferences to ensure optimal performance. Refer to the manual for detailed guidance on specific functions and troubleshooting common issues. This section helps you unlock your TV’s full potential and enjoy a seamless entertainment experience.

Troubleshooting Common Issues

Identify common problems like no picture, sound issues, or connectivity errors. Restart the TV, check cable connections, and ensure proper settings. Refer to the manual for step-by-step solutions to resolve issues quickly and effectively.

6.1. Resetting Your Emerson TV to Factory Settings

Resetting your Emerson TV to factory settings can resolve persistent software issues. To perform a factory reset, navigate to the TV’s settings menu, select the “System” or “About” option, and choose “Reset” or “Factory Reset.” Enter the parental control PIN if prompted. The TV will reboot, restoring default settings. Note that this process erases all saved preferences, so ensure you have your Wi-Fi password and any app login details handy before proceeding. If the on-screen menu is inaccessible, press and hold the “Menu” and “Volume Down” buttons simultaneously for 10-15 seconds to initiate a hard reset. After resetting, update the TV’s software to the latest version for optimal performance. Always refer to the manual for specific reset instructions tailored to your Emerson TV model.

Software Updates and Maintenance

Regular software updates are essential to ensure your Emerson TV operates at peak performance. To check for updates, go to the TV’s settings menu, navigate to the “System” or “About” section, and select “Software Update.” If an update is available, follow the on-screen instructions to download and install it. Always use the official Emerson website or the TV’s built-in update feature to avoid unauthorized software. After updating, restart your TV to apply the changes. For additional guidance, visit the Emerson support website at http://emersonaudiovideo.com/support/download and enter your TV’s model number. Keeping your TV’s software up-to-date ensures compatibility with the latest features, improves functionality, and resolves potential bugs. If you encounter issues during the update process, contact Emerson technical support for assistance. Regular maintenance also includes clearing cache and ensuring stable internet connectivity for a seamless viewing experience.

Safety Precautions and Best Practices

To ensure safe and optimal use of your Emerson TV, follow these guidelines. Place the TV on a stable, flat surface to prevent tipping. Keep it away from water, moisture, or extreme temperatures. Avoid exposing the screen to direct sunlight or heat sources, as this may cause damage. Use a surge protector to safeguard against power surges. Never touch electrical components with wet hands or while standing on a wet surface. For cleaning, use a soft, dry cloth and avoid harsh chemicals or abrasive materials. Always unplug the TV before cleaning or performing maintenance. Ensure proper ventilation to prevent overheating. Follow all instructions provided in the manual and avoid modifying the TV or its components. By adhering to these safety precautions and best practices, you can enjoy your Emerson TV while minimizing risks of damage or harm.

Warranty Information and Support Options

Your Emerson TV is backed by a limited warranty that covers manufacturing defects for a specified period. To determine the warranty terms for your model, visit the Emerson website or contact customer support. Register your TV to ensure warranty validation and receive updates on any maintenance programs. The warranty typically covers repairs or replacements for defective parts or labor within the warranty period. For issues outside the warranty, Emerson offers paid support options. Visit the official Emerson support website to find detailed warranty information, download user manuals, or contact their customer service team. You can also reach out to their toll-free number for assistance. Emerson’s support options ensure you receive timely help for any queries or issues with your TV.

Accessing Technical Support and Resources

For any technical assistance or resources, visit the official Emerson website, where you can find a dedicated support section. Use the search function to locate your TV model and access related manuals, FAQs, and troubleshooting guides. Emerson also provides a toll-free customer support hotline for direct assistance. Additionally, their website offers downloadable software updates, ensuring your TV stays up-to-date with the latest features. For more convenience, you can register your product online to receive personalized support and notifications. Emerson’s support team is available to address any questions or concerns, ensuring a seamless experience with your TV. Utilize these resources to maximize your TV’s performance and resolve any issues promptly.

dyson dc39 instruction manual

The Dyson DC39 is a versatile vacuum cleaner designed for efficient cleaning on carpets and hard floors. It features Radial Root Cyclone technology for superior dust capture.

1.1 Overview of the Dyson DC39

The Dyson DC39 is a pull-behind vacuum designed for efficient cleaning across carpets and hard floors. It features an ergonomic design that reduces wrist and arm fatigue during use. With its compact build and lightweight construction, it offers easy maneuverability for thorough cleaning. The vacuum is equipped with Dyson’s Radial Root Cyclone technology, which captures microscopic dust particles and allergens, ensuring cleaner air and surfaces. Its versatility makes it suitable for various cleaning tasks, from daily maintenance to deep cleaning. The Dyson DC39 is a practical choice for households seeking a reliable and user-friendly cleaning solution.

1.2 Key Features and Benefits

The Dyson DC39 boasts several key features that enhance its performance and user experience. Its Radial Root Cyclone technology ensures powerful suction, capturing dust, dirt, and allergens effectively. The ergonomic design reduces wrist and arm strain, making it comfortable for extended use. The vacuum is lightweight and easy to maneuver, allowing seamless transitions between carpets and hard floors. Additionally, the Dyson DC39 comes with a 2-year warranty, offering peace of mind and protection for parts and labor. These features make it a reliable and efficient cleaning solution for various household needs.

Important Safety Instructions

Always read and follow safety precautions in the manual. Avoid using near water or leaving unattended. Keep out of children’s reach and ensure proper cable handling.

2.1 General Safety Warnings

Read all instructions and warnings in this manual carefully before using the Dyson DC39. Avoid using the appliance near water or in damp environments. Never leave the vacuum unattended while in operation. Keep children away and ensure the cable is handled properly to prevent tripping. Do not use the vacuum if it is damaged or malfunctioning. Always turn it off and unplug it before performing maintenance. Wear loose clothing that could get caught in moving parts. Follow these guidelines to ensure safe and effective use of your Dyson DC39 vacuum cleaner.

2.2 Specific Precautions for Operation

Always ensure the vacuum is used on suitable surfaces and avoid blockages in the nozzle or hose. Regularly empty the dustbin to maintain performance. Use the correct attachments for different surfaces to prevent damage. Avoid vacuuming water or wet debris, as this can damage the motor. Do not vacuum hot ashes, sparks, or flammable materials. Keep the vacuum upright while in use to prevent instability. Avoid overfilling the dustbin, as this can reduce suction power. Follow these precautions to ensure safe and optimal operation of your Dyson DC39 vacuum cleaner.

Product Specifications

The Dyson DC39 features Radial Root Cyclone technology, capturing microscopic dust and allergens. It is a lightweight, ergonomic cylinder vacuum designed for efficient home cleaning.

3.1 Technical Details and Dimensions

The Dyson DC39 measures approximately 43.3 x 19.7 x 31.8 inches and weighs 15.6 pounds. It operates with a powerful digital motor, providing consistent suction power. The vacuum includes a 21.7-foot cord length for extended cleaning reach. Its bin capacity is 0.42 gallons, and it uses a washable pre-filter. The ergonomic design reduces wrist and arm fatigue, making it comfortable for long cleaning sessions. These specifications ensure efficient performance across various floor types and cleaning tasks;

3.2 Radial Root Cyclone Technology

The Dyson DC39 features Radial Root Cyclone technology, designed to capture microscopic dust and allergens effectively. This innovative system uses cyclonic airflow to separate particles from the air, ensuring efficient dust collection without loss of suction. Unlike traditional vacuums, it doesn’t rely on bags, reducing maintenance and costs. The technology also minimizes clogging, allowing for consistent cleaning performance. By trapping allergens and dust, it improves indoor air quality, making it ideal for households with pets or allergies. This advanced engineering enhances overall cleaning efficiency and user satisfaction.

Assembly and Setup

Start by unpacking all components, including the vacuum, wand, and accessories. Connect the wand to the machine and ensure all parts click securely into place. Use the provided tools to attach additional accessories as needed for complete setup.

4.1 Unpacking and Initial Setup

Begin by carefully unpacking the Dyson DC39 and its accessories from the box. Ensure all components, including the vacuum, wand, and tools, are included and free from damage. Place the machine on a flat, stable surface. Remove any protective packaging materials, especially from the wand and accessories. Locate the quick-start guide or manual for reference. Familiarize yourself with the parts and their connections. Before first use, ensure all components are securely attached and the vacuum is properly assembled according to the provided instructions.

4.2 Attaching Tools and Accessories

To attach tools and accessories to the Dyson DC39, start by identifying the correct attachment points on the wand and vacuum. Align the tool with the connection port and gently push until it clicks securely into place. For example, the combination tool can be attached directly to the wand for upholstery or crevice cleaning. Ensure all connections are firm to maintain proper suction power. If a tool does not fit easily, refer to the manual for guidance. Always check that accessories are properly secured before use to avoid any issues during operation.

Operating the Dyson DC39

The Dyson DC39 is designed for easy operation, featuring an ergonomic pull-behind design to reduce fatigue. It excels on both carpets and hard floors with adjustable suction control.

5.1 Using the Vacuum on Carpets and Hard Floors

The Dyson DC39 is designed to efficiently clean both carpets and hard floors. For carpets, use the motorized brush bar to agitate and capture embedded dirt. On hard floors, adjust the suction power to avoid pushing debris. The ergonomic pull-behind design reduces wrist and arm fatigue, making it comfortable for extended use. Ensure the vacuum head is properly aligned with the surface for optimal cleaning results. Regularly emptying the bin and maintaining the brush bar will enhance performance on all floor types.

5.2 Adjusting Suction Power and Emptying the Bin

The Dyson DC39 allows you to adjust suction power according to the cleaning task. Use the suction control slider to increase or decrease power for different surfaces. For delicate floors, reduce suction to prevent damage, while higher settings are ideal for deep carpet cleaning. To empty the bin, press the release button, pull it out, and dispose of the contents. Regularly emptying ensures optimal performance. Wash the bin with cold water and allow it to dry completely before reattaching to maintain hygiene and efficiency.

Maintenance and Care

Regularly clean the filter and check for blockages to ensure optimal performance. Empty the bin after each use and wash it with cold water for hygiene.

6.1 Cleaning and Replacing the Filter

Regular filter maintenance is essential for optimal performance. Turn off and unplug the vacuum before cleaning. Remove the filter and wash it with cold water only. Allow it to air-dry completely to prevent mold. Reassemble the filter and ensure it is securely fitted. If the filter is damaged or worn, replace it with a genuine Dyson part. Check for blockages in the filter housing and clean as needed. Replace the filter every 1-2 years, depending on usage, to maintain suction power and efficiency.

6.2 Checking for Blockages and Optimizing Performance

Regularly inspect the wand, hose, and vacuum inlet for blockages. Turn off and unplug the machine before checking. Remove any obstructions gently with a soft brush or cloth. Ensure the dust bin is emptied frequently to maintain suction power. Check the filter for dust buildup and clean or replace it as needed. For optimal performance, avoid vacuuming large debris or wet surfaces. If the machine overheats, allow it to cool before use. Refer to the troubleshooting guide for persistent issues and ensure all parts are securely fitted after maintenance.

Troubleshooting Common Issues

Identify common issues like reduced suction or motor noise. Refer to the troubleshooting guide for solutions, ensuring proper maintenance and addressing specific operational problems effectively.

7.1 Resolving Suction Problems

If your Dyson DC39 experiences reduced suction, check for blockages in the hose, wand, or cyclone. Ensure the filter is clean or replaced as needed. Also, verify that the dustbin is empty and properly aligned. If issues persist, refer to the troubleshooting section in the manual for detailed guidance on restoring optimal performance. Regular maintenance can help prevent suction problems and keep your vacuum functioning efficiently. Always follow the manufacturer’s instructions for resolving such issues.

7.2 Addressing Motor and Operational Issues

If the motor stops or operates inconsistently, first check the power supply and ensure the vacuum is properly assembled. Look for blockages in the airflow paths, as these can strain the motor. If unusual noises occur, inspect for foreign objects or misaligned parts. For persistent issues, consult the manual or contact Dyson support. Regular maintenance, such as cleaning filters and ensuring proper belt tension, can prevent motor-related problems. Always follow the manufacturer’s guidelines for troubleshooting to avoid further damage and ensure optimal performance.

Warranty and Customer Support

Your Dyson DC39 is covered by a 2-year guarantee for parts and labor. For assistance, contact Dyson Customer Care for support and inquiries.

8.1 Understanding the Dyson Guarantee

The Dyson DC39 is backed by a 2-year guarantee covering parts and labor from the purchase date. This warranty ensures repair or replacement of defective components. For details, refer to the Dyson operating manual, page 8. The guarantee applies to household use only. Keep your proof of purchase for warranty claims. Dyson’s commitment to quality and customer satisfaction is reflected in this comprehensive coverage, providing peace of mind for users.

8.2 Contacting Dyson Customer Care

For any inquiries or assistance with your Dyson DC39, contact Dyson Customer Care. Support is available to address questions, troubleshooting, and maintenance. Visit the official Dyson website or refer to the manual for contact details. Phone support is accessible during business hours, and online resources offer extensive guidance. The dedicated team ensures prompt resolution of issues, helping you maintain optimal performance of your appliance. Whether you need repairs, parts, or advice, Dyson’s customer care is designed to provide reliable and efficient support for your cleaning needs.

manual for living by epictetus

The Enchiridion, or “Manual for Living,” is a concise guide to Stoic philosophy compiled by Arrian from Epictetus’ teachings. It offers practical wisdom for living virtuously, emphasizing personal responsibility and focusing on what lies within one’s control.

Background and Historical Context of the Enchiridion

The Enchiridion, or “Manual for Living,” is a concise compilation of Stoic teachings by Epictetus, a former slave who became a prominent philosopher in the Roman Empire. Compiled by Arrian, one of Epictetus’ disciples, in the early 2nd century AD, it captures the essence of Epictetus’ oral lectures, known as the Discourses. The text reflects the Stoic philosophy of self-control, virtue, and indifference to external events. Epictetus’ unique perspective, shaped by his experiences as a slave and later as a free man, emphasizes personal responsibility and the power of the mind. The Enchiridion serves as a practical guide for ethical living, offering timeless wisdom on navigating life’s challenges with resilience and integrity.

The Significance of Epictetus’ Teachings in Modern Times

Epictetus’ teachings in the Enchiridion remain profoundly relevant in modern times, offering timeless wisdom on resilience, self-discipline, and psychological well-being. His emphasis on focusing on what lies within one’s control resonates deeply in today’s fast-paced, uncertain world. The philosophy encourages individuals to cultivate inner strength, embrace challenges as opportunities for growth, and prioritize virtue over external validation; These principles are particularly valuable for fostering emotional resilience, improving decision-making, and promoting personal freedom. By aligning with Stoic ideals, modern readers can navigate life’s complexities with clarity and purpose, making the Enchiridion a vital resource for personal development and ethical living in the 21st century.

Key Principles of the Manual for Living

The Enchiridion outlines Epictetus’ core teachings, emphasizing the distinction between what is within and beyond our control, the importance of self-discipline, and living in harmony with nature and virtue.

The Dichotomy of Control: What is Within and Beyond Our Power

Epictetus’ teachings center on the dichotomy of control, a fundamental principle distinguishing between what lies within our power and what does not. According to him, things within our control include our opinions, desires, aversions, and actions, while external events, such as bodily health, possessions, and reputation, are beyond our control. This distinction is crucial for achieving inner peace and freedom. By focusing only on what we can influence, we avoid unnecessary suffering and cultivate resilience. The Enchiridion emphasizes that true freedom lies in mastering our responses to life’s challenges, rather than trying to control external circumstances. This philosophy encourages self-awareness and alignment with nature, fostering a life of virtue and contentment.

The Importance of Focus on What is Within Our Control

Epictetus stresses that concentrating on what lies within our control is essential for a tranquil and purposeful life. By prioritizing our thoughts, judgments, and actions, we avoid the frustration of attempting to manipulate external events. This focus fosters self-discipline, enabling us to navigate life’s uncertainties with clarity and resilience. The Enchiridion advises that aligning our efforts with what we can control not only enhances our effectiveness but also reduces anxiety. This mindset encourages personal growth and inner peace, as we learn to accept external circumstances without resistance. By channeling energy into controllable aspects, individuals can achieve a life of harmony and fulfillment, embodying Stoic wisdom.

Practical Applications of Stoic Philosophy

Stoic philosophy offers timeless, practical advice for everyday life, emphasizing emotional resilience, mental clarity, and focusing on what truly matters. Its principles guide individuals toward inner peace and balance, regardless of external circumstances.

How to Cultivate Self-Discipline and Inner Strength

Epictetus teaches that self-discipline and inner strength are cultivated through mindfulness and intentional living. He emphasizes recognizing what lies within your control and focusing on those aspects. By practicing self-awareness, individuals can avoid being swayed by external events or emotions. Daily reflection and goal-setting help build resilience. Embrace challenges as opportunities for growth rather than obstacles. Additionally, Epictetus advises living modestly and aligning actions with core values. These practices foster a strong, disciplined character capable of navigating life’s challenges with clarity and purpose.

  • Practice mindfulness to stay grounded in the present.
  • Set clear goals aligned with your values.
  • Embrace challenges as growth opportunities.
  • Reflect daily to assess progress and intentions.

Through consistent effort, one can develop the inner strength needed to face life’s adversities with equanimity and integrity.

Strategies for Managing Emotions and Desires

Epictetus offers practical strategies for managing emotions and desires by focusing on what lies within your control. He advises individuals to pause before reacting to external events, allowing time for rational reflection. This practice helps prevent being ruled by impulsive emotions. Additionally, he recommends examining desires critically, considering their alignment with your values and the potential consequences of pursuing them. By cultivating gratitude for what you already have, you can reduce discontent and envy. Epictetus also emphasizes the importance of self-awareness, recognizing that true freedom comes from mastering your own mind rather than external circumstances.

  • Pause and reflect before reacting to emotions.
  • Align desires with core values and long-term goals.
  • Practice gratitude to diminish envy and discontent.
  • Cultivate self-awareness to master emotional responses.

These strategies empower individuals to govern their emotions and desires, fostering inner peace and clarity.

Social and Relational Guidance

Epictetus’ teachings emphasize treating others with kindness, humility, and respect. He advises avoiding envy, comparisons, and unnecessary conflicts, fostering harmony in all interactions. Focus on your own actions, not others’, to maintain inner peace and strong relationships.

Epictetus’ Advice on Interacting with Others

Epictetus teaches that interacting with others should be guided by kindness, humility, and self-awareness. He emphasizes avoiding comparisons and envy, as these breed discord. Treat others with respect, regardless of their actions, and focus on your own conduct. Avoid being offended by others’ opinions, as true harm lies within your reactions. Cultivate patience and understanding, recognizing that others’ behavior reflects their own character, not yours. By maintaining inner peace and integrity in social interactions, you embody Stoic principles, fostering harmony and strength in relationships.

Maintaining Inner Peace in Social Situations

Epictetus’ teachings emphasize that inner peace in social situations arises from self-control and detachment from external events. He advises avoiding envy and resentment, as these emotions disturb tranquility. Focus on your own actions and judgments, rather than others’, to prevent being unsettled by their behavior. Recognize that others’ opinions or actions are beyond your control, and resist the urge to react impulsively. Cultivate patience and understanding, remembering that social harmony begins within. By adhering to Stoic principles, you can navigate interactions with composure, preserving your inner peace even in challenging environments.

Understanding the Original Text

The Enchiridion is a foundational Stoic text, compiled by Arrian from Epictetus’ teachings. It provides a concise guide to ethical living, emphasizing self-discipline and distinguishing what is within our control.

The Structure and Content of the Enchiridion

The Enchiridion, or “Manual for Living,” is a concise guide to Stoic philosophy, comprising 54 short chapters. Compiled by Arrian from Epictetus’ Discourses, it distills his teachings into practical advice. The text begins with foundational principles, such as the dichotomy of control, emphasizing what lies within and beyond human power. It then explores ethical conduct, self-discipline, and managing emotions. Later chapters address social interactions and maintaining inner peace. The manual is structured to be accessible, offering timeless wisdom for everyday life. Its brevity and clarity make it a timeless resource for applying Stoic principles to achieve virtue and tranquility. Each section builds on the last, creating a cohesive guide to living in harmony with nature and reason.

Arrian’s Role in Compiling the Teachings of Epictetus

Arrian, a dedicated disciple of Epictetus, played a pivotal role in preserving his mentor’s teachings. Recognizing the value of Epictetus’ philosophy, Arrian compiled the Enchiridion, a summary of key principles from the Discourses. This manual captures the essence of Epictetus’ ethical guidance, focusing on Stoic doctrines like the dichotomy of control and the importance of self-discipline. Arrian’s work ensured that Epictetus’ ideas endured beyond his lifetime, making Stoic philosophy accessible to future generations. His meticulous compilation transformed Epictetus’ oral teachings into a written legacy, cementing the philosopher’s influence on Western thought and ensuring the Enchiridion remains a foundational text of Stoicism to this day.

The Legacy and Impact of the Manual

The Enchiridion has left a lasting impact as a cornerstone of Stoic philosophy, guiding countless seekers of wisdom through its timeless principles and practical advice.

How the Enchiridion Influenced Stoic Thought Through the Ages

The Enchiridion has profoundly shaped Stoic philosophy, serving as a foundational text that distills Epictetus’ teachings into essential principles. Its concise yet powerful framework has made it accessible to scholars and laymen alike for centuries. The manual’s emphasis on self-control, virtue, and distinguishing between what is within and beyond one’s power resonated deeply, influencing later Stoic thinkers and philosophers. Its practical advice on ethics and daily conduct has endured, remaining a cornerstone of Stoic thought and continuing to inspire contemporary interpretations and applications of the philosophy. The Enchiridion’s enduring relevance underscores its significance as a timeless guide to living in harmony with nature and reason.

Modern Relevance and Applications of Epictetus’ Teachings

Epictetus’ teachings in the Enchiridion remain remarkably relevant today, offering timeless wisdom for navigating modern challenges. His emphasis on self-discipline, resilience, and focusing on what is within one’s control resonates deeply in an age marked by uncertainty and stress. The principles of Stoicism, as outlined by Epictetus, are increasingly applied in personal growth, mental health, and professional development. Many modern mindfulness and self-help practices draw inspiration from his ideas, such as managing emotions, setting priorities, and cultivating inner peace. The Enchiridion continues to serve as a practical guide for living a purposeful and fulfilling life, bridging ancient philosophy with contemporary needs and aspirations. Its universal appeal ensures its continued influence in the modern world.

The Enchiridion remains a timeless guide, offering practical wisdom for living a virtuous life. Its enduring relevance underscores the universal appeal of Epictetus’ teachings, continuing to inspire self-reflection and personal growth across centuries.

Summarizing the Core Teachings of Epictetus

Epictetus’ teachings, as outlined in the Enchiridion, emphasize the power of individuals to control their thoughts, emotions, and actions. He advocates for focusing solely on what lies within one’s control, such as personal judgments and reactions, while accepting external events with equanimity. Central to his philosophy is the idea that true freedom stems from self-discipline and aligning one’s desires with virtue. Epictetus encourages individuals to cultivate inner strength, gratitude, and humility, while avoiding excessive attachment to material possessions or social status. His teachings also stress the importance of living in harmony with nature and adhering to ethical principles in all interactions. Ultimately, Epictetus’ wisdom provides a practical guide for achieving a tranquil and meaningful life, regardless of external circumstances.

The Enduring Value of the Manual for Living

The Enchiridion remains a timeless guide for living, offering practical wisdom that transcends centuries. Its teachings on self-control, resilience, and ethical living continue to resonate, providing a foundation for personal growth and emotional well-being. Epictetus’ emphasis on focusing on what lies within one’s control has made his philosophy universally relevant, helping individuals navigate life’s challenges with clarity and purpose. The manual’s concise and accessible nature has ensured its enduring popularity, making it a cornerstone of Stoic thought. Its principles continue to inspire modern audiences, offering a pathway to inner peace, moral integrity, and a life lived in harmony with nature and society.

halcyon dc inverter manual

Welcome to the Halcyon DC Inverter Manual, your comprehensive guide to understanding and utilizing the advanced features of this innovative air conditioning system. This manual provides essential information for proper installation, operation, and maintenance, ensuring optimal performance and energy efficiency. Designed for both homeowners and technicians, it covers key functionalities, safety precautions, and troubleshooting tips to enhance your experience with the Halcyon DC Inverter.

Overview of the Halcyon DC Inverter System

The Halcyon DC Inverter System is a cutting-edge air conditioning solution designed for energy efficiency and optimal performance. It utilizes advanced inverter technology to adjust compressor and fan speeds, ensuring consistent temperature control while minimizing energy consumption. The system features a compact design, multiple operating modes, and a user-friendly interface. Its DC inverter technology allows for precise power modulation, reducing operational noise and enhancing overall reliability. This system is ideal for residential and commercial spaces, offering a balance of comfort, efficiency, and durability.

Importance of the Manual for Users

The Halcyon DC Inverter manual is an essential resource for users to understand system operation, safety, and maintenance. It provides detailed instructions for installation, troubleshooting, and optimal usage, ensuring safe and efficient operation. By following the manual, users can avoid errors, extend the system’s lifespan, and maximize energy efficiency. It also serves as a quick reference for resolving common issues, making it indispensable for both homeowners and technicians to get the most out of their Halcyon DC Inverter system.

Key Features of the Halcyon DC Inverter

The Halcyon DC Inverter boasts advanced inverter technology for precise temperature control, high energy efficiency, and quiet operation. Its smart features optimize performance and reduce energy consumption effectively.

Inverter Technology and Its Benefits

The Halcyon DC Inverter utilizes advanced inverter technology to regulate compressor speed, optimizing performance based on demand. This technology minimizes energy consumption by avoiding constant on-off cycles, ensuring stable temperatures and reduced noise levels. It also enables faster cooling and heating, reaching desired temperatures quickly while maintaining efficiency. The inverter system adapts seamlessly to varying conditions, providing consistent comfort and lowering utility bills. Its intelligent operation enhances reliability and prolongs system lifespan, making it a superior choice for modern air conditioning needs.

Energy Efficiency and Performance

The Halcyon DC Inverter is designed to deliver exceptional energy efficiency and performance. By continuously adjusting compressor speed, it optimizes cooling and heating output, reducing energy waste. This results in lower utility bills and a significant decrease in carbon emissions. The system achieves faster temperature control, maintaining consistent comfort while minimizing power consumption. Its advanced inverter technology ensures smooth operation, reducing noise levels and enhancing overall performance. This makes the Halcyon DC Inverter an eco-friendly and reliable choice for modern air conditioning needs.

Installation Guidelines

Proper installation is crucial for optimal performance and safety. Plan the location carefully, ensuring good ventilation and a level surface. Follow the manual for power supply and connections, adhering to safety standards and manufacturer recommendations.

Indoor Unit Installation Requirements

Proper installation of the Halcyon DC Inverter indoor unit requires careful planning and adherence to the manual. Ensure the unit is installed in a well-ventilated area, away from direct sunlight and moisture. The location should allow easy access for maintenance and service. Ensure the wall is sturdy enough to support the unit’s weight. Drainage must be properly planned to avoid water accumulation. Follow the manual for electrical connections and mounting brackets. Ensure the intake grille is completely closed before operation for optimal performance. Refer to the installation guide for precise measurements and guidelines to avoid issues during operation. Adhere to safety standards to prevent hazards and ensure longevity of the system. If unsure, consult a professional installer for accurate and safe installation. This ensures the unit operates efficiently and meets energy-saving expectations.

Outdoor Unit Installation Considerations

Installing the Halcyon DC Inverter outdoor unit requires careful consideration of its placement. Ensure the unit is installed in a well-ventilated, shaded area to avoid direct sunlight, which can affect performance. Avoid locations with high humidity or exposure to water. The unit should be placed on a level surface, away from obstacles that could restrict airflow. Proper drainage and sufficient clearance from walls or fences are essential for optimal operation. Ensure compliance with local building codes and regulations. Refer to the manual for specific mounting guidelines and electrical connections to prevent damage and ensure safety. Regularly inspect the outdoor unit for debris or blockages to maintain efficiency.

Operating the Halcyon DC Inverter

Welcome to the operational guide for the Halcyon DC Inverter. This section provides insights into smooth functionality, including basic controls, remote operations, and essential features for seamless performance. Learn how to utilize automatic modes, adjust settings, and optimize energy use with the advanced inverter technology. Refer to the manual for detailed instructions on timer functions and smart energy-saving operations to enhance your experience.

Basic Controls and Functions

The Halcyon DC Inverter features intuitive controls designed for ease of use. The remote controller allows you to adjust temperature, fan speed, and operating modes effortlessly. The MANUAL AUTO button serves as a backup when the remote is unavailable. Ensure the intake grille is fully closed before operation for optimal performance. Basic functions include cooling, heating, and fan modes, while advanced settings like energy-saving modes and timer operations enhance efficiency. Refer to the manual for detailed instructions on activating these features and troubleshooting common issues.

Using the Remote Controller Effectively

The remote controller for the Halcyon DC Inverter offers seamless control over temperature, fan speed, and operating modes. Use the MANUAL AUTO button as a backup when the remote is unavailable. To ensure smooth operation, keep the remote’s signal unobstructed and check battery levels regularly. Access advanced features like timer scheduling and energy-saving modes by navigating through the menu options. Proper use of the remote enhances efficiency and comfort, allowing you to tailor the system’s performance to your preferences effortlessly.

Safety Precautions and Maintenance

Ensure proper installation and operation to avoid hazards. Turn off the unit during thunderstorms to prevent electric shock. Regularly inspect power plugs and intake grilles for optimal performance and safety.

Essential Safety Measures

Always follow safety guidelines to ensure safe operation. Turn off the unit and unplug it during thunderstorms to prevent electric shock. Avoid exposing the unit to water or excessive moisture. Regularly inspect the power cord and plugs for damage. Ensure proper ventilation to prevent gas leaks or accumulation. Never touch electrical components with wet hands. Keep children away from moving parts. Follow installation instructions carefully to avoid hazards. Schedule routine maintenance to maintain efficiency and safety standards.

Regular Maintenance Tips

Regular maintenance is crucial for optimal performance. Clean or replace air filters monthly to ensure airflow efficiency. Check for refrigerant leaks and inspect drain pipes for blockages. Ensure the outdoor unit is free from debris and vegetation. Verify proper ventilation to prevent gas accumulation. Schedule annual professional maintenance to inspect internal components. Keep the remote controller batteries charged and replace them as needed. Refer to the manual for detailed procedures and guidelines to maintain your Halcyon DC Inverter’s efficiency and longevity.

Troubleshooting Common Issues

Identify and resolve common issues with your Halcyon DC Inverter using the troubleshooting guide. Check for error codes, communication errors, or system malfunctions. Refer to the manual for solutions.

Check wiring connections, power supply, and refrigerant levels. Reset the system if necessary. Consult the manual for detailed diagnostic steps and repair guidance to restore functionality quickly.

Identifying Error Codes and Solutions

Understanding error codes is crucial for diagnosing and resolving issues with your Halcyon DC Inverter. Common errors like E1 or E2 often indicate communication faults or sensor malfunctions. Check the manual for a detailed list of codes and their meanings. For example, if the inverter input DC voltage exceeds safe levels, the compressor may stop operating. Solutions may involve resetting the system, inspecting wiring, or checking refrigerant levels. Refer to the troubleshooting section for step-by-step guidance to restore functionality quickly and safely.

Resolving Communication Errors

Communication errors between the indoor and outdoor units can disrupt system operation. These issues often arise from wiring problems or loose connections. To resolve, first, ensure all cables are securely connected and free from damage. Restart the system by turning it off, waiting 5 minutes, and then powering it back on. If the issue persists, check the remote controller’s battery and functionality. For persistent errors, consult the error code list in the manual or contact a certified technician to diagnose and repair the communication fault effectively.

Warranty and Support Information

Fujitsu offers comprehensive warranty options for the Halcyon DC Inverter, ensuring reliable support. Detailed manuals and dedicated customer service provide assistance for optimal system performance.

Understanding the Warranty Terms

The Halcyon DC Inverter is backed by a comprehensive warranty program, ensuring peace of mind for users. The warranty typically covers parts and the compressor for a specified period, while labor costs may be included for a shorter duration. Registration within a certain timeframe is often required to activate full warranty benefits. It is essential to review the terms carefully to understand what is covered and any conditions that may void the warranty. Proper installation and maintenance, as outlined in the manual, are usually prerequisites for warranty validity. Always refer to the official documentation for detailed warranty specifics.

Accessing Customer Support

For any inquiries or issues regarding the Halcyon DC Inverter, accessing customer support is straightforward. Users can contact Fujitsu’s dedicated support team via phone or email, as detailed in the manual. Additionally, the official Fujitsu website provides a wealth of resources, including troubleshooting guides, FAQs, and downloadable manuals. Live chat support is also available on select platforms for immediate assistance. Ensure to have your model number and serial number ready for quicker resolution. The customer support team is committed to addressing concerns promptly and efficiently.

Advanced Features of the Halcyon DC Inverter

The Halcyon DC Inverter boasts advanced features like timer functions and smart energy-saving modes, optimizing performance and user convenience while maintaining energy efficiency and comfort.

Timer Functions and Scheduling

The Halcyon DC Inverter features advanced timer functions, enabling users to schedule operations for optimal comfort and energy savings. Set specific start and stop times, customize daily schedules, and utilize energy-saving modes to reduce consumption. The timer functions allow seamless integration with your lifestyle, ensuring the system operates efficiently even when you’re not home. This feature enhances convenience and energy efficiency, making it a standout aspect of the Halcyon DC Inverter’s advanced capabilities.

Smart Operations and Energy Saving Modes

The Halcyon DC Inverter offers intelligent smart operations and energy-saving modes designed to optimize performance while reducing power consumption. Adaptive sensors monitor room conditions to automatically adjust cooling or heating, ensuring efficiency. Energy-saving modes lower operational intensity during off-peak times, minimizing energy waste. These features, combined with the inverter technology, provide consistent comfort while significantly cutting energy costs. The system’s smart operations ensure seamless adjustments, making it an eco-friendly and cost-effective solution for modern air conditioning needs.

The Halcyon DC Inverter Manual provides a detailed guide to maximizing efficiency, comfort, and system longevity. By following its instructions, users can enjoy optimal performance and energy savings while maintaining ease of operation and reliability.

The Halcyon DC Inverter Manual is a comprehensive resource for understanding and optimizing your air conditioning system. It covers installation, operation, and maintenance, ensuring energy efficiency and performance. Key features include advanced inverter technology, smart operations, and user-friendly controls. The manual also provides troubleshooting guides for common issues and emphasizes safety precautions. By following the guidelines, users can extend system longevity and enjoy reliable comfort. This manual is essential for maximizing the benefits of the Halcyon DC Inverter, making it a valuable tool for both homeowners and technicians.

Encouragement for Proper Usage

Properly using your Halcyon DC Inverter ensures optimal performance, energy efficiency, and longevity. Always follow the manual’s guidelines for installation, operation, and maintenance to avoid potential issues. Regularly clean filters, check wiring, and schedule professional inspections to maintain efficiency. Utilize features like timers and smart modes to tailor the system to your needs. By adhering to these practices, you can enjoy consistent comfort, reduced energy costs, and reliable operation for years to come. Proper usage not only enhances performance but also protects your investment.

samsung rf263beaesr manual

The Samsung RF263BEAESR manual is a comprehensive guide designed to help users understand and optimize their refrigerator’s features. It includes detailed instructions for installation, maintenance, and troubleshooting, ensuring seamless operation and longevity of the appliance. This manual is essential for both first-time users and experienced owners seeking to maximize their fridge’s performance.

By following the manual, users can explore advanced settings, understand error codes, and perform routine care tasks. It serves as a valuable resource for anyone looking to get the most out of their Samsung RF263BEAESR refrigerator while ensuring safety and efficiency.

Key Features of the Samsung RF263BEAESR

The Samsung RF263BEAESR boasts a 24.6 cu. ft. capacity, ideal for large households. Its 3-door French Door design offers easy access to fresh and frozen foods. Features include adjustable shelves, crisper drawers, and ample door storage for organization and convenience.

Advanced cooling technology ensures even temperature distribution, while the sleek design enhances kitchen aesthetics. The refrigerator also includes ice and water dispensers, adding functionality and modern appeal to its user-friendly interface.

2.1 Design and Build Quality

The Samsung RF263BEAESR showcases a sleek and modern design with a stainless steel finish, complementing various kitchen decors. Its robust build ensures durability, while the French Door layout provides effortless access to contents. The exterior handles are ergonomically designed for easy opening and closing.

Inside, the refrigerator features adjustable shelves made of high-quality glass, offering flexibility in storage. The drawers and compartments are constructed from durable materials, ensuring long-lasting performance. The overall build quality reflects Samsung’s commitment to reliability and sophistication in home appliances.

The design emphasizes user convenience, with door bins and compartments strategically placed for easy access. The ice and water dispenser on the door adds functionality without compromising the aesthetic appeal. This blend of style and sturdiness makes the RF263BEAESR a standout in its class.

2.2 Storage Capacity and Organization

The Samsung RF263BEAESR refrigerator offers an impressive total capacity of 24.6 cubic feet, providing ample space for storing groceries and household essentials. The French Door design allows for optimal use of vertical space, ensuring that every corner of the fridge is utilized efficiently.

The refrigerator compartment is equipped with adjustable shelves made of durable glass, enabling users to customize the layout based on their needs. The crisper drawers are designed to maintain optimal humidity levels, keeping fruits and vegetables fresh for longer. Additional storage options include spacious door bins, perfect for bottles, jars, and other items.

The freezer section is equally well-organized, with removable drawers and dividers that allow for easy access and efficient storage of frozen foods. The overall design ensures that users can maximize their storage capacity while maintaining a clutter-free environment. This makes the RF263BEAESR an ideal choice for families or households requiring ample refrigeration space.

With its versatile storage solutions, this refrigerator caters to diverse household needs, ensuring that every item has its dedicated place for optimal organization and accessibility.

Installation and Setup Guide

The Samsung RF263BEAESR manual provides detailed installation instructions, ensuring a smooth setup process. It covers leveling the refrigerator, connecting water lines, and configuring door orientation. Proper installation is crucial for optimal performance and longevity of the appliance.

Follow the manual’s guidelines to avoid damage and ensure safety. Refer to the troubleshooting section for resolving any installation-related issues. Complete installation details are available in the manual packed with the product or downloadable from samsung.com.

3;1 Preparing the Installation Site

Before installing the Samsung RF263BEAESR, ensure the installation site is properly prepared. The area must be level and sturdy to support the refrigerator’s weight. Clear the space of any obstructions and ensure there is adequate ventilation around the unit for optimal performance.

Measure the designated area to confirm it matches the refrigerator’s dimensions. Ensure there is enough clearance on all sides for proper door opening and airflow. Additionally, protect the floor from potential damage by placing a sturdy, level surface or anti-vibration mat underneath the appliance.

The site should also be near a water supply line if the refrigerator has an ice maker or water dispenser feature. Ensure a power outlet is within reach and meets the voltage requirements specified in the manual. Avoid placing the refrigerator near direct sunlight or heat sources to maintain energy efficiency and prevent overheating.

By carefully preparing the installation site, you can ensure a smooth and successful setup process for your Samsung RF263BEAESR refrigerator. Proper site preparation is essential for the appliance’s performance, safety, and longevity.

Maintenance and Care Tips

Regular cleaning and filter replacements are crucial for optimal performance. Check door seals for tightness and ensure shelves are organized for efficient storage. Defrost the freezer periodically to maintain efficiency. Follow the manual’s guidelines for proper care and maintenance.

By keeping your Samsung RF263BEAESR well-maintained, you can extend its lifespan and ensure consistent performance. Regular checks and simple maintenance tasks will help prevent issues and keep your refrigerator running smoothly for years to come.

4.1 Regular Cleaning and Maintenance

Regular cleaning is essential to maintain the performance and hygiene of your Samsung RF263BEAESR refrigerator. Start by wiping down the exterior with a soft cloth to remove fingerprints and splatters. For the interior, remove all shelves and drawers and wash them with mild soap and warm water. Dry thoroughly before reinstalling to prevent water spots.

Check and clean the door seals periodically to ensure a tight closure, which helps maintain optimal temperature control. Additionally, defrost the freezer compartment regularly to remove ice buildup and ensure proper airflow; Refer to the manual for specific defrosting instructions tailored to your model.

Don’t forget to clean the drain and evaporator coils to prevent dust accumulation, which can reduce efficiency. Replace the water filter every 6 months or as recommended to maintain water quality. Regular maintenance not only keeps your refrigerator running smoothly but also extends its lifespan.

By following these simple cleaning and maintenance routines, you can ensure your Samsung RF263BEAESR operates efficiently and continues to provide reliable service for years to come.

Troubleshooting Common Issues

Identify and resolve common issues with your Samsung RF263BEAESR by checking temperature settings, door alignment, and power supply. Refer to the manual for error code explanations and step-by-step solutions to ensure optimal performance and quick fixes for everyday problems.

5.1 Understanding Error Codes and Solutions

The Samsung RF263BEAESR manual provides a detailed guide to understanding and resolving error codes that may appear on your refrigerator’s display. These codes are designed to help you identify specific issues quickly and take appropriate action. Common error codes include those related to temperature control, ice maker malfunctions, and door alignment problems.

For instance, an error code like “E” or “dE” often indicates a defrost issue or a malfunction in the defrost sensor. Other codes, such as “IC” or “IE,” may signal problems with the ice maker or its electronic control. The manual offers step-by-step solutions, such as resetting the refrigerator, checking water supply lines, or ensuring proper door sealing.

Before attempting any repairs, it’s important to consult the manual for the specific code and its corresponding solution. If the issue persists, contact a certified Samsung technician for professional assistance. Regular maintenance, such as cleaning condenser coils and inspecting door seals, can also prevent many common errors from occurring in the first place.

By familiarizing yourself with the error codes and their solutions, you can address problems efficiently and extend the lifespan of your Samsung RF263BEAESR refrigerator. Always refer to the official manual or Samsung support resources for accurate and reliable guidance.

Safety Precautions and Best Practices

Safety is a top priority when operating your Samsung RF263BEAESR refrigerator. Always read and follow the guidelines outlined in the manual to ensure safe and efficient use of your appliance. Avoid placing the refrigerator in direct sunlight or near heat sources, as this can affect performance and safety.

Never attempt to repair the refrigerator yourself, as this can lead to electrical shock or further damage. Always unplug the appliance before performing any maintenance or cleaning tasks. Keep children away from the refrigerator’s electrical components and ensure they do not play with the doors or shelves.

Proper installation is crucial for safety. Ensure the refrigerator is installed by a qualified professional to avoid gas leaks or electrical hazards. Regularly inspect the power cord and plug for damage, and replace them immediately if necessary.

Store food and beverages safely by following the manual’s guidelines for temperature settings and storage practices. Avoid placing flammable materials near the refrigerator, and keep the area around it clean and dry to prevent accidents.

For emergencies, such as a power outage, refer to the manual for instructions on maintaining food safety. By adhering to these precautions, you can enjoy a safe and trouble-free experience with your Samsung RF263BEAESR refrigerator.

The Samsung RF263BEAESR manual is a vital resource for optimizing your refrigerator’s performance. For further assistance, visit Samsung’s official website or contact their support team. Additional resources, such as repair guides and troubleshooting tips, are also available online to enhance your user experience.

7.1 Final Thoughts and Warranty Information

Regarding warranty, Samsung offers comprehensive coverage for parts and labor, typically spanning one year from the purchase date. Extended warranties may be available for additional protection. Registering your product on Samsung’s official website can enhance warranty benefits and provide easier access to support services.

For any post-warranty issues or further assistance, Samsung’s customer support is readily available through their website or dedicated helpline. Refer to the manual or Samsung’s official resources for detailed warranty terms and conditions. By following the guidelines and leveraging the provided resources, users can enjoy a seamless and satisfying experience with their Samsung RF263BEAESR refrigerator.

katolight generator manuals

Katolight generator manuals provide essential guidance for installation‚ operation‚ and maintenance of diesel‚ gaseous‚ and agricultural generators‚ ensuring optimal performance and safety across various applications.

Overview of Katolight Generators

Katolight generators are designed for diverse applications‚ including agriculture‚ industrial‚ and residential use. They offer diesel and gaseous-powered models‚ ranging from 15kW to 2759kW for diesel and 25kW to 800kW for gaseous units. Known for reliability and efficiency‚ these generators are often used in critical infrastructure such as hospitals‚ communications‚ and government installations. Their robust design ensures durability‚ making them a preferred choice for both emergency and primary power solutions across various industries.

Importance of Proper Manual Usage

Proper use of Katolight generator manuals is crucial for ensuring safe operation‚ preventing equipment damage‚ and optimizing performance. These manuals provide detailed instructions for installation‚ maintenance‚ and troubleshooting‚ helping users adhere to safety guidelines and prolong the generator’s lifespan. By following the manual‚ users can avoid common issues and ensure reliable power delivery in various applications.

Applications of Katolight Generators

Katolight generators are widely used in agriculture‚ industry‚ residential settings‚ and emergency power solutions‚ ensuring reliable energy supply for critical infrastructure‚ homes‚ and commercial operations.

Agricultural Use Cases

Katolight generators are indispensable in agriculture‚ powering irrigation systems‚ lighting‚ and farm equipment. Models like the PTO and Agricultural Generators are designed for rural settings‚ offering reliable energy solutions. They ensure continuous operation of critical farm machinery‚ even in remote areas. These generators are built to withstand harsh outdoor conditions‚ making them ideal for farming applications. Their versatility and durability support agricultural productivity‚ ensuring uninterrupted power for essential tasks and equipment. This makes Katolight generators a trusted choice for farmers worldwide.

Industrial and Commercial Applications

Katolight generators are widely used in industrial and commercial settings to provide reliable power for critical infrastructure. With power ratings from 15kW to 2759kW‚ they support hospitals‚ communication networks‚ and government installations. Designed for durability‚ these generators ensure uninterrupted operations in demanding environments. Their versatility makes them ideal for factories‚ data centers‚ and large-scale commercial projects. Katolight’s robust engineering and comprehensive warranty ensure long-term performance‚ making them a trusted choice for industrial and commercial power solutions worldwide.

Residential and Emergency Power Solutions

Katolight generators are a reliable choice for residential and emergency power needs‚ ensuring continuous energy supply during outages. Customizable to meet specific requirements‚ they provide peace of mind for homeowners. From small-scale solutions to larger systems‚ these generators deliver consistent power for lights‚ appliances‚ and critical systems. Their robust design and availability of accessories make them ideal for emergency preparedness. With a two-year warranty‚ Katolight generators offer a dependable solution for residential energy needs‚ ensuring safety and reliability in everyday use and crises.

Types of Katolight Generators

Katolight generators include diesel‚ gaseous‚ and PTO models‚ each designed for specific industrial‚ agricultural‚ or residential applications‚ ensuring versatile and reliable power solutions;

Diesel-Powered Generators

Katolight diesel-powered generators are versatile and reliable‚ ranging from 15kW to 2759kW‚ suitable for industrial and commercial applications. They offer low and medium voltage options‚ making them ideal for critical infrastructure like hospitals and communications. These generators are built for durability and performance‚ with a 2-year limited warranty covering all components. Their robust design ensures consistent power delivery‚ catering to diverse energy needs across various industries.

Gaseous-Powered Generators

Katolight gaseous-powered generators are eco-friendly and efficient‚ ranging from 25kW to 800kW. They are ideal for industrial and commercial applications‚ offering lower emissions and reduced environmental impact. Designed for versatility‚ these generators can be customized to meet specific energy requirements. With a focus on reliability‚ they are supported by a comprehensive warranty‚ ensuring long-term performance. Their compact design and robust engineering make them suitable for diverse power needs‚ providing a sustainable alternative to traditional diesel models.

PTO and Agricultural Generators

Katolight PTO and agricultural generators are designed for farm and field operations‚ offering portable power solutions. These generators are engineered to be durable and efficient‚ capable of powering essential equipment. They are ideal for rural areas with limited access to electricity‚ providing reliable energy for agricultural tasks. With a focus on simplicity and robust construction‚ Katolight agricultural generators ensure consistent performance‚ making them a vital tool for farming operations and off-grid power needs.

Safety and Precautions

Adhering to Katolight generator manuals is crucial for safe operation. Ensure proper ventilation‚ avoid overloading‚ and follow electrical safety guidelines to prevent shock or fire hazards.

General Safety Guidelines

Always follow Katolight generator manuals for safe operation. Ensure proper ventilation to prevent carbon monoxide buildup. Avoid overloading the generator‚ as it can cause overheating or fire. Keep flammable materials away and wear protective gear when servicing. Regularly inspect cables and connections for damage; Never operate the generator in wet conditions or touch electrical components with wet hands. Adhere to shutdown procedures during maintenance to prevent accidents. Following these guidelines ensures reliable performance and user safety.

Electrical Safety Measures

Ensure proper grounding of Katolight generators to prevent electrical shocks. Avoid overloading circuits‚ as this can cause fires or equipment damage. Use correctly rated cables and connectors to handle the generator’s output. Never operate the generator near water or in humid conditions. Regularly inspect electrical components for wear or damage. Always disconnect power before servicing. Follow NFPA 110 standards for installation and operation. Adhering to these measures ensures safe electrical operation and protects both users and equipment from potential hazards.

Installation and Setup

Proper installation of Katolight generators requires careful planning‚ ensuring the unit is placed on a level surface with adequate ventilation and clear access for maintenance.

Pre-Installation Checks

Before installing a Katolight generator‚ ensure the site is prepared and all components are verified. Check for damage‚ ensure the exciter rotor is securely mounted‚ and confirm proper bearing lubrication. Verify the generator’s nameplate rating matches the application requirements. Ensure all accessories‚ such as control panels and wiring‚ are included and undamaged. Review the manual for specific pre-installation steps to guarantee a safe and efficient setup process.

Step-by-Step Installation Process

Begin by moving the generator using an overhead hoist or forklift‚ ensuring it is placed on a level‚ stable surface; Reattach the exciter rotor assembly if it was shipped separately and ensure proper bearing lubrication. Connect the electrical and fuel systems according to the manual’s specifications. Install any additional accessories like control panels and ensure all wiring is securely connected. Follow the manual’s precise steps for final assembly and connections. Always refer to the manual for specific instructions and safety guidelines to ensure a successful installation.

Operation and Maintenance

Daily checks include monitoring oil levels‚ filter condition‚ and electrical connections. Regular maintenance involves oil changes‚ filter replacements‚ and inspecting bearings. Always follow the manual for safe‚ efficient operation and longevity.

Daily Operational Checks

Daily operational checks are crucial for ensuring optimal performance and safety. Start by verifying oil levels‚ fuel quality‚ and air filter condition. Inspect electrical connections for tightness and signs of wear. Check the control panel for error codes or alarms. Ensure all indicators‚ such as voltage and frequency‚ are within acceptable ranges. Consult the manual for specific guidelines and address any issues promptly to prevent downtime. Regular checks help maintain reliability and extend the generator’s lifespan.

Regular Maintenance Schedule

A regular maintenance schedule ensures longevity and efficiency. Monthly‚ inspect the air filter‚ clean or replace it as needed‚ and check battery terminals for corrosion. Every 500 hours‚ change the oil and filter‚ and inspect belts for wear. Annually‚ perform a comprehensive inspection of electrical connections‚ cooling systems‚ and fuel lines. Refer to the Katolight manual for specific intervals and procedures tailored to your generator model. Adhering to this schedule prevents unexpected failures and ensures reliable performance.

Troubleshooting Common Issues

Common issues include overload‚ electrical faults‚ and mechanical failures. Refer to the manual for diagnostic steps and solutions. Regular checks prevent unexpected shutdowns and ensure reliability.

Diagnosing Electrical Problems

Diagnosing electrical issues in Katolight generators involves checking overload indicators‚ circuit breakers‚ and voltage levels. Ensure all connections are secure and verify the control panel settings. If problems persist‚ consult the manual for detailed troubleshooting steps‚ including testing procedures for electrical components. Regular maintenance and adherence to safety guidelines can help prevent and resolve electrical faults efficiently.

Addressing Mechanical Failures

Identifying mechanical failures in Katolight generators involves inspecting bearings‚ belts‚ and moving parts for wear. Lubrication schedules must be followed to prevent overheating and friction-related damage. If unusual noises or vibrations occur‚ immediately shut down the generator and consult the manual for repair procedures. Regular maintenance‚ such as replacing worn components and checking alignment‚ ensures reliability. For critical issues‚ professional assistance may be required to restore optimal performance and prevent further damage.

Accessories and Warranty

Katolight offers a range of integrated accessories and a standard 2-year‚ 1500-hour warranty. Extended warranty options are available‚ ensuring comprehensive coverage for generator sets and components.

Available Accessories

Katolight offers a wide range of accessories tailored to enhance generator performance and versatility. These include control panels‚ lubrication systems‚ and custom-designed components. Accessories are fully integrated with generator sets to meet global standards‚ ensuring seamless operation and durability. Optional features like extended warranties and specialized filters are also available‚ providing users with comprehensive solutions for their power needs. These accessories are designed to optimize efficiency‚ reliability‚ and safety across various applications‚ from industrial to residential use.

Warranty Information

Katolight generator sets are backed by a standard 2-year‚ 1500-hour limited warranty‚ covering all components and accessories. Optional extended warranty periods are available‚ offering flexible protection tailored to user needs. This warranty ensures reliability and performance‚ aligning with global standards. The EPA Tier III certification further underscores the product’s quality and environmental compliance. Users can contact the factory for detailed warranty options‚ ensuring comprehensive coverage for their generator sets across various applications and operational demands.

Model-Specific Manuals

Katolight provides detailed manuals for specific models‚ such as the 40‚ 45‚ and 50 series‚ offering technical insights and operational guidelines tailored to each generator’s unique features and controls.

Katolight 40 / 45 / 50 Series Manuals

The Katolight 40‚ 45‚ and 50 series manuals offer comprehensive instructions for installation‚ operation‚ and maintenance. These guides provide technical specifications‚ control panel details‚ and troubleshooting tips specific to each model. They ensure users can optimize performance‚ address common issues‚ and maintain safety standards. The manuals are essential for operators to understand and utilize their generators effectively in various industrial and agricultural applications.

Control Panel Technical Information

The control panel technical information provides detailed insights into the operational and monitoring systems of Katolight generators. It includes specifications for digital genset controllers‚ configuration guidelines‚ and troubleshooting procedures. This section ensures users can effectively manage generator performance‚ monitor operational parameters‚ and address electrical issues promptly. The manuals emphasize safety protocols and efficient control panel maintenance to maintain reliability and optimal functionality across all Katolight generator models.

Katolight generator manuals are crucial for safe and efficient operation‚ providing comprehensive guidance for installation‚ maintenance‚ and troubleshooting. They ensure optimal performance and longevity of the equipment.

Final Thoughts on Using Katolight Manuals

Using Katolight generator manuals ensures efficient and safe operation‚ providing detailed guidance for installation‚ maintenance‚ and troubleshooting. These manuals are essential for maximizing performance and longevity‚ covering agricultural‚ industrial‚ and residential applications. By following the instructions‚ users can prevent common issues and ensure compliance with safety standards. Regular updates and clear technical information make Katolight manuals indispensable for both professionals and homeowners‚ ensuring reliable power generation across various settings.

Additional Resources for Users

For further assistance‚ users can access Katolight generator manuals online as PDF downloads‚ offering detailed technical specifications and troubleshooting guides. Additionally‚ manufacturer websites and authorized service providers like FM Generator provide extensive support‚ including parts‚ repairs‚ and maintenance tips. These resources ensure users can resolve issues efficiently and maintain their generators for optimal performance. Regular updates and interactive guides are also available to enhance user experience and adherence to safety protocols.

rav4 manual gearbox

The Toyota RAV4 manual gearbox offers a more engaging and fuel-efficient driving experience, popular among enthusiasts, though availability varies by region and model year.

Overview of the RAV4 and Its Transmission Options

The Toyota RAV4 is a versatile compact SUV known for its reliability and performance. While it primarily features automatic transmissions, certain models and regions offer a manual gearbox option. Historically, the RAV4 was available with a 5-speed manual transmission, particularly in international markets, paired with engines like the 2.0-liter four-cylinder. However, in North America, manual transmissions have been largely phased out, with automatic and CVT options dominating the lineup. The manual gearbox provides a more engaging driving experience, appealing to enthusiasts who value control and direct connection to the vehicle;

Importance of Manual Transmission in the RAV4

The manual transmission in the Toyota RAV4 holds a special appeal for driving purists, offering a more direct connection to the vehicle. It provides better fuel efficiency in certain conditions and lower maintenance costs compared to automatics. Enthusiasts appreciate the control and engagement manual shifting delivers, enhancing the driving experience. Although less common in modern RAV4 models, the manual gearbox remains a sought-after option in international markets, particularly for drivers who value precision and responsiveness behind the wheel. Its availability, however, has declined in regions like North America, where automatic transmissions dominate.

History of Manual Transmissions in the Toyota RAV4

The Toyota RAV4 debuted in 1994 with a manual transmission option, initially offering a 5-speed gearbox. Popular in global markets, its availability later declined in North America, yet remained a favorite among enthusiasts.

The First Generation RAV4 and Its Manual Gearbox

The first-generation Toyota RAV4, introduced in 1994, featured a 2.0-liter four-cylinder engine paired with a five-speed manual transmission. This setup offered a direct, engaging driving experience, appealing to enthusiasts who valued control and precision. The manual gearbox played a significant role in the RAV4’s initial success, particularly in global markets where driving dynamics were prioritized. Its compact design and responsive handling made it a standout in the emerging SUV segment, establishing the RAV4 as a versatile and driver-centric vehicle that resonated with those seeking a more connected driving experience.

Decline of Manual Transmissions in North America

The Toyota RAV4 manual transmission saw a significant decline in North America, particularly after the mid-2000s. By the late 2000s, manual transmissions became rare in the region, with only 10-20% of RAV4s equipped with them. This shift was driven by changing consumer preferences, as automatic transmissions became more popular for their convenience and ease of use. By 2009, manual transmissions were discontinued in North American RAV4 models, reflecting a broader industry trend toward automatic and CVT options. Today, manual transmissions are no longer available in the North American RAV4 lineup, catering to a market prioritizing comfort and practicality over manual driving engagement.

Why Manual Transmissions Are Still Preferred by Enthusiasts

Manual transmissions are cherished by driving enthusiasts for the control and engagement they offer. The Toyota RAV4’s manual gearbox provides a direct connection to the vehicle, allowing drivers to feel more involved in the driving experience. Enthusiasts appreciate the precision of shifting gears, which enhances acceleration and responsiveness. Additionally, manual transmissions often deliver better fuel efficiency compared to automatics, making them a practical choice for some. While manual transmissions are less common in modern RAV4 models, they remain a sought-after option for those who value driver involvement and the satisfaction of mastering a manual drivetrain.

Specifications of the RAV4 Manual Gearbox

The RAV4 manual gearbox typically features a 5-speed or 6-speed transmission, paired with a 2.0-liter engine, offering smooth shifting and reliable performance, providing a direct driving experience.

Engine and Transmission Pairing in Manual RAV4 Models

The manual RAV4 models are typically paired with a 2.0-liter inline-four cylinder engine, offering a balance of fuel efficiency and performance. This pairing is designed for drivers seeking a more engaging experience, with the manual gearbox providing precise control over gear shifts. The engine delivers adequate power for both urban and light off-road driving, making it a practical choice for everyday use. In earlier generations, the 2.0-liter engine was commonly matched with a five-speed manual transmission, while later models occasionally featured a six-speed option. This combination ensures smooth acceleration and responsive handling, catering to enthusiasts who prefer a more involved driving experience.

Performance Characteristics of the Manual Transmission

The manual transmission in the Toyota RAV4 delivers a responsive and engaging driving experience, with smooth, precise gear shifts that enhance control. It pairs well with the engine, offering crisp acceleration and a direct connection to the road. Drivers can expect improved fuel efficiency compared to automatic models, particularly in city driving. The manual gearbox also allows for better modulation of power, making it ideal for winding roads or off-road scenarios. While it may lack the convenience of an automatic, the manual transmission’s performance characteristics make it a favorite among driving enthusiasts who value precision and responsiveness behind the wheel.

Comparison with Automatic Transmission Models

The manual transmission in the Toyota RAV4 offers a more engaging and fuel-efficient driving experience compared to automatic models, particularly in city driving. While automatic transmissions provide convenience and smooth acceleration, the manual gearbox delivers better control and responsiveness, appealing to driving enthusiasts. However, automatic models often have slightly better fuel economy on the highway due to advanced transmission technology. Manual transmissions also require more driver input, which can be a drawback in heavy traffic. Overall, the choice between manual and automatic depends on personal preference, with manuals offering a more connected driving experience and automatics prioritizing ease and convenience.

Maintenance and Care for the RAV4 Manual Transmission

Regular fluid checks, clutch inspection, and avoiding aggressive driving help extend the manual gearbox’s life. Proper maintenance ensures smooth operation and prevents premature wear.

Tips for Extending the Life of the Manual Gearbox

Regular fluid checks and timely replacements are crucial for maintaining the manual gearbox. Avoid aggressive driving, such as rapid acceleration or harsh shifting, to reduce wear. Ensure the clutch is not ridden excessively, as this can lead to premature wear. Schedule periodic inspections of the transmission and clutch system to identify potential issues early. Using the correct transmission fluid as specified by Toyota helps maintain optimal performance. Additionally, avoid overheating by not staying in high gears during steep climbs. Proper care and adherence to maintenance schedules can significantly extend the lifespan of the RAV4’s manual gearbox.

Common Issues and Troubleshooting

Common issues with the Toyota RAV4 manual gearbox include gear shifting problems and clutch wear. These often arise from excessive wear on synchronizers or improper clutch engagement. Drivers may experience difficulty shifting into higher gears or a grinding sensation during shifts. Regular inspection of the clutch and transmission components can help identify these issues early. Low transmission fluid levels or contamination may also cause poor shifting. Troubleshooting involves checking fluid levels, inspecting for worn components, and ensuring proper clutch adjustment. Persistent issues may require professional diagnosis to prevent further damage. Addressing these problems promptly ensures smooth operation and extends gearbox longevity.

Availability of Manual Transmission in Different Markets

The Toyota RAV4 manual transmission is primarily available in international markets, with limited or no availability in North America, reflecting regional driving preference differences.

Geographic Variations in Manual RAV4 Availability

The Toyota RAV4 manual transmission is predominantly available in international markets, such as Europe, Australia, and parts of Asia, where driving enthusiasts prefer manual gearboxes. In contrast, North America has seen a decline in manual RAV4 availability, with most models now featuring automatic transmissions. This regional variation reflects differing driving preferences and market demands. While some global markets continue to offer manual options, especially in base or lower trim levels, the shift toward automatics in certain regions highlights Toyota’s adaptation to consumer trends and the growing popularity of convenience-oriented driving experiences.

Why Manual Transmissions Are Rare in North America

Manual transmissions in the Toyota RAV4 are rare in North America due to shifting consumer preferences favoring convenience and ease of use. With increasing urbanization and traffic congestion, automatic transmissions have become the preferred choice for most drivers. Additionally, the SUV market in North America is heavily skewed toward family-oriented vehicles, where automatics are seen as more practical. Toyota has also focused on meeting this demand by prioritizing automatic and CVT options, further reducing the availability of manual transmissions in the region. This trend aligns with broader industry shifts away from manual gearboxes in favor of more accessible driving experiences.

Fuel Efficiency and Performance

The Toyota RAV4 with a manual gearbox historically offered improved fuel efficiency and driving engagement, though current models in North America no longer include this option.

Fuel Economy Comparison: Manual vs. Automatic

Historically, the Toyota RAV4 with a manual gearbox offered slightly better fuel economy compared to its automatic counterparts, appealing to drivers seeking efficiency. However, in recent years, automatic transmissions, particularly the 8-speed unit in newer models, have closed this gap, often matching or even surpassing the manual’s efficiency. The shift toward automatics and hybrids has led to the phase-out of manual options in many markets, including North America. While manual transmissions were once favored for their fuel-saving potential, modern automatics now deliver comparable or better performance without sacrificing efficiency, making them the preferred choice for most drivers today.

Driving Dynamics and Handling with Manual Transmission

The Toyota RAV4 with a manual gearbox delivers a more engaging and responsive driving experience, offering precise control over gear shifts and acceleration. This connection to the vehicle enhances agility, particularly in city driving or winding roads. The manual transmission allows drivers to exploit the engine’s torque curve effectively, providing a sportier feel compared to automatic models. While modern automatics have improved, the manual option remains favored by enthusiasts who value the tactile feedback and direct involvement in the driving process. This dynamic handling makes the RAV4 with a manual gearbox a standout choice for those prioritizing driver engagement and precision.

The Toyota RAV4 manual gearbox offers a unique blend of driving engagement and efficiency, appealing to enthusiasts despite its limited availability in modern models.

Final Thoughts on the RAV4 Manual Gearbox

The Toyota RAV4 manual gearbox remains a preferred choice for driving enthusiasts, offering a more engaging and fuel-efficient experience. While its availability has declined in recent years, particularly in North America, it continues to provide a unique connection between driver and vehicle. For those who value control and precision, the manual transmission option in the RAV4 is a standout feature, even as automatics dominate the market. Its legacy as a reliable and responsive system ensures its appeal endures among purists, making it a timeless choice for those seeking a more hands-on driving experience.

razor black label e90 electric scooter manual

Welcome to the Razor Black Label E90 Electric Scooter manual. This guide provides essential information for safe operation, maintenance, and troubleshooting to ensure optimal performance and longevity of your scooter.

1.1 Overview of the Scooter and Its Features

The Razor Black Label E90 Electric Scooter is a sleek, powerful ride designed for teens and adults. It features a 10 mph top speed, 40-minute runtime, and a kick-start mechanism requiring 3 mph to engage the motor. Built for safety and durability, it includes a hand-operated brake and sturdy frame. Recommended for riders aged 8 and above, with a weight limit of 120 lbs, this scooter combines style, performance, and reliability for an exciting riding experience.

1.2 Importance of Reading the Manual

Reading the manual is crucial for safe and proper use of the Razor Black Label E90 Electric Scooter. It provides detailed instructions on assembly, operation, and maintenance, ensuring optimal performance and longevity. Understanding safety guidelines, charging procedures, and troubleshooting tips helps prevent accidents and extends the scooter’s lifespan. Familiarizing yourself with the manual guarantees a safe and enjoyable riding experience while maintaining compliance with warranty terms and conditions.

Safety Guidelines and Precautions

Always wear protective gear, including a helmet and pads. Follow traffic rules and ensure proper visibility. Parental supervision is recommended for younger riders to ensure safe operation.

2.1 Recommended Rider Age and Weight Limit

The Razor Black Label E90 Electric Scooter is designed for riders aged 8 and above, with a maximum weight limit of 120 lbs (54 kg); Ensure the rider can comfortably fit on the scooter and operates it responsibly. Parental discretion is advised for younger riders based on maturity and ability to follow safety guidelines. Always refer to the manual for specific recommendations.

2.2 Safety Precautions and Warnings

Always wear protective gear, including a helmet, knee pads, and elbow pads, to minimize injury risks. Avoid riding in hazardous conditions, such as wet surfaces or steep inclines. Ensure the scooter is used by riders aged 8 and above, within the weight limit of 120 lbs (54 kg). Do not modify the scooter or use it in a way that contradicts the manual’s guidelines. Follow all traffic rules and local regulations while riding.

Assembly and Initial Setup

Begin by carefully unpacking and inventorying all parts. Follow the step-by-step assembly instructions in the manual to ensure proper setup and functionality of your scooter.

3.1 Unpacking and Inventory of Parts

Start by carefully unpacking the scooter and all accessories from the box. Inspect each component for damage or defects. Verify the presence of all parts, including the scooter frame, handlebar, deck, wheels, battery, charger, and tools. Organize the parts to ensure nothing is missing before proceeding with assembly. This step is crucial to confirm that all components are in good condition and ready for use.

3.2 Step-by-Step Assembly Instructions

  • Attach the handlebar to the scooter frame using the provided bolts and tools. Tighten securely to ensure stability.
  • Connect the deck to the frame, aligning it properly for even weight distribution.
  • Install the front wheel by aligning the axle with the fork and securing it with the provided nuts.
  • Attach the rear wheel and ensure it is properly seated in the wheel housing.
  • Double-check all bolts and connections for tightness before first use.

Operating the Scooter

The Razor Black Label E90 requires a kick start to reach 3 mph before the motor engages. Ride smoothly, adjusting speed with the throttle, and brake firmly for control.

4.1 Starting and Accelerating the Scooter

To start the Razor Black Label E90, place one foot on the deck and kick off manually until the scooter reaches 3 mph. At this speed, gently twist the throttle to engage the motor. Ensure you wear safety gear, including a helmet. Accelerate smoothly and maintain control by adjusting the throttle. The scooter’s top speed is 10 mph, optimized for both fun and safety.

4.2 Braking and Stopping Techniques

The Razor Black Label E90 features a handbrake and rear fender brake for safe stopping. Squeeze the handbrake lever gradually to slow down, and press the rear fender brake for added control. Avoid sudden stops to maintain balance. Always reduce speed before braking and ensure both brakes are used in conjunction for optimal stopping performance. Regularly check brake functionality to ensure safety while riding.

Maintenance and Care

Regular cleaning and lubrication of moving parts are essential. Check for wear and tear on tires and brakes. Use only authorized replacement parts for optimal performance and safety.

5.1 Cleaning and Lubricating the Scooter

Regularly clean the scooter with a soft cloth and mild detergent to remove dirt and grime. Avoid harsh chemicals that may damage the finish. Lubricate moving parts like hinges and pivot points with silicone-based spray. Ensure the motor and battery compartments are dry and free from debris. After cleaning, inspect for wear and tear, and tighten any loose screws. Lubricate chains or gears as needed to maintain smooth operation. Always follow the manufacturer’s recommendations for cleaning products and lubricants to ensure longevity and performance.

5.2 Regular Checks and Maintenance Schedule

Perform regular checks every month to ensure optimal scooter performance; Inspect the brake system, tires, and battery connections for wear or damage. Lubricate moving parts like hinges and folding mechanisms every 25 miles. Check the charger for damage and ensure it is stored properly. After each ride, wipe down the scooter and tighten any loose screws. Replace worn parts promptly, such as handlebar grips or kickstand, to maintain safety and functionality.

Battery Care and Charging

Charge the scooter for 12 hours before first use. Avoid extreme temperatures and overcharging. Store the battery in a cool, dry place when not in use.

6.1 Charging Instructions and Guidelines

Charge the battery for 12 hours before first use. Use only the original charger provided. Avoid overcharging, as it can reduce battery life. The charger light will turn green when fully charged. Store the battery in a cool, dry place when not in use. Recharge the scooter when the battery level is low to maintain optimal performance.

6.2 Battery Life and Optimization Tips

The Razor Black Label E90 features a 12V rechargeable battery, offering up to 40 minutes of runtime. To maximize battery life, avoid overcharging and store the scooter in a cool, dry place. Ensure the battery is fully discharged before recharging to maintain its capacity. Regularly check for software updates and avoid extreme temperatures to optimize performance. Proper care will extend the battery’s lifespan and ensure consistent reliability.

Troubleshooting Common Issues

Identify and resolve common issues with your Razor Black Label E90 scooter. Check the power button, ensure proper battery charge, and verify motor engagement. Reset the scooter if it doesn’t turn on. Address problems like slow acceleration or uneven braking by inspecting tire pressure and brake alignment. Regularly clean electrical connections to prevent malfunctions. Refer to the manual for detailed solutions to ensure optimal performance and safety.

7.1 Diagnosing and Solving Common Problems

Common issues with the Razor Black Label E90 include motor disengagement, slow acceleration, or battery drained quickly. Check if the scooter is fully charged and ensure proper throttle function. If the motor doesn’t engage, verify the scooter reaches the required 3 mph kick-start speed. For electrical issues, inspect connections and ensure they are clean and secure. Reset the scooter by turning it off and on if it malfunctions.

Address battery-related problems by avoiding overcharging and ensuring the charger is Razor-approved. If the scooter slows down, check for worn tires or excessive rider weight. Regular maintenance, such as cleaning brakes and tightening bolts, can prevent many issues. Refer to troubleshooting steps in the manual for detailed solutions to restore optimal performance and safety. Always follow manufacturer guidelines for repairs and adjustments.

7.2 Resetting the Scooter and Electrical Issues

To reset the Razor Black Label E90, turn it off, wait 30 seconds, and restart. This often resolves electrical glitches. For issues like faulty lights or inconsistent acceleration, check connections for damage or corrosion. Ensure the battery is fully charged and the charger is Razor-approved. If problems persist, contact Razor customer support for assistance. Regular inspections and proper care can prevent electrical malfunctions and ensure reliable performance. Always follow safety guidelines when addressing electrical concerns.

Product Specifications

The Razor Black Label E90 features a 12V rechargeable battery, 10 mph top speed, and 120 lbs weight capacity. Designed for riders aged 8+, it combines durability and safety for an enjoyable ride experience.

8.1 Technical Details and Performance Metrics

The Razor Black Label E90 is powered by a 12V rechargeable battery, delivering up to 40 minutes of continuous runtime. It reaches a top speed of 10 mph, suitable for riders aged 8 and above with a maximum weight capacity of 120 lbs. Designed for smooth acceleration and reliable performance, it features a kick-start mechanism requiring a 3 mph push to engage the motor, ensuring safety and efficiency. The scooter’s compact design and durable frame make it ideal for both urban and recreational use, offering a balance between power and portability. Regular maintenance and proper charging are essential to maintain optimal performance and extend the battery life. The E90 is equipped with a manual that provides detailed specifications and guidelines for owners to follow, ensuring a safe and enjoyable riding experience. By adhering to these technical details and performance metrics, users can maximize their scooter’s functionality and longevity.

8.2 Dimensions and Weight of the Scooter

The Razor Black Label E90 measures approximately 37 inches in height and 17 inches in width, making it a compact and portable option for riders. Weighing around 9.8 kg (21.6 lbs), it is lightweight yet durable, designed for easy handling and storage. These dimensions ensure the scooter is suitable for riders of various sizes while maintaining stability and maneuverability, perfect for both kids and teenagers. The scooter’s weight distribution enhances its overall balance, providing a smooth riding experience.

Warranty Information

Your Razor Black Label E90 Electric Scooter is backed by a limited warranty covering defects in materials and workmanship. For details, contact Razor support at 866-467-2967.

9.1 Warranty Coverage and Terms

The Razor Black Label E90 Electric Scooter is covered by a limited warranty for defects in materials and workmanship. The warranty period varies by component: 6 months for the battery and 90 days for accessories. Coverage applies to the original purchaser only and does not include damage caused by misuse, neglect, or unauthorized modifications. For full details, refer to the warranty section in the manual or contact Razor support.

9.2 Contact Information for Support

For assistance with your Razor Black Label E90 Electric Scooter, contact Razor customer support at 1-866-467-2967, available Monday through Friday from 8AM to 5PM Pacific Time. Have your product ID ready, located on the white label on your scooter or the back of the charger. Visit the official Razor website for additional support resources or to download the manual.

Additional Tips for Optimal Use

For the best experience, maintain proper tire pressure, store the scooter in a dry place, and avoid riding in wet conditions to ensure longevity and performance.

10.1 Enhancing Riding Experience

To enhance your riding experience, ensure proper tire inflation for a smoother ride and better control. Regularly check and tighten all bolts and screws to maintain stability. Practice balancing and braking techniques in a safe, open area before riding in traffic. Wearing safety gear, such as a helmet and knee pads, is crucial for protecting yourself in case of a fall. Additionally, avoid riding on uneven or wet surfaces to prevent accidents. Keeping the scooter clean and well-maintained will also contribute to a more enjoyable and safe ride. By following these tips, you can maximize the performance and longevity of your Razor Black Label E90 Electric Scooter while ensuring a fun and secure experience.

10.2 Storage and Transportation Tips

Store your Razor Black Label E90 in a dry, cool place to protect the battery and components. Clean the scooter before storage to prevent dust buildup. For transportation, use a sturdy scooter cover to shield it from dirt and moisture. Always lift the scooter by the frame to avoid damage. Avoid leaving it in extreme temperatures or direct sunlight, as this can affect battery performance. Proper storage and handling will help maintain your scooter’s condition and ensure reliable use.

gogo scooter repair manual

Welcome to the Pride Mobility Products’ Go-Go scooter repair manual. This guide provides essential insights into safety precautions, routine maintenance, troubleshooting, and disassembly procedures. By following these steps, you can ensure optimal performance and longevity of your scooter.

Safety Precautions for Scooter Maintenance and Repair

Ensuring your safety while maintaining or repairing your Go-Go scooter is paramount. Always wear protective gear, such as gloves, to prevent injury. Avoid operating the scooter on steep slopes, as this can cause instability and tipping. Never exceed the weight limit for the rear basket, which should not exceed 13 lbs. When handling batteries, avoid damaged or cracked units, and store them in a plastic bag if compromised. If unintended motion occurs, turn off the scooter immediately by removing the key and contact Pride Customer Care; Additionally, electromagnetic interference from devices like cell phones or radios may affect performance. Always disconnect the charger before performing repairs to avoid electrical hazards. For prolonged storage, elevate the scooter to prevent tire damage. Finally, consult your authorized Pride Provider for guidance on disposal and recycling of batteries. Adhering to these precautions ensures both personal safety and the longevity of your scooter.

Understanding the Components of Your Go-Go Scooter

Your Go-Go scooter features key components like the motor/transaxle assembly, battery pack, tiller, and anti-tip wheels. These parts work together to ensure smooth operation, stability, and control. Familiarizing yourself with these components aids in effective maintenance and troubleshooting.

Key Components and Their Functions

Your Go-Go scooter is built with essential components designed to enhance performance and safety. The motor/transaxle assembly converts electrical energy into mechanical power, driving the wheels. The battery pack, containing two 12-volt deep-cycle batteries, powers the scooter and is easily removable for charging. The tiller houses controls for speed and direction, while anti-tip wheels improve stability. The brake system, including regenerative braking, ensures smooth and safe stops. Understanding these components helps in maintaining and troubleshooting your scooter effectively.

Diagnostic Beep Codes and Their Meanings

The Go-Go scooter features a diagnostic system that uses beep codes to indicate specific issues. These codes, ranging from 2 to 9 beeps, provide valuable information for troubleshooting. For instance, 5 beeps signal a solenoid brake trip, often caused by the manual freewheel lever being in the wrong position. Understanding these codes allows you to identify and address problems promptly, ensuring your scooter runs smoothly and safely. Always refer to the manual for detailed explanations and solutions to maintain optimal performance and prevent further issues. This feature is a crucial tool for all users, helping to diagnose and resolve common issues efficiently. By familiarizing yourself with these codes, you can keep your scooter in top condition and enjoy a hassle-free riding experience. Regular checks and timely repairs based on these diagnostics will extend the life of your Go-Go scooter and ensure reliability.

Battery Maintenance and Charging Guidelines

Proper battery care is crucial for your Go-Go scooter’s performance. Use a 2-amp charger for deep cycle AGM or Gel-Cell batteries. Avoid overcharging and ensure the charger is disconnected after use to prevent damage. Regularly check battery connections and charge levels for optimal function.

Proper Charging Techniques for Long Battery Life

To maximize the lifespan of your Go-Go scooter’s batteries, adhere to these charging guidelines. First, ensure the charger is specifically designed for deep cycle AGM or Gel-Cell batteries, as using the wrong charger can cause irreversible damage. Always charge the batteries in a well-ventilated area, away from direct sunlight and moisture. Connect the charger to the battery pack and plug it into a standard electrical outlet. Allow the batteries to charge for the recommended 8 to 10 hours, or until the charger indicates a full charge. Avoid overcharging, as it can reduce battery capacity. If you notice any signs of wear or corrosion on the terminals, clean them with a wire brush and apply a thin layer of petroleum jelly to prevent further corrosion. Regular charging cycles will help maintain peak performance and ensure your scooter runs smoothly for years to come.

Regular Maintenance Tasks to Keep Your Scooter Running Smoothly

Regular maintenance is crucial to ensure your Go-Go scooter operates efficiently and safely. Begin by checking the tire pressure and ensuring it matches the manufacturer’s recommendations, as underinflated tires can reduce performance and increase wear. Next, inspect the brakes for proper function and adjust them if necessary. Lubricate the moving parts, such as the tiller and seat adjustments, to maintain smooth operation. Additionally, clean the scooter thoroughly, paying attention to the electrical components and wheels, to prevent dirt buildup that could cause malfunctions. Finally, store the scooter in a dry, cool place when not in use, and elevate the tires if storing for extended periods to prevent flat spots. By following these routine tasks, you can extend the lifespan of your scooter and ensure it continues to provide reliable service.

Troubleshooting Common Issues with Your Go-Go Scooter

Identify common issues by referring to the diagnostic beep codes. For example, five beeps indicate a solenoid brake trip, often caused by the manual freewheel lever being engaged. Always check the battery connection and ensure the freewheel mode is disabled for proper operation.

Identifying and Resolving Frequent Problems

Frequent issues with your Go-Go scooter can often be resolved by addressing basic components and following diagnostic procedures. One common problem is a dead battery, which may result from improper charging or a faulty charger. Ensure the battery pack is fully seated and the charger is correctly connected. If the scooter does not power on, check the main circuit breaker and reset it if necessary.

Another issue is unexpected beeps, which indicate specific system errors. For example, five beeps may signal a solenoid brake trip, often caused by the manual freewheel lever being in the wrong position. To resolve this, ensure the lever is fully disengaged and the scooter is not in freewheel mode.

If the scooter moves unintentionally, turn it off immediately and remove the key. This could be due to throttle sensitivity or electromagnetic interference (EMI/RFI). To prevent such incidents, avoid operating near strong radio sources and ensure all connections are secure. For persistent problems, consult your authorized Pride Provider or refer to the troubleshooting section in your manual.

Disassembly and Assembly of Your Go-Go Scooter

Your Go-Go scooter can be disassembled into four main parts: the seat, front section, rear section, and battery pack. Use the toggle latch to secure components during reassembly. Always ensure the tiller lock knob is unlocked before operation.

Step-by-Step Guide for Safe and Effective Reassembly

Reassembling your Go-Go scooter requires careful attention to detail to ensure proper functionality. Begin by preparing a clean, flat workspace and gathering all disassembled parts. Start with the battery pack, ensuring it is securely reattached to the scooter frame using the handle for easy lifting. Next, reconnect the front and rear sections, aligning the toggle latch and locking it firmly in place. Make sure the tiller lock knob is turned counterclockwise to unlock the front wheel before use. Reattach the seat, ensuring it is locked securely into position. After reassembly, double-check all connections, such as the front-to-rear harness, to ensure they are secure. Finally, test the scooter by turning it on and verifying that all controls function correctly. Always refer to the manual for specific diagrams and instructions. If unsure, consult your authorized Pride Provider for assistance. Proper reassembly ensures safety and optimal performance of your scooter.

Optional Accessories for Enhanced Scooter Performance

Enhance your Go-Go scooter experience with a range of optional accessories designed to improve comfort, convenience, and functionality. Pride Mobility offers accessories such as cup holders, front and rear baskets, and storage solutions to keep essentials within reach. For added safety, consider adding reflective decals or additional lighting to increase visibility. Weather protection kits, including canopies or covers, can extend usability in various conditions. Customizable seating options, such as deluxe seats with extra cushioning, provide enhanced comfort for long rides. Additionally, Pride Mobility offers accessories like armrest bags for storage and portability. These accessories are designed to integrate seamlessly with your scooter, ensuring optimal performance and user satisfaction. Always consult your authorized Pride Provider for compatibility and installation guidance to ensure your scooter remains in peak condition. By adding these optional features, you can tailor your Go-Go scooter to meet your specific needs and preferences.